Braze
This section describes how to integrate Braze with Purchasely to trigger automatic campaigns or push notifications
Integrating Purchasely with Braze
The integration requires 5 steps:
- Set the Braze User ID in the app
- Activate the Braze integration in the Purchasely Console
- Enable the forwarding of Server Events in the Purchasely Console
- Enable the update of User Properties in the Purchasely Console
1 - Set the Braze User ID in the app (SDK Implementation)
There is nothing special to be done to associate Purchasely events to your logged in users in Braze. Just setup Braze SDK as you would normally, and use the changeUser method to set the user ID in Braze:
Appboy.sharedInstance()?.changeUser("YOUR_USER_ID")
Appboy.getInstance(context).changeUser("YOUR_USER_ID")
ReactAppboy.changeUser("YOUR_USER_ID");
BrazePlugin braze = BrazePlugin();
braze.changeUser("{YOUR_USER_ID}");
AppboyPlugin.changeUser("YOUR_USER_ID");
Handling anonymous users
If you have anonymous users in your app, you will need to add their Purchasely anonymous_id as a user alias to Braze
Appboy.sharedInstance()?.user.addAlias(
    Purchasely.anonymousUserId,
    withLabel: "purchasely_anonymous_id"
)
Appboy.getInstance(applicationContext)?.currentUser?.addAlias(
    Purchasely.anonymousUserId,
    "purchasely_anonymous_id"
)
ReactAppboy.addAlias(
    Purchasely.getAnonymousUserId(),
    "purchasely_anonymous_id"
);
BrazePlugin braze = BrazePlugin();
braze.addAlias("{YOUR_USER_ID}", "purchasely_anonymous_id");
AppboyPlugin.addAlias(
    Purchasely.anonymousUserId,
    withLabel: "purchasely_anonymous_id"
);
Keep the label provided above
The label must be set to
purchasely_anonymous_id, as our servers refer to this label when sending events while the user is anonymous.
When the anonymous user later becomes logged in, Purchasely will automatically send following events using the provided user id
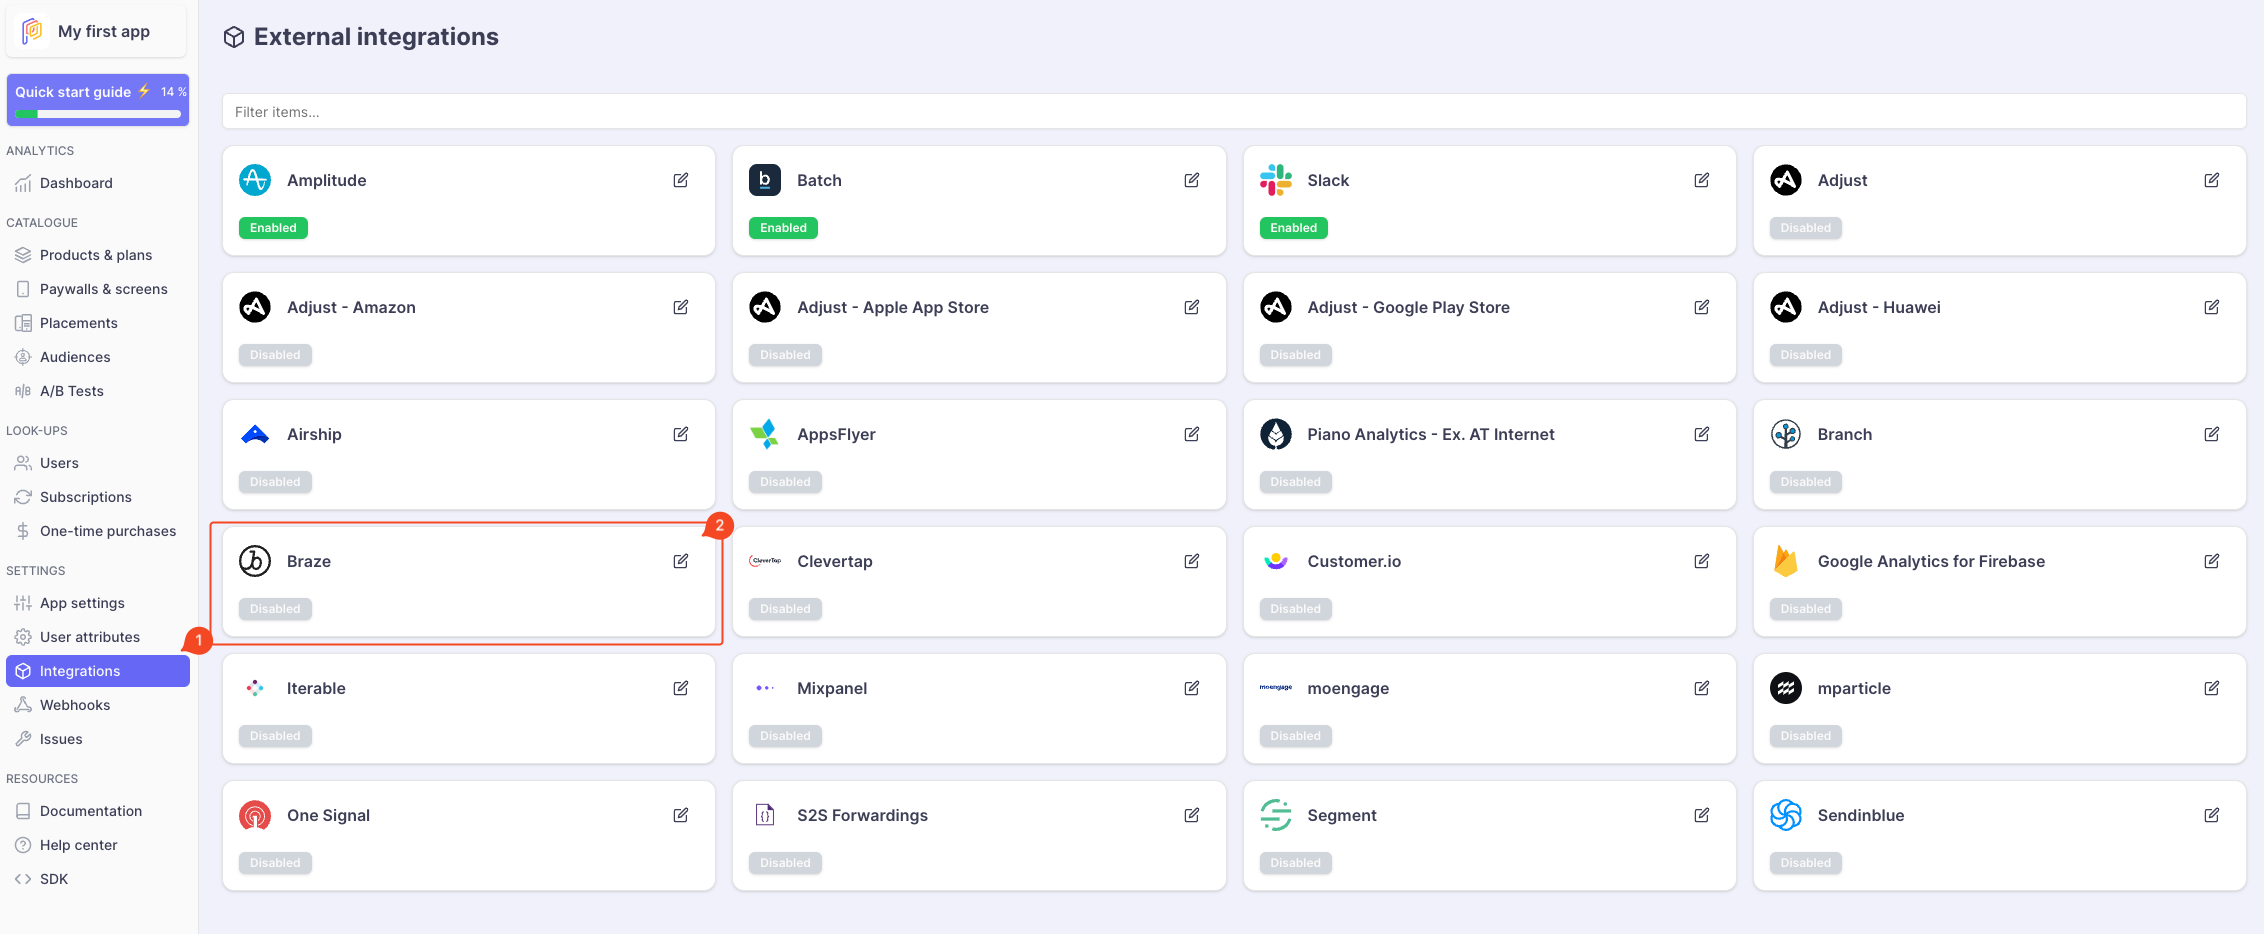
1 - Activate the Braze integration in the Purchasely Console
To use Braze with Purchasely, go to the section Integrations of Purchasely Console and click on Braze
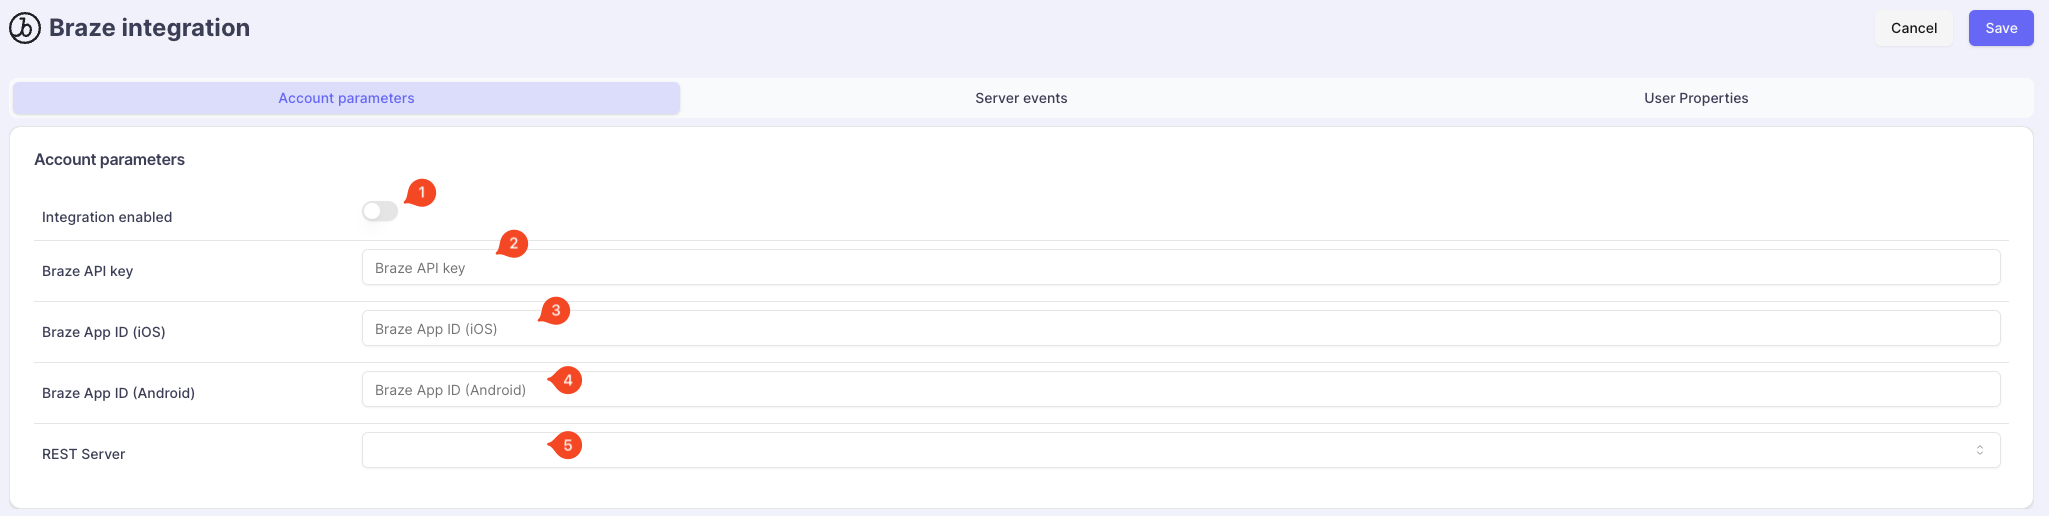
You can:
- Activate the integration
- Set your API Key
- Set your iOS App ID
- Set your Android App ID
- Select the Braze Server you are using
Refer to Braze API Endpoints table. You can use your Braze Dashboard URL find the correct server. E.g. if your dashboard is accessible at https://dashboard-01.braze.eu, then you should select the
EU-01 server.
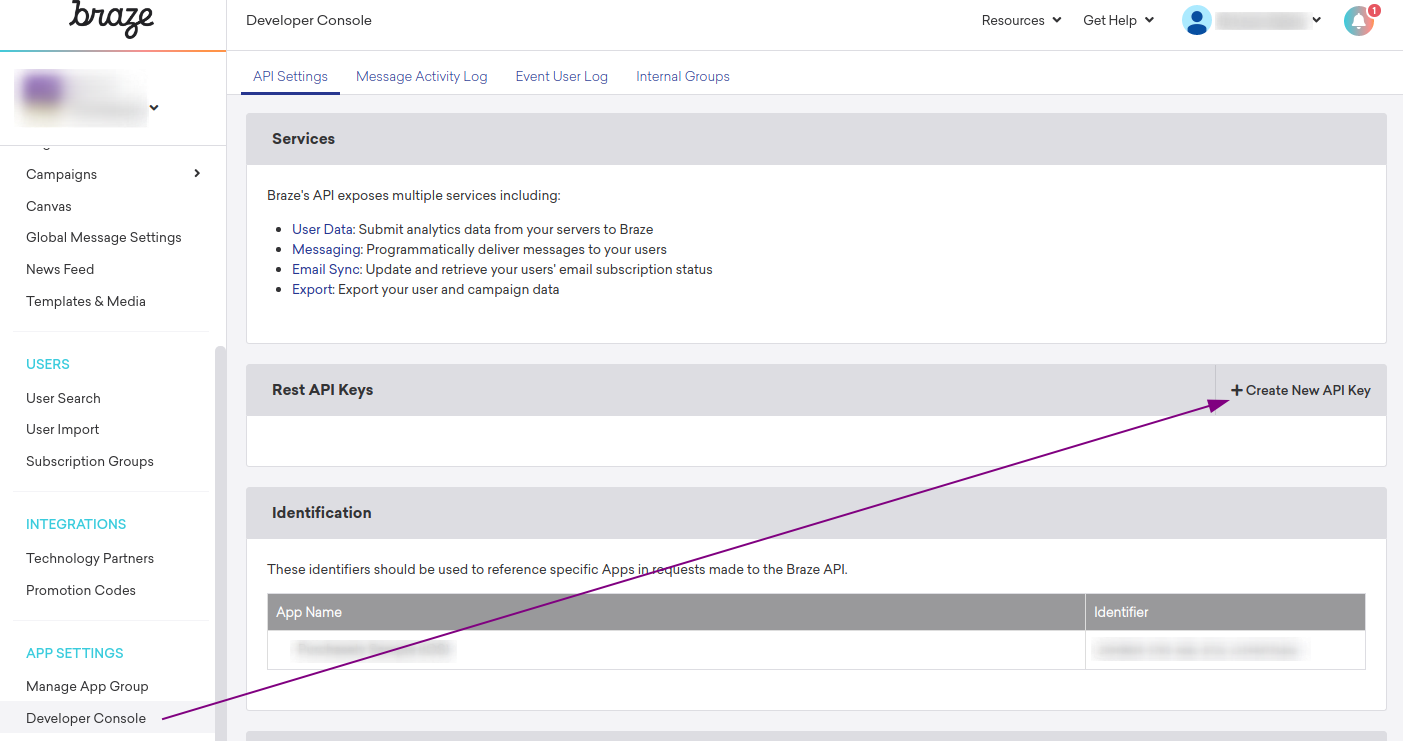
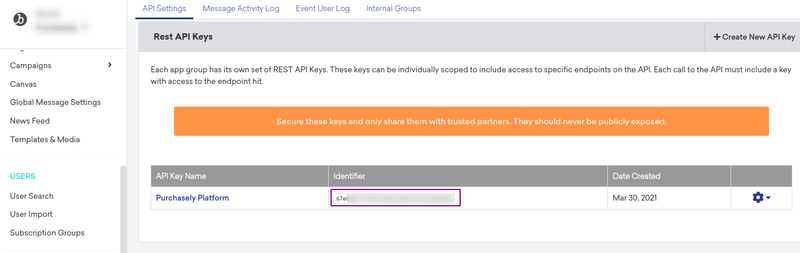
Retrieving Braze API Key
Go to your Braze Developer Console, and click on "Create New API Key"
Give a relevant name to your API Key. In the "User Data" permission area, check
users.track as our servers need this permission to report backend events to Braze.
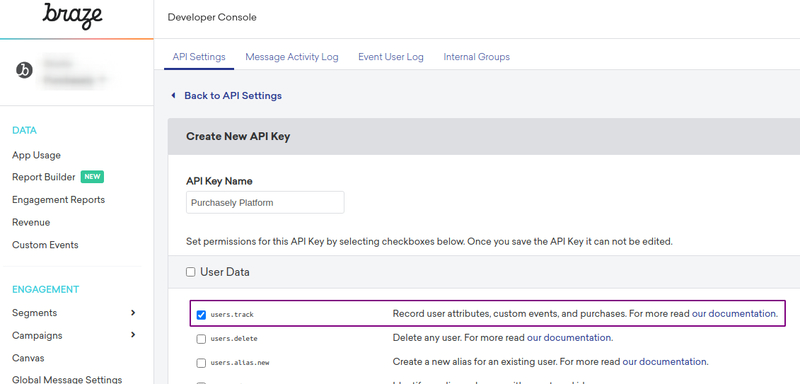
Click "Save API Key" at the bottom of the page.
3 - Enable the forwarding of Server Events in the Purchasely Console
In the Purchasely Console, under the tab Server Events, you can choose with Server Events must be forwarded to Braze.
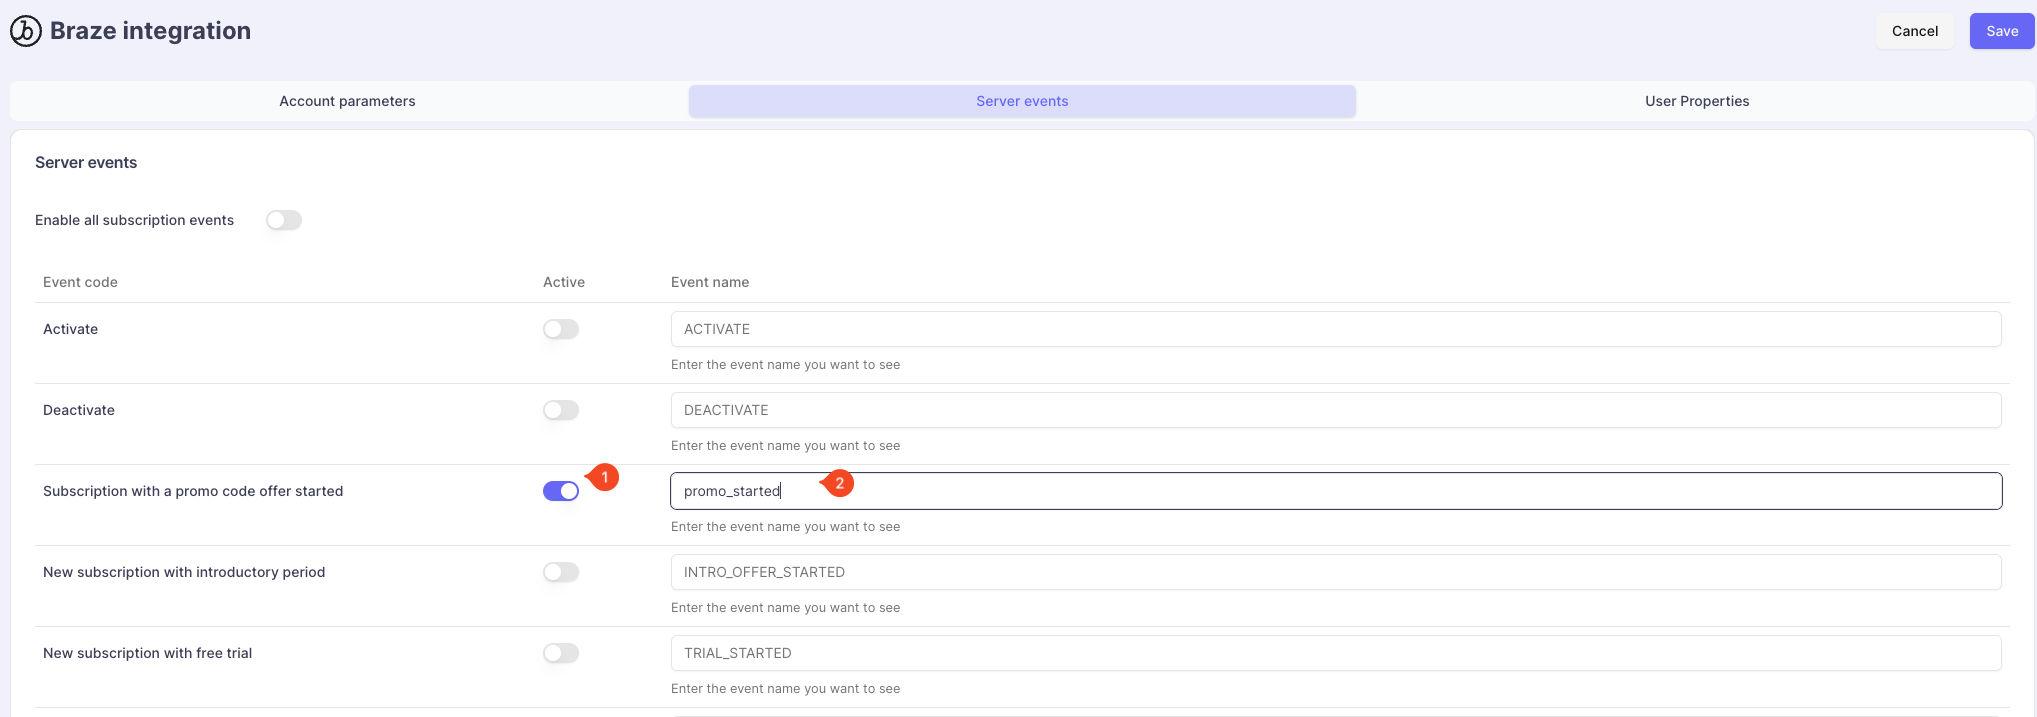
(Optional) Events names can be overridden to match with your tacking plan.
Keep in mind
UI / SDK Events triggered by the Purchasely SDK cannot be forwarded to Braze directly from the Purchasely Console.
This has to be done at the app level by intercepting the SDK events and forwarding them to the Braze SDK.
Each event sent to Braze carries a set of properties that you can use to further personalize your campaigns.
4 - Enable the update of User Properties in the Purchasely Console
In the Purchasely Console, under the tab User Properties, you can choose with User Properties should be updated in real time along the subscription lifecycle.
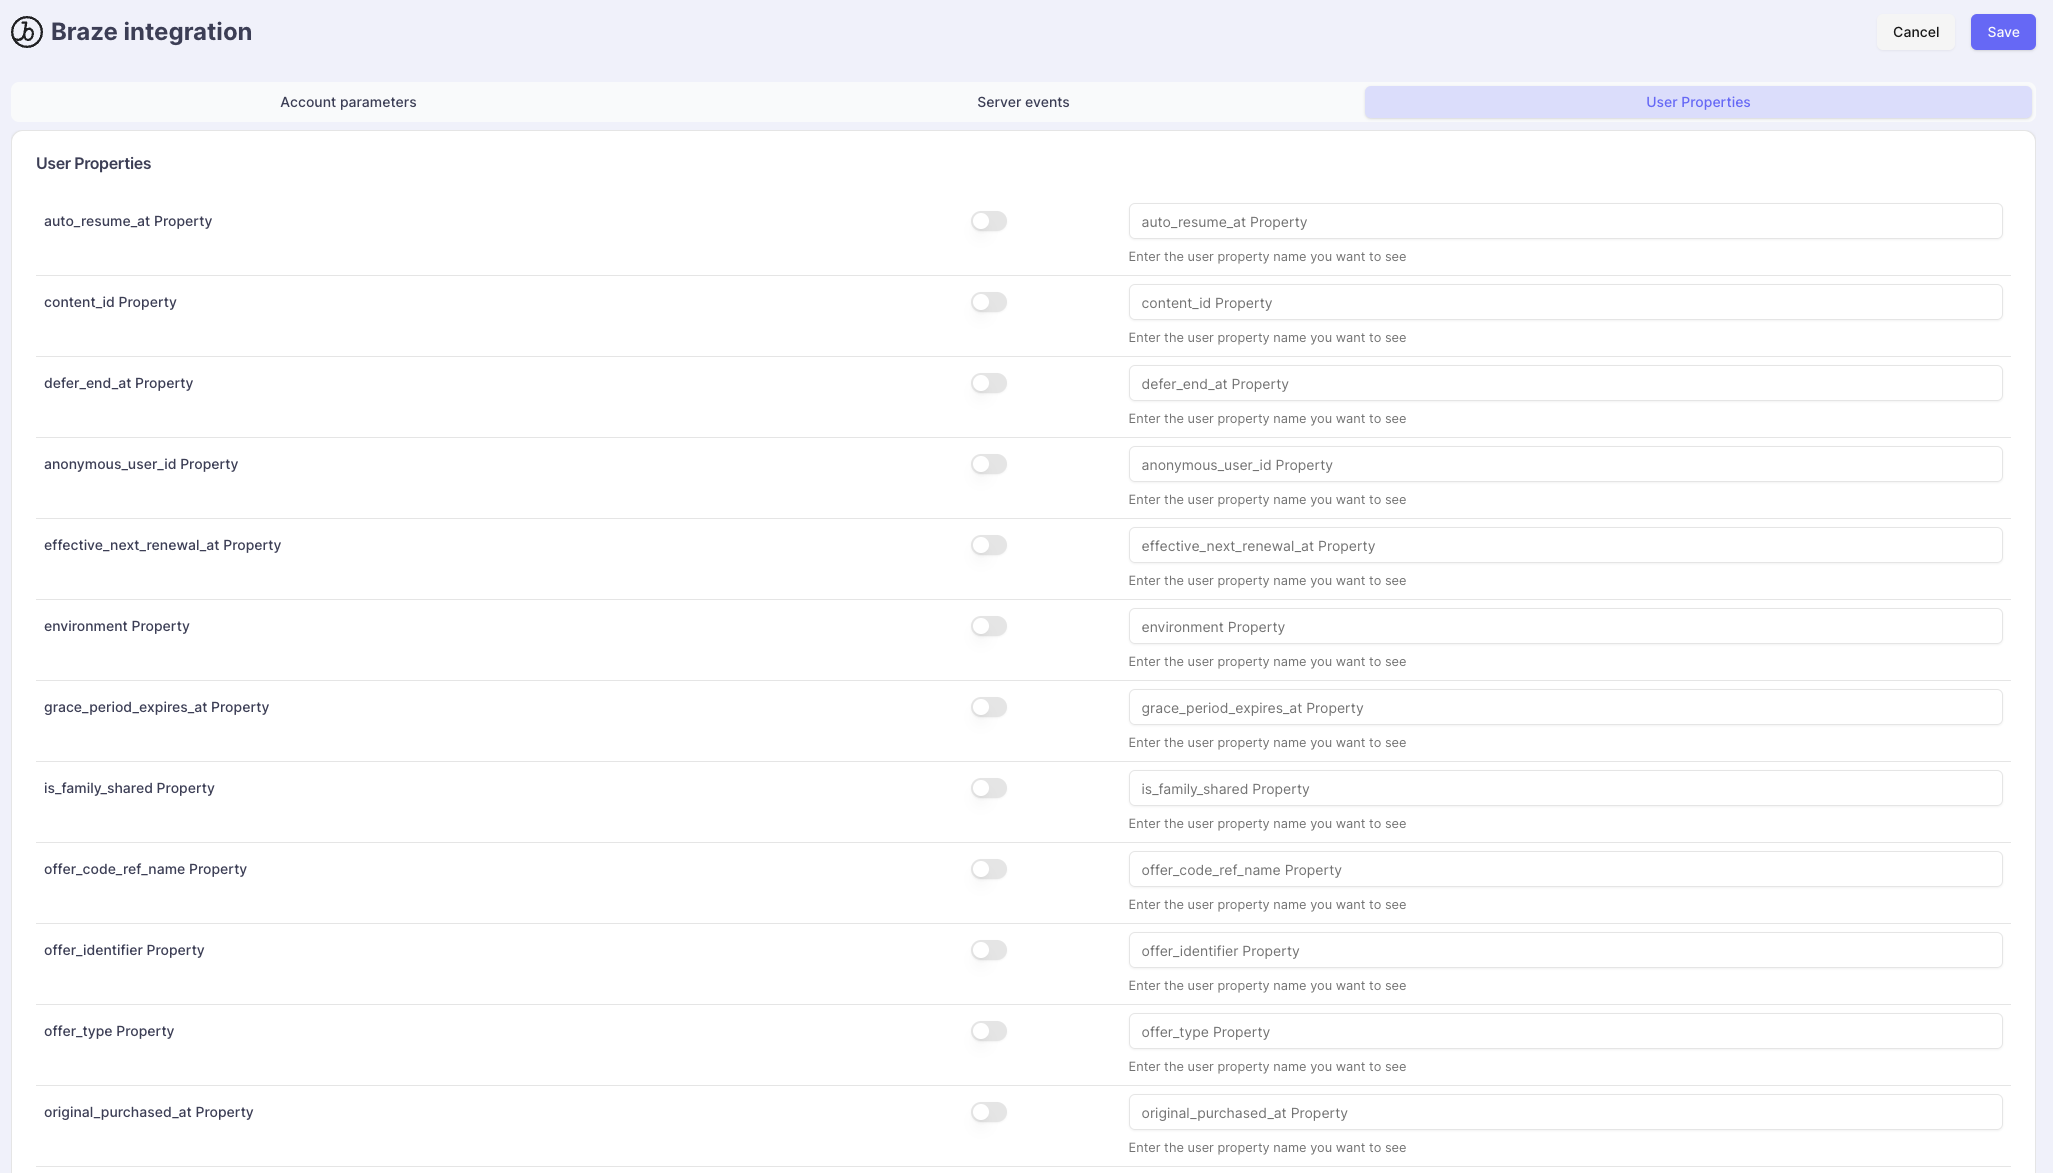
(Optional) User Properties names can be overridden to match with your nomenclature.
Details on User Properties are accessible here.
Updated about 1 month ago