

Using Placements to display Screens & Paywalls
This section describes how to use and implement Placements inside your application
Overview
A placement represents a specific location in your user journey inside your app (e.g. Onboarding, Settings, Home page, Article).
A Placement can be linked to a Screen or a Flow and a single Screen can be used for different Placements. You can create as many Placements as you want, and this is the only thing that ties the app developer to the marketer.
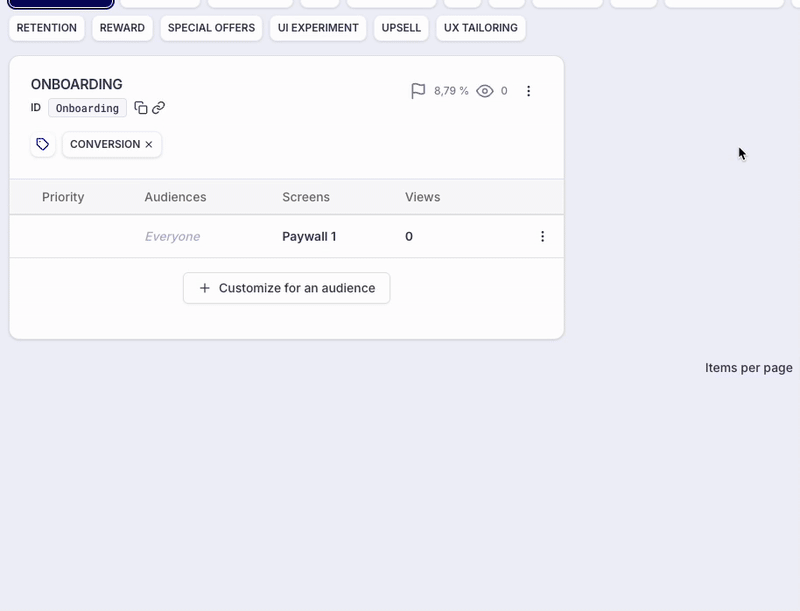
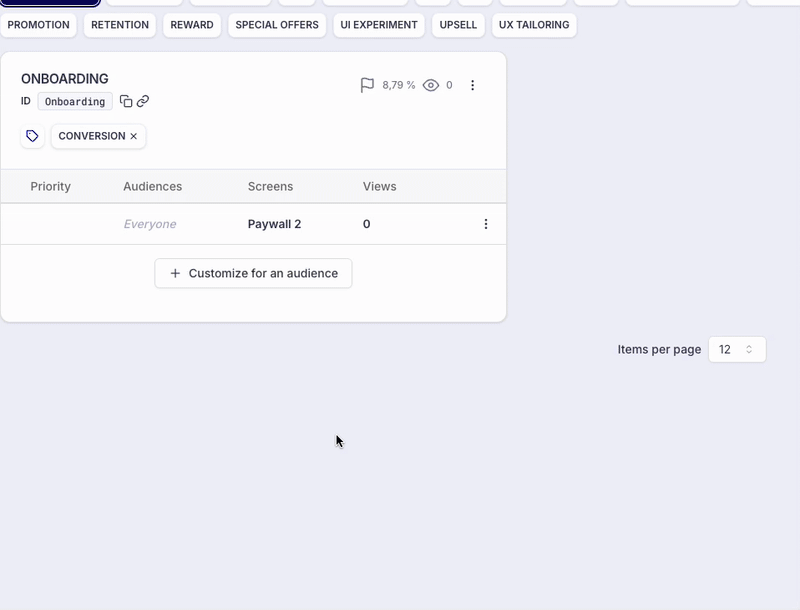
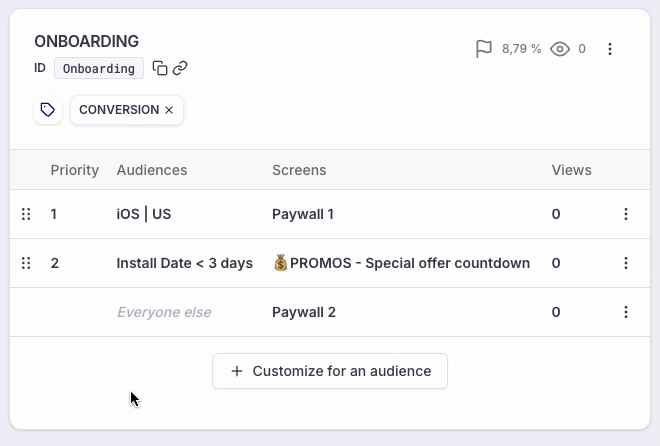
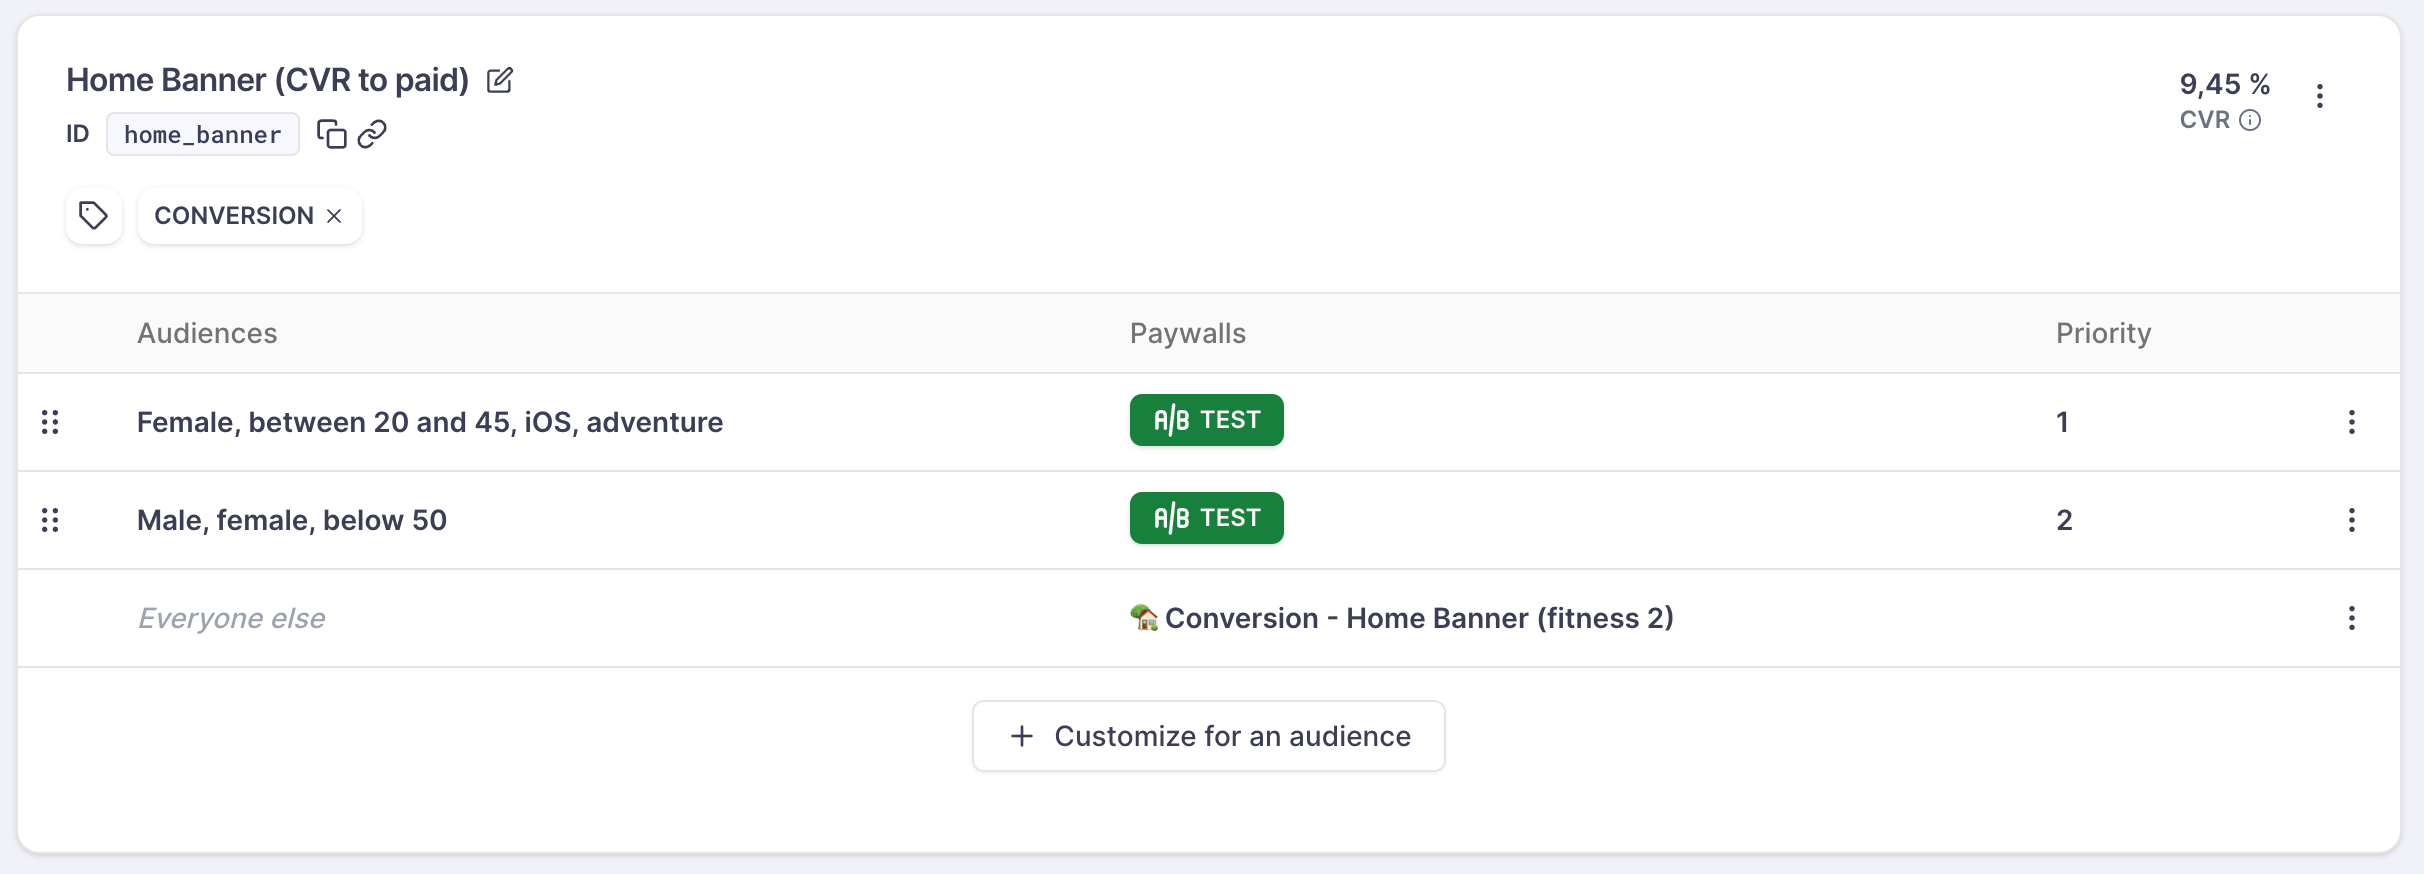
Placements can be configured in the section Placements of the Purchasely Console. From there, you can get the placement_id that can be integrated in your app's code by clicking on the Copy button.

The main benefits of leveraging Placements is that:
-
they allow you to change the In-App Experience associated with the Placement directly from the Purchasely Console, in no-code and without needing an app release
-
the also let you map different Audiences with different In-App Experiences
-
they can be prioritized to manage overlaps
Placements are a core principle of the Purchasely platform. To use our Audience and A/B tests features, you need to use Placements.
Placements are also useful for a common use case: changing the Screen to display by default at any time.
By calling a Placement from your application, you never have to change your code afterwards as any Screen, audience, or A/B test that you apply to that Placement will be live right away. You can also "disable" it by setting no Screen for a specific Audience or for the entire Placement.
Example with New Yorker application
Let's take the example of the New Yorker app, which has many triggers to display paywalls.
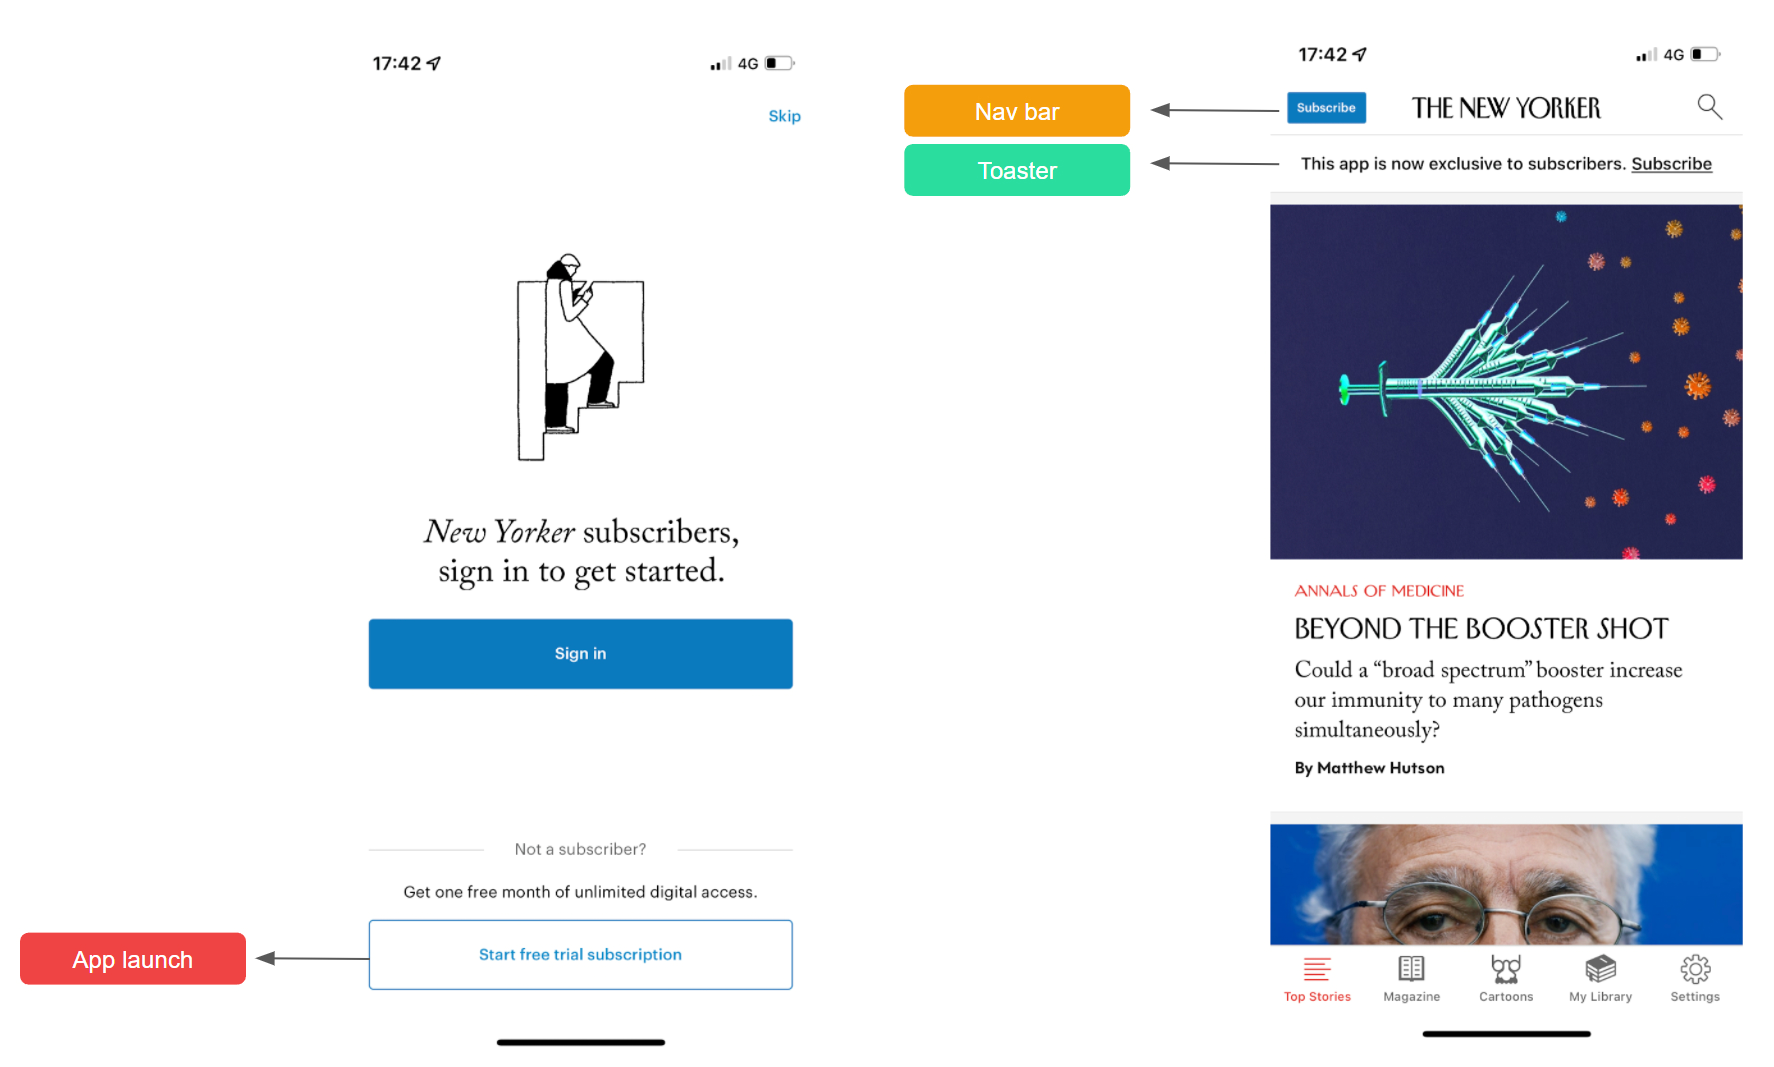
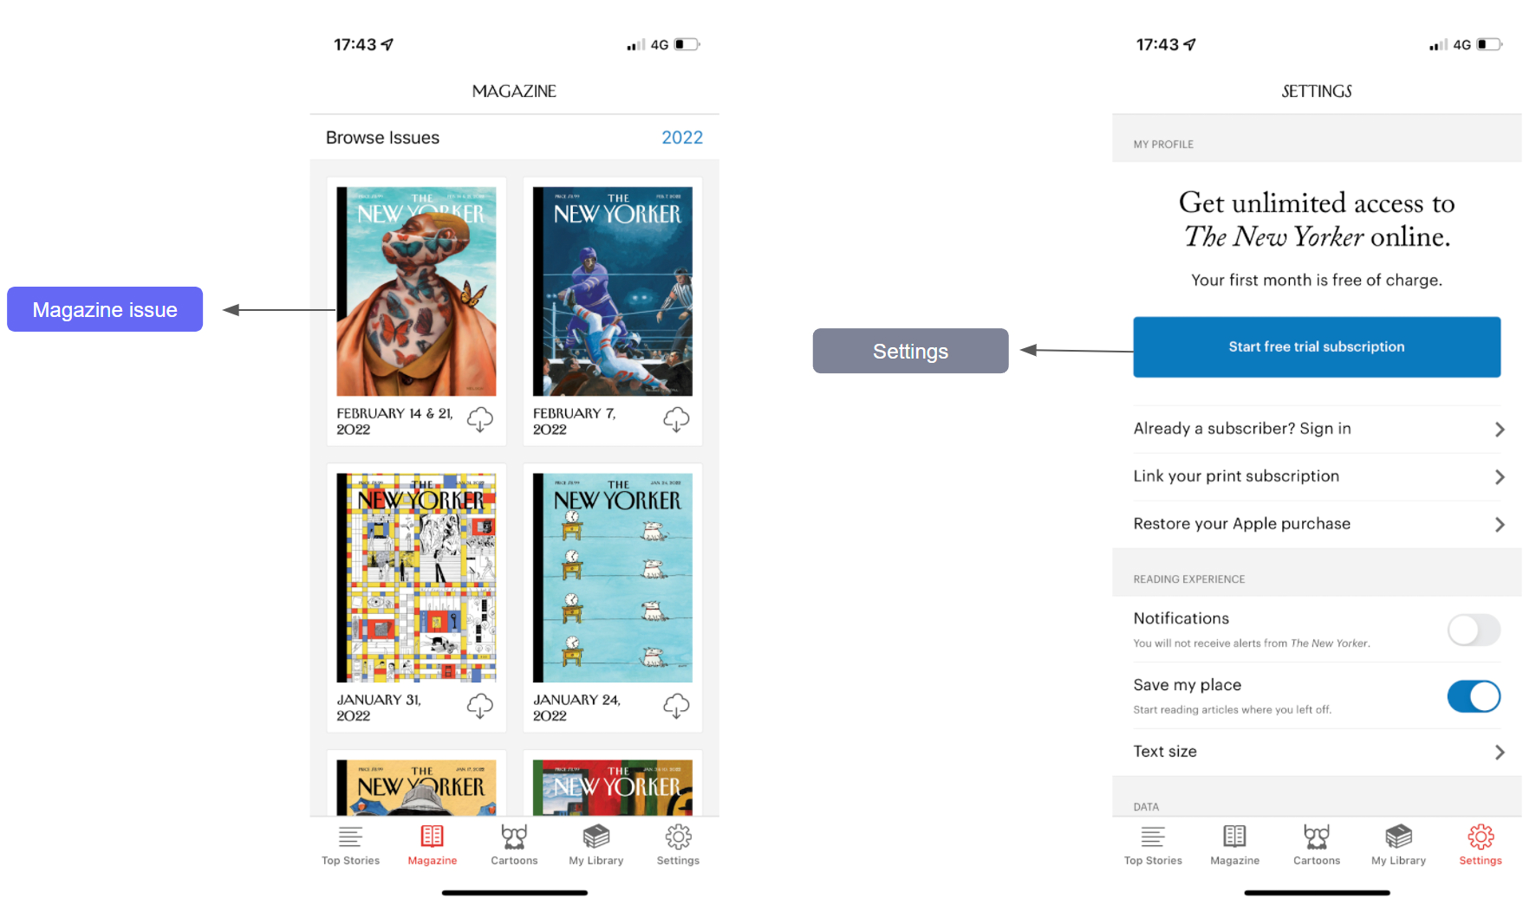
For this specific case the New Yorker should create 5 Placements:
- App launch
- Nav bar
- Magazine issue
- Toaster
- Settings
Implementation
Direct call
In one line of code in your application, you can retrieve the UIViewController (iOS) / View (Android) to display it. It will be displayed automatically with our bridge sdk, unless you want to use a nested view.
let placementId = "DEFAULT_PLACEMENT"
// Get the UIViewController to present
PLYPresentationBuilder.forPlacementId(placementId).build().preload { presentation, error in
    let purchaselyController = presentation?.controller
}
// Retrieve the view to display in your layout hierarchy
PLYPresentation {
placementId("DEFAULT_PLACEMENT")
onCloseRequested {
// remove view from layout hierarchy
}
}.preload { loaded, error ->
if (error != null || loaded == null) return@preload
val presentationView = loaded.buildView(context) { outcome ->
when (outcome.purchaseResult) {
PLYPurchaseResult.PURCHASED -> Log.d("Purchasely", "User purchased ${outcome.plan?.name}")
PLYPurchaseResult.CANCELLED -> Log.d("Purchasely", "User cancelled purchased")
PLYPurchaseResult.RESTORED -> Log.d("Purchasely", "User restored ${outcome.plan?.name}")
null -> {}
}
}
// Add presentationView to your layout hierarchy
}await Purchasely.presentation
.placement('DEFAULT_PLACEMENT')
.build()
.display();await PLYPresentationBuilder.placement('DEFAULT_PLACEMENT').build().display();Purchasely.presentPresentationForPlacement('DEFAULT_PLACEMENT');Deeplinks
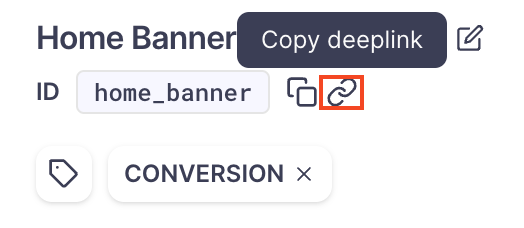
Placements can also be shown directly from a deeplink if the related implementation has been completed.
A deeplink for a Placement can be copied directly from the console in the Placements section and should look like this:
yourapp://ply/placements/{placement_id}
Limitations
Displaying a Screen as described above is synchronous, as such it always returns a View to be displayed. Consequently it carries a few limitations:
- You cannot pre-fetch the Screen
- A loading indicator is displayed until the network call is executed and the view fully rendered
- You cannot deactivate a placement to not display a Purchasely Screen, your default Screen will be displayed
- You cannot Bring Your Own Screen, your default Purchasely screen will be displayed
To overcome those limitations, you should consider using the asynchronous method that allows you to pre-fetch the presentation and chose not to display a Screen for a specific placement.
Updated 1 day ago