

Configuring an A/B test
This page provides a step-by-step guide to launching a price or UI A/B test and analyzing the data.
A/B testing paywalls are a great way to grow your business by minimizing risks and measuring the impact of changes.
PrerequisitesYou should have: 3.2 SDK version or above
Minimum of 1 placement and 2 Paywalls (Paywall published)
Create a new UI A/B Test
A/B test set up
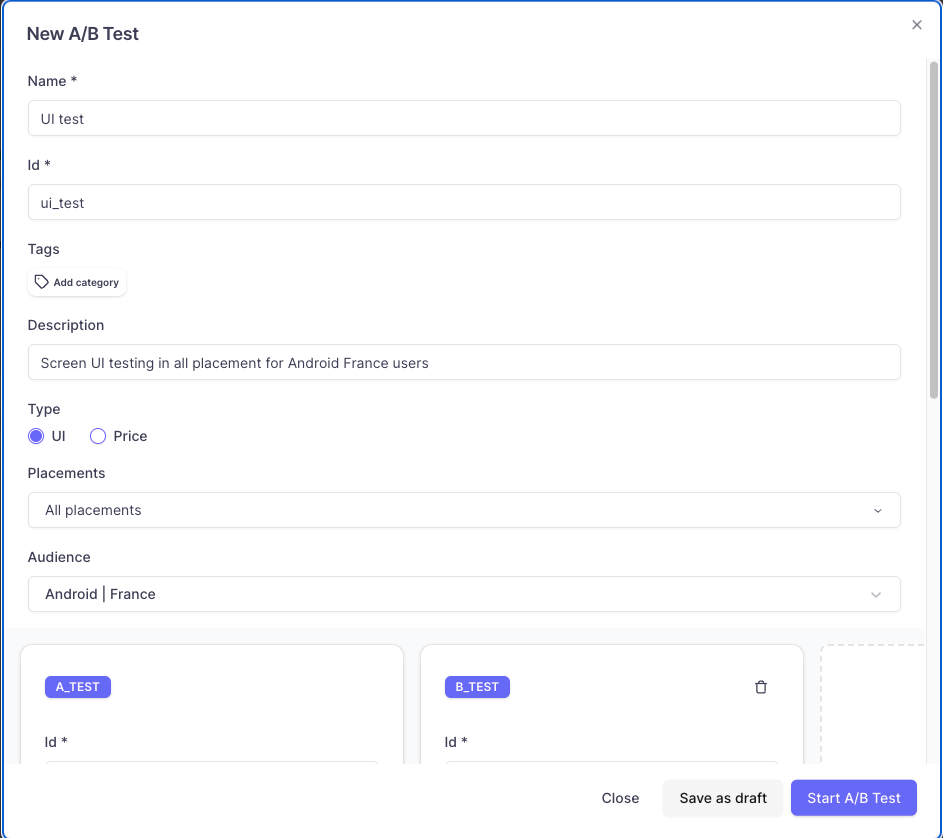
In Purchasely Console, Click on A/B Test --> you can either click on Start your first A/B test or New A/B Test.
Provide the mandatory fields- Name, ID, and Placement. You can add a short description of the A/B test created.
Name & ID: both have to be unique.
Tags: Adding a tag is recommended but optional. It enables you to group your A/B tests for better organization. Clicking on tags allows you to view all related A/B tests. You have the flexibility to create as many tags as you need or utilize existing ones.
Description: a short phrase about the test.
Type: choose the type as UI
⚠️ You need to choose between UI and Price to avoid mixing different things in your variations which would lead to uninterpretable results.
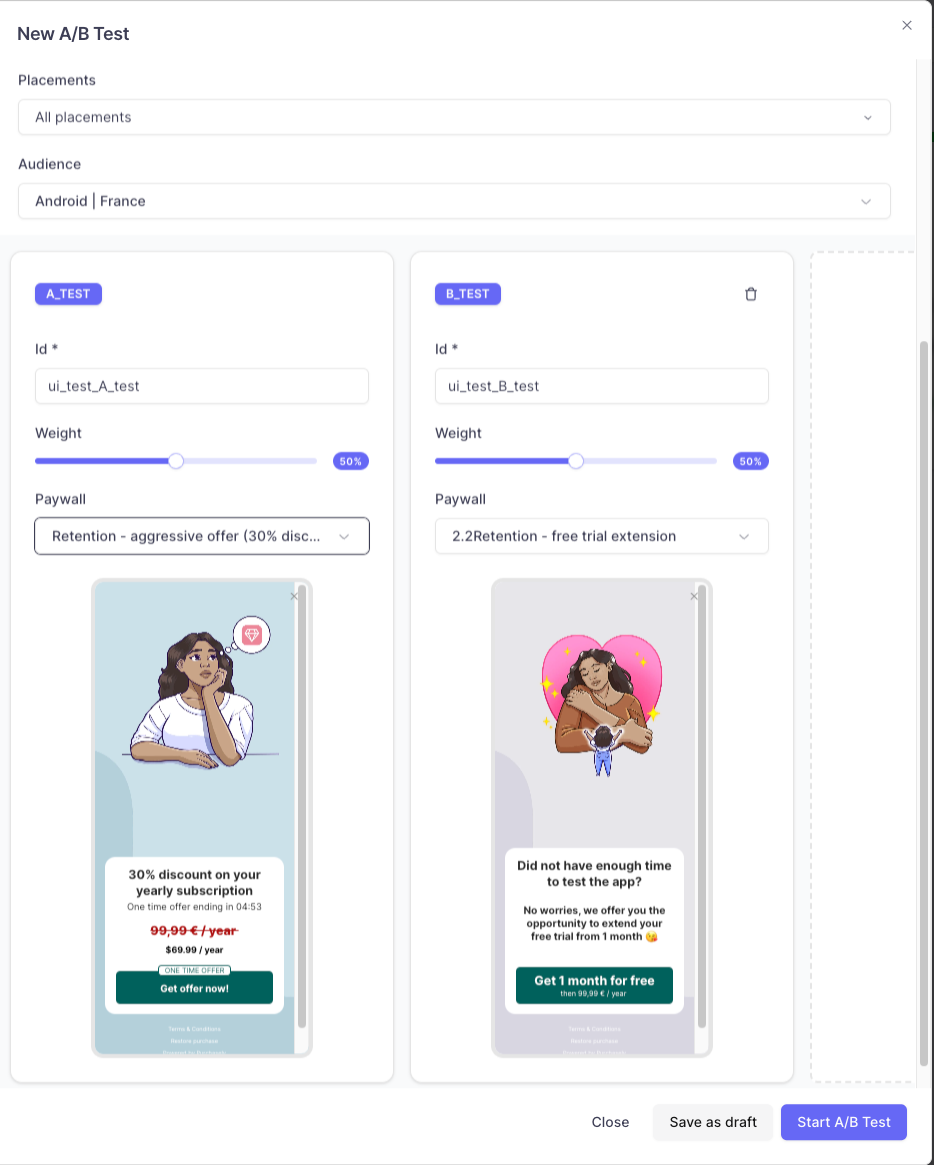
Placement: Only one placement can be selected per test. If the Placement was already chosen for another test, it can't be used for another test.
Audience: choose the audience you would like to run this test on.
WarningYou can't run multiple A/B tests for the combination of same Audience and Placement
Variant set up
Select paywalls for the A/B/C test respectively
ID- is created by default.
Weight- is assigned by default.
Paywall- you can choose any paywall that you have already created.
Total weight- your total weightage for all the tests you have created should be equivalent to 100. You can click on equalize to make them=100.
You can click on Save as a draft and Start A/B test whenever you are ready to run it.
Create a new price A/B Test
To create a new price A/B test, you need to meet the following prerequisites:
NotePlease make sure that you have more than one plan in the Products and Plan section in order to perform a price A/B test.
A/B test set up
In the Purchasely Console and click on the A/B Test section. From there, you have two options to start the process: Start your first A/B test or select New A/B Test.
To create your new price A/B test, be sure to provide the mandatory fields such as Name, ID, and Placement. Additionally, you can include a brief description of the A/B test you're creating.
Name and ID: both need to be unique.
Description: provide a short phrase to describe the test.
Tags: Adding a tag is recommended but optional. It enables you to group your A/B tests for better organization. Clicking on tags allows you to view all related A/B tests. You have the flexibility to create as many tags as you need or utilize existing ones.
Type: choose the test type as Price. It's important to avoid mixing UI and price variations as it may lead to confusing and uninterpretable results.
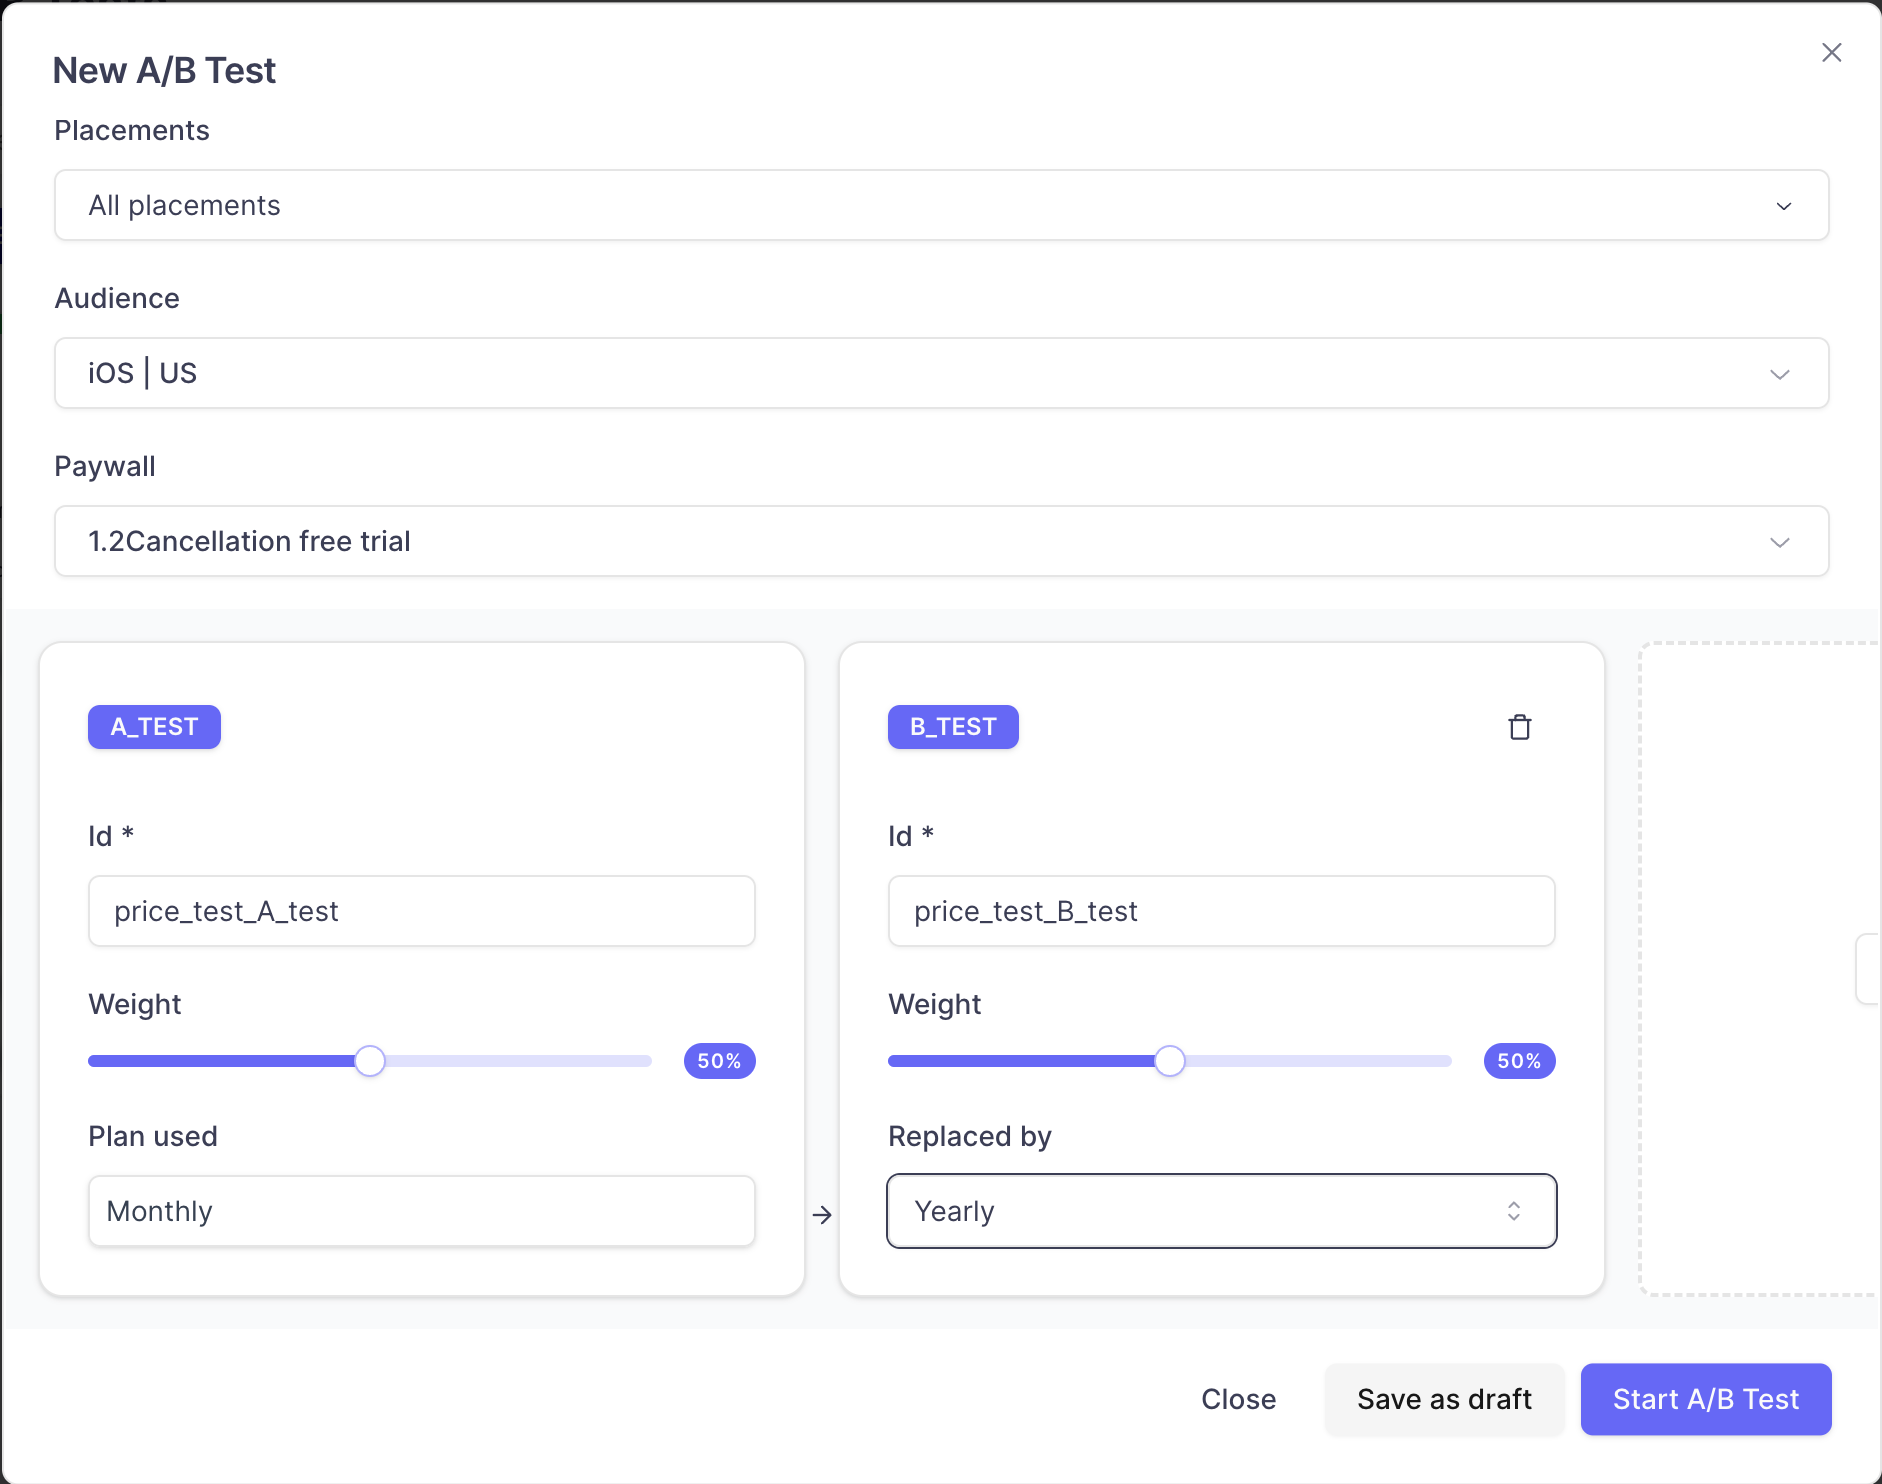
Placement: only one placement can be selected per test. The same placement can’t be used for more than one test.
Audience: select the audience you want to run this test on.
Paywall: choose the paywall you want to run this test on.

Variant set up
Select plans for the A/B/C test variants, respectively
ID is created by default
Weight is assigned by default and can be customized as needed
Plans used: these are the plans you chose for this paywall in the paywall builder.
Warning:If you would like to change the plans for Variant A, you should do it from the paywall builder
Replaced by: For variant B, select the plans you want to replace the plans in variant A with.
You can click on Save as a draft and Start A/B test whenever you are ready to run it.
Things to review before you launch a Price A/B test:
5 Dos of Price A/B test
Before launching your price A/B test, there are a few important things to review to ensure the test runs smoothly. Here are some tips to consider:
- Organize your Products and Plans: Review how your Products and Plans are organized in the Purchasely Console. Google doesn't have a Subscription group concept, so we manage this for you based on how you set up your Products and Plans.
- Understand Subscription Groups: In Purchasely, Products are equivalent to Subscription groups in Apple. Subscription groups play a vital role in
- managing migration policy
- ensuring subscribers only see plans available in their subscription group
- preventing users from buying two subscriptions from the same group
- create a new subscription group only when you have to do a regular price testing
- Avoid Double Subscriptions: Make sure users cannot double-purchase subscriptions during the test.
- Keep Prices Hidden: Ensure that users do not see the price of the other variant during the test. In other words, don't show the price of variant A to variant B, and vice versa.
- Targeting the Same Users: If you plan to target the same set of users for subsequent price tests, ensure that they are not included in the first test results to maintain the integrity of your data.
By following these tips, you can avoid potential issues and launch a successful price A/B test.
Updated 9 months ago