

Account setup
This section describes how to get invited, how to invite team members and activate 2FA
Getting invited
To access the Purchasely Console, you need to get invited by the Purchasely Team.
Check your email (and your spam messages if you did not receive the invitation after reaching out to us). The email will come from account-update[at]purchasely.io, with the object "You've been invited to Purchasely"
Once you get the email, click on the button "Accept Invitation" inside it to define your password.
Inviting team members
You can then invite the other members of your team.
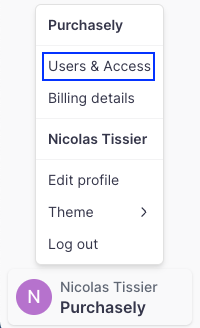
To do so, click on your name in the bottom left corner and then on Users & Access.
Click Invite an administrator. The invitation is prepared in three steps, and nothing is final until the last one — you can change everything later, too.
1. Profile & access
Fill in the first name, last name and e-mail address. The invitation e-mail goes to that address.
Then choose which applications this person can work on: turn on All applications to cover every app in the workspace, including the ones created later, or leave it off and pick apps one by one.
2. Permissions
Start from a preset — a ready-made bundle of permissions for a typical job: Read-only, Support, Editor, Developer or Full admin. The banner reminds you of the one rule that always applies: you can only grant permissions you hold yourself.
The panel underneath shows exactly what the preset covers, category by category, and the bar at the bottom sums it up — how many permissions are granted, how many of them are critical (deletions and account management), and a plain-English list of what this person will be able to do.
On Enterprise, the Custom preset unlocks that panel so you can switch any single permission on or off.
3. Review
The last step recaps the profile, the app access and the permissions, each with an Edit shortcut back to its step. Critical permissions are called out here so nothing slips through unnoticed. Click Send invite to send the e-mail.
See Roles & permissions for what each preset grants, permission by permission, and for the guardrails that apply to everyone.
Activating 2FA
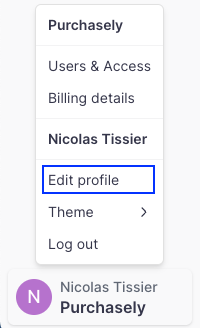
You can enable the Two-Factors Authentication (2FA) by clicking on your name in the bottom left corner, then on Edit profile.
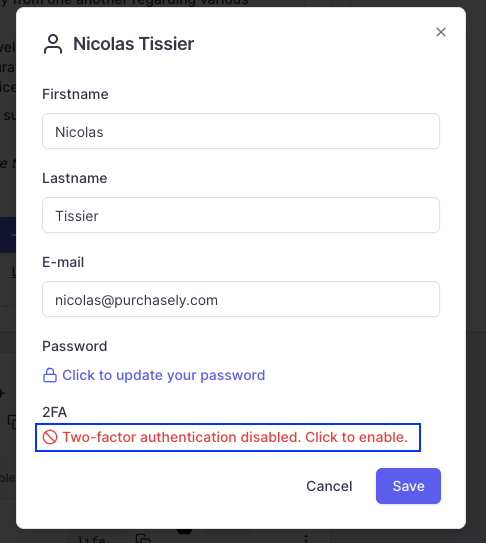
And then on the link in red Click to enable it.
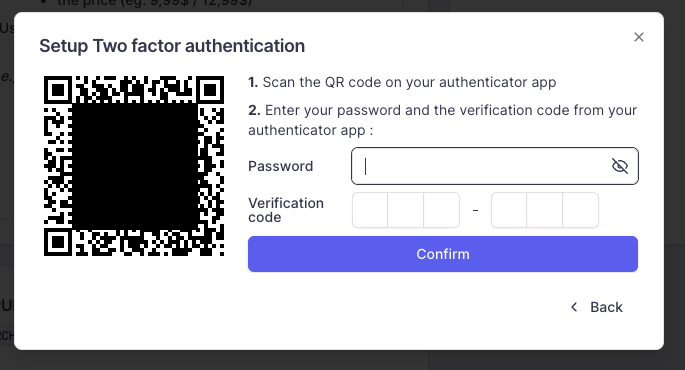
You can enable the 2FA by scanning the QR code with your authenticator app, then entering your password and the Verification code provided by your authenticator app.
Updated 3 months ago