

App Store - Configuring In-App Subscriptions
This section provides details on how to configure In-App Subscriptions in the App Store with the App Store Connect Console
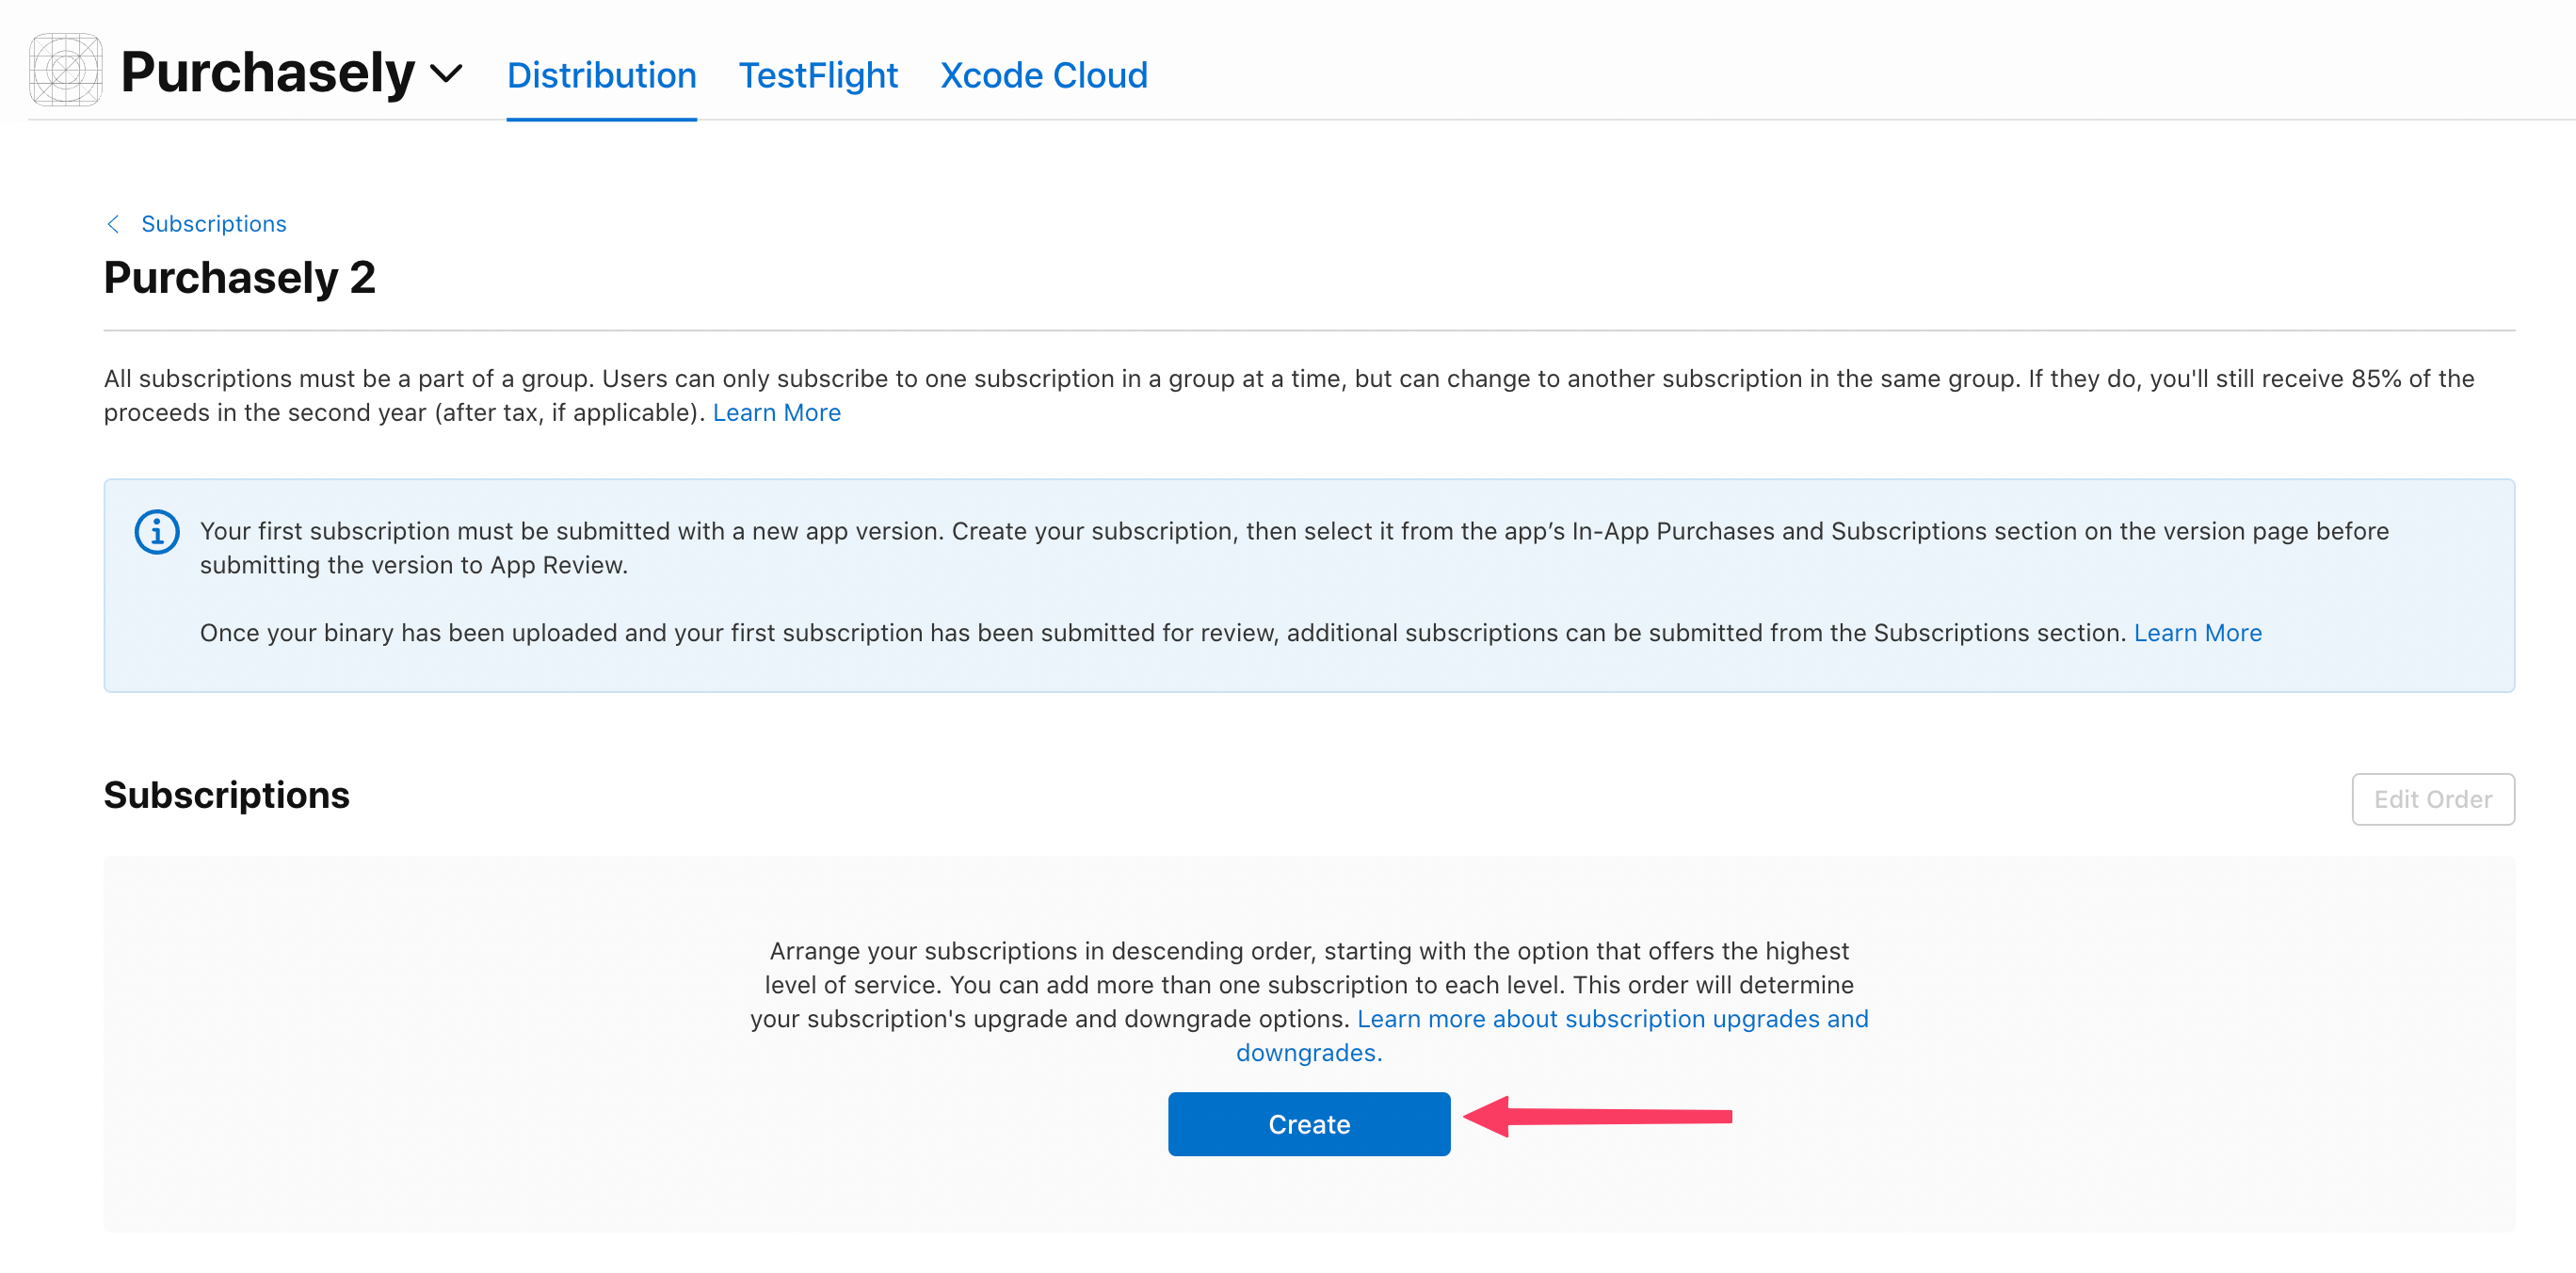
To create an in-app subscription for the first time, you need to create a subscription group
Subscription groups are a way to organize your products in App Store Connect. If you already have a subscription group and wish to create a plan within it, you can skip this step.
Important information to read if you're building in-app subscription into your app for the first timeUnderstanding how subscription groups work is key to manage your upgrade, downgrade and crossgrade policies and to avoid users to pay for 2 active subscriptions at the same time. And unfortunately, they cannot be changed if the initial setup is not done properly.
We strongly invite you to read the following article: Understanding Subscription Groups before starting to configure your subscriptions in the App Store.
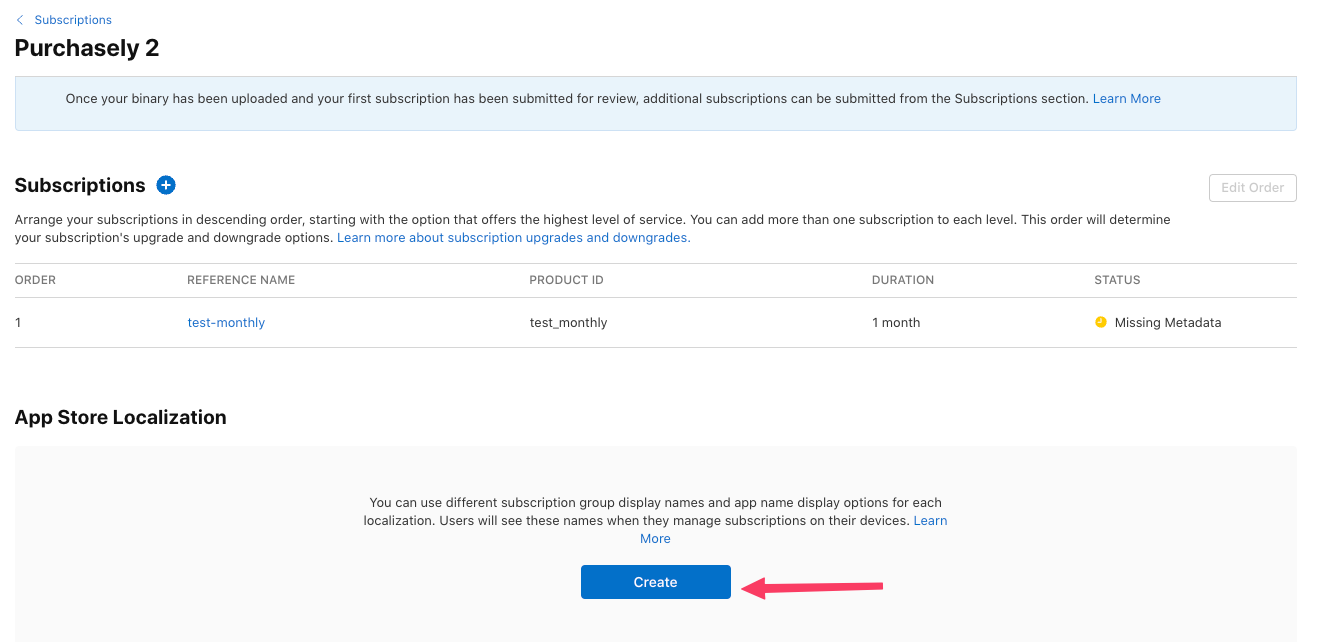
Creating Subscription Group
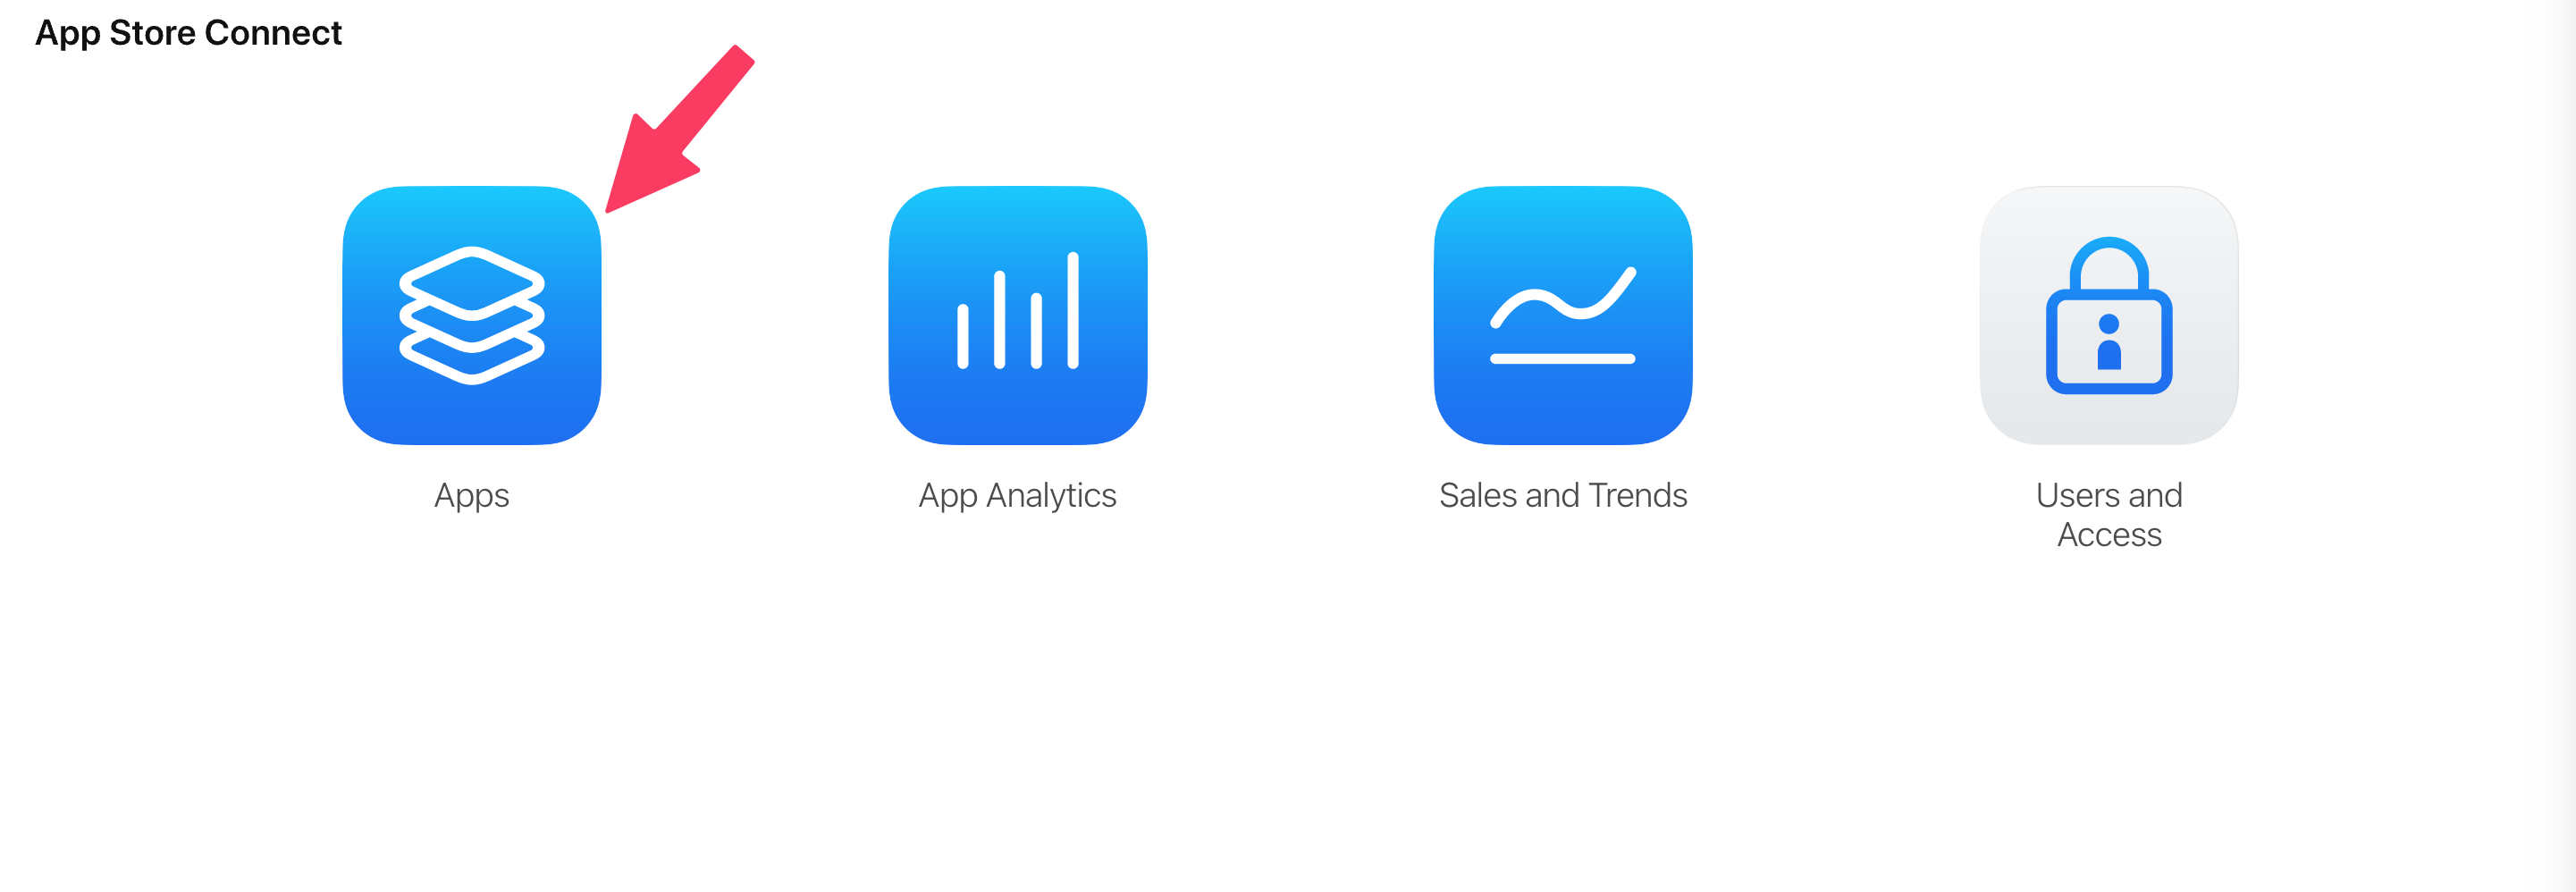
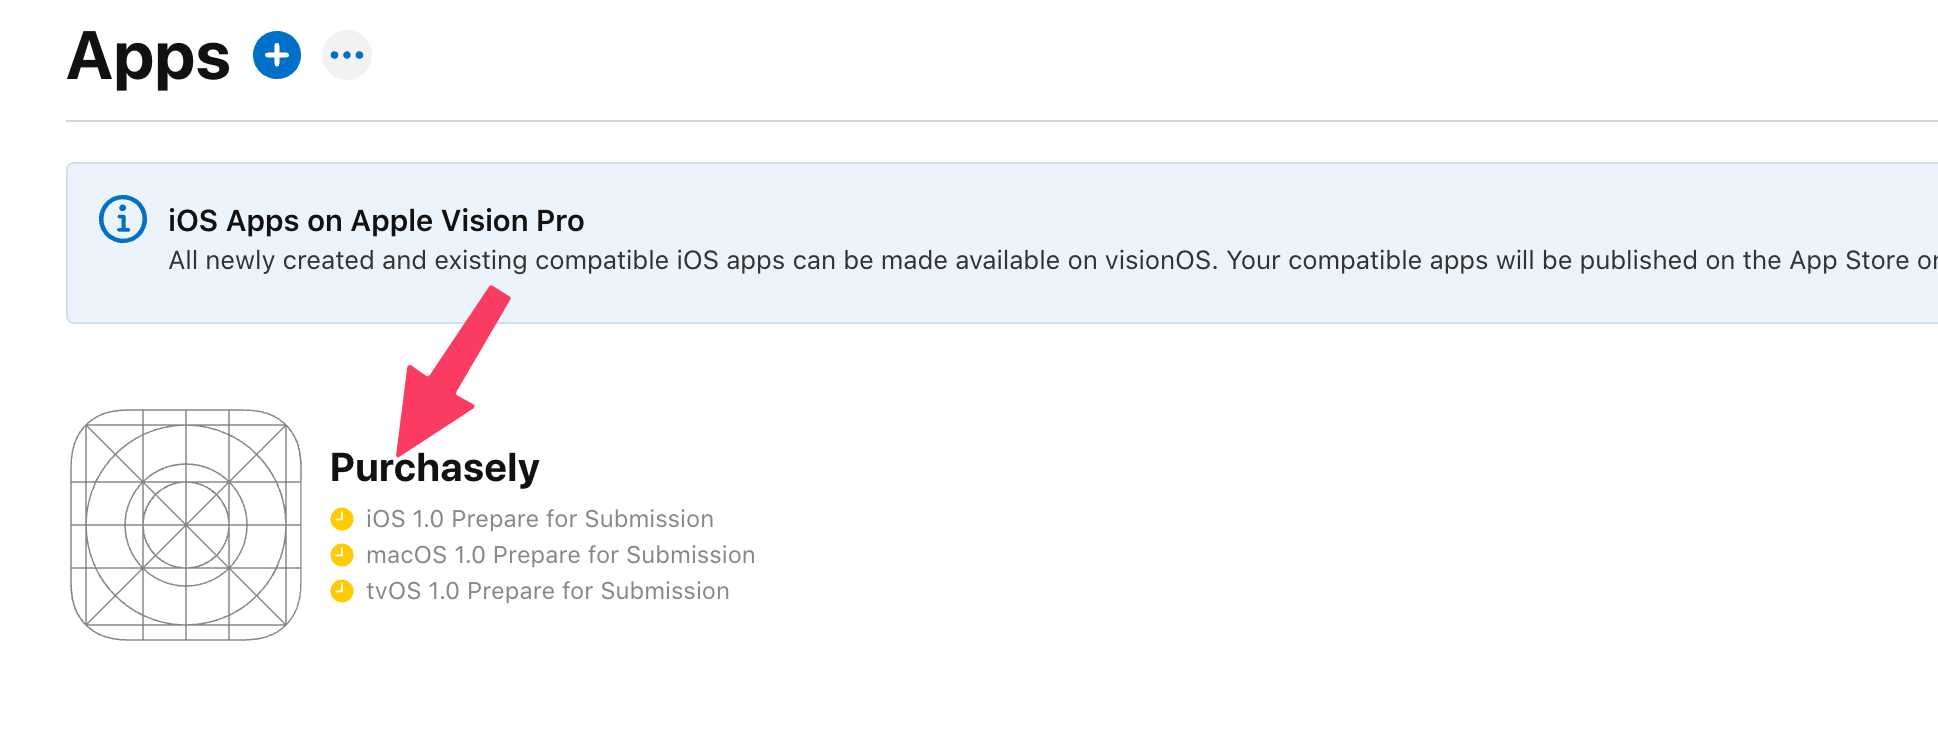
Go to App Store Connect's 'Apps' page
and select the name of your app from the list.
In the sidebar, select 'Subscriptions' under Monetization,

then click the '+' symbol to create a Subscription Group.
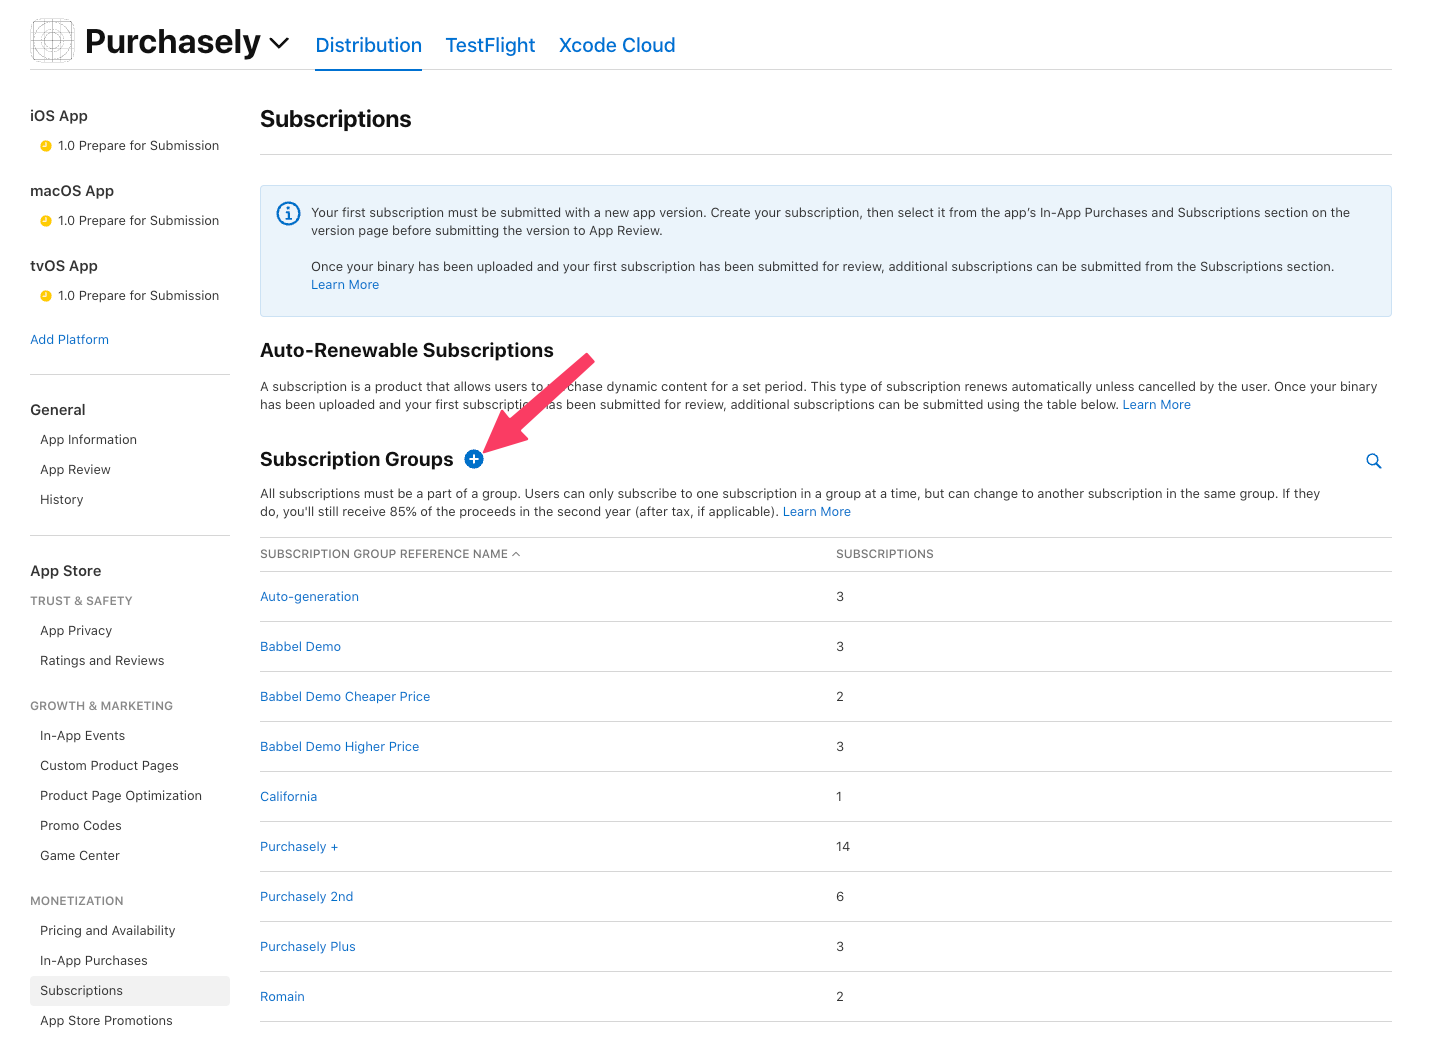
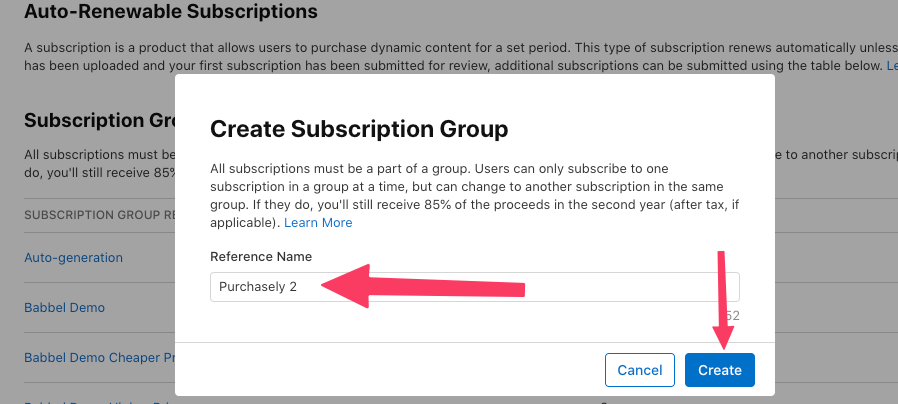
When you have prompted to provide a Reference Name you can set any String as this is not user-facing.
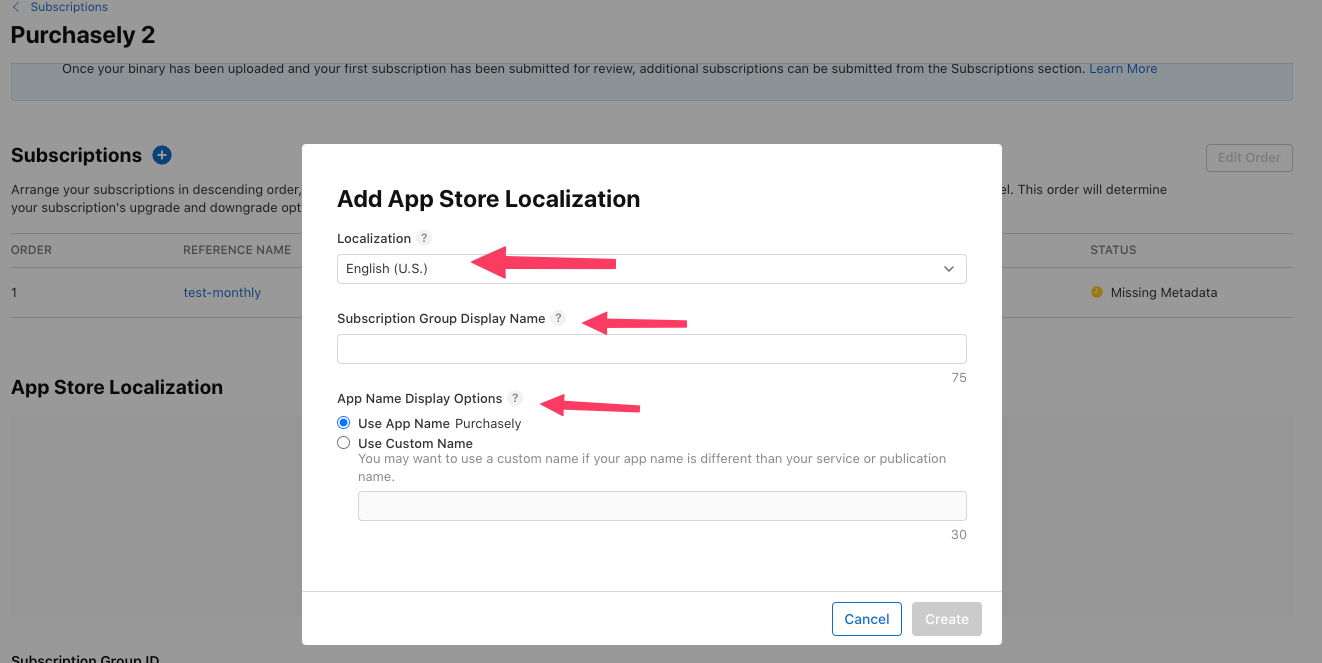
Adding Localization
Before you can submit your in-app purchase for review, you must add at least one localization to your subscription group.
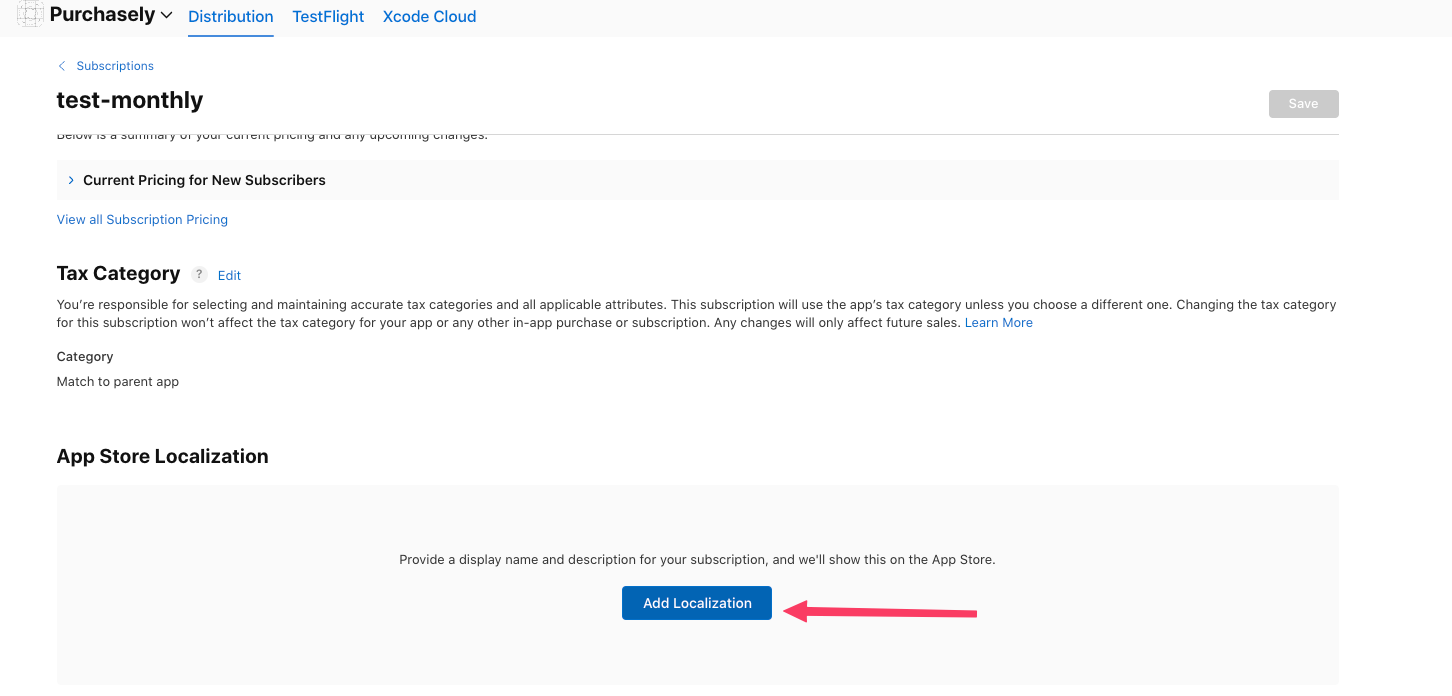
The next piece to set up is localization information for the App Store. This is the name and description of the in-app purchase that the user will see.
In the App Store Localization section just below the Subscriptions section in the Susbcription group page.
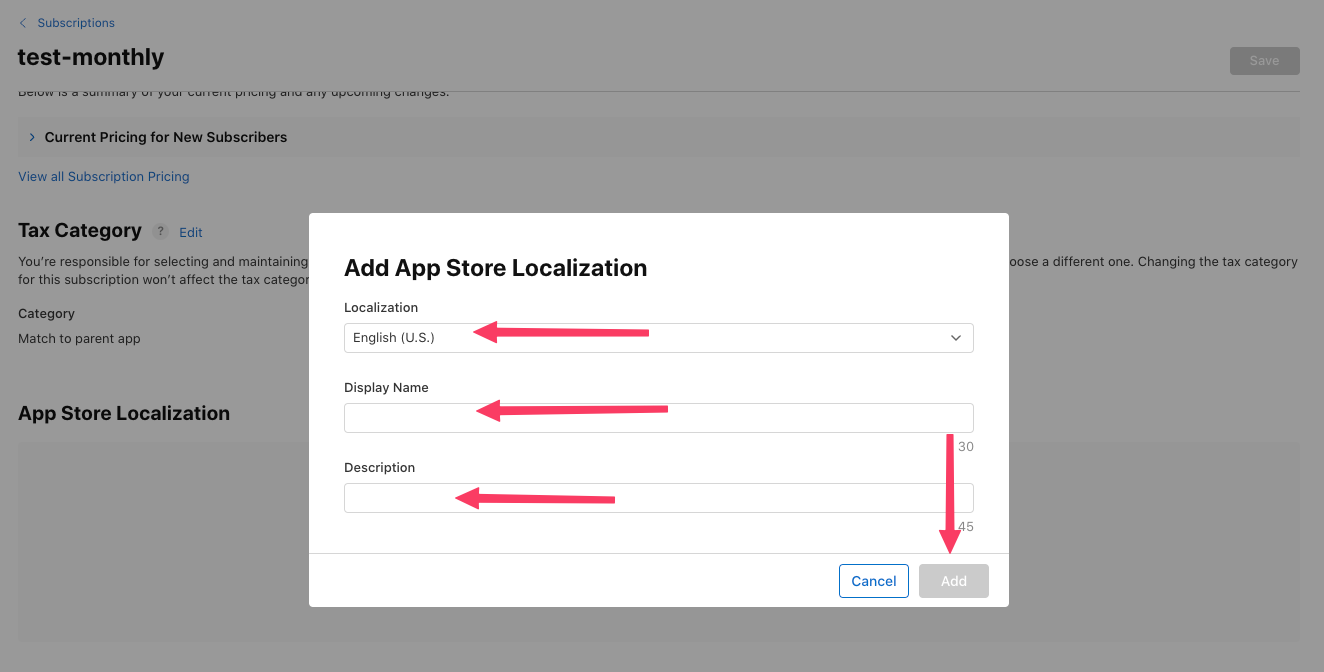
Click the create button next to Localization and choose the language you with to set up.
Next, you'll need to provide:
Localization: You can use different subscription group display names and app name display options for each localization. Users will see these names when they manage subscriptions on their devices.Subscription Display Name: This is the subscription group display name as it will appear to users for this localization.Description: This is your app name as it will appear when shown with this subscription group to users.
Creating a Subscription
To create a subscription plan, click on the subscription group you have created or the one of your choice,
and click on the create button to create you subscription.
Next, you fill the a Reference Name and a Product ID.
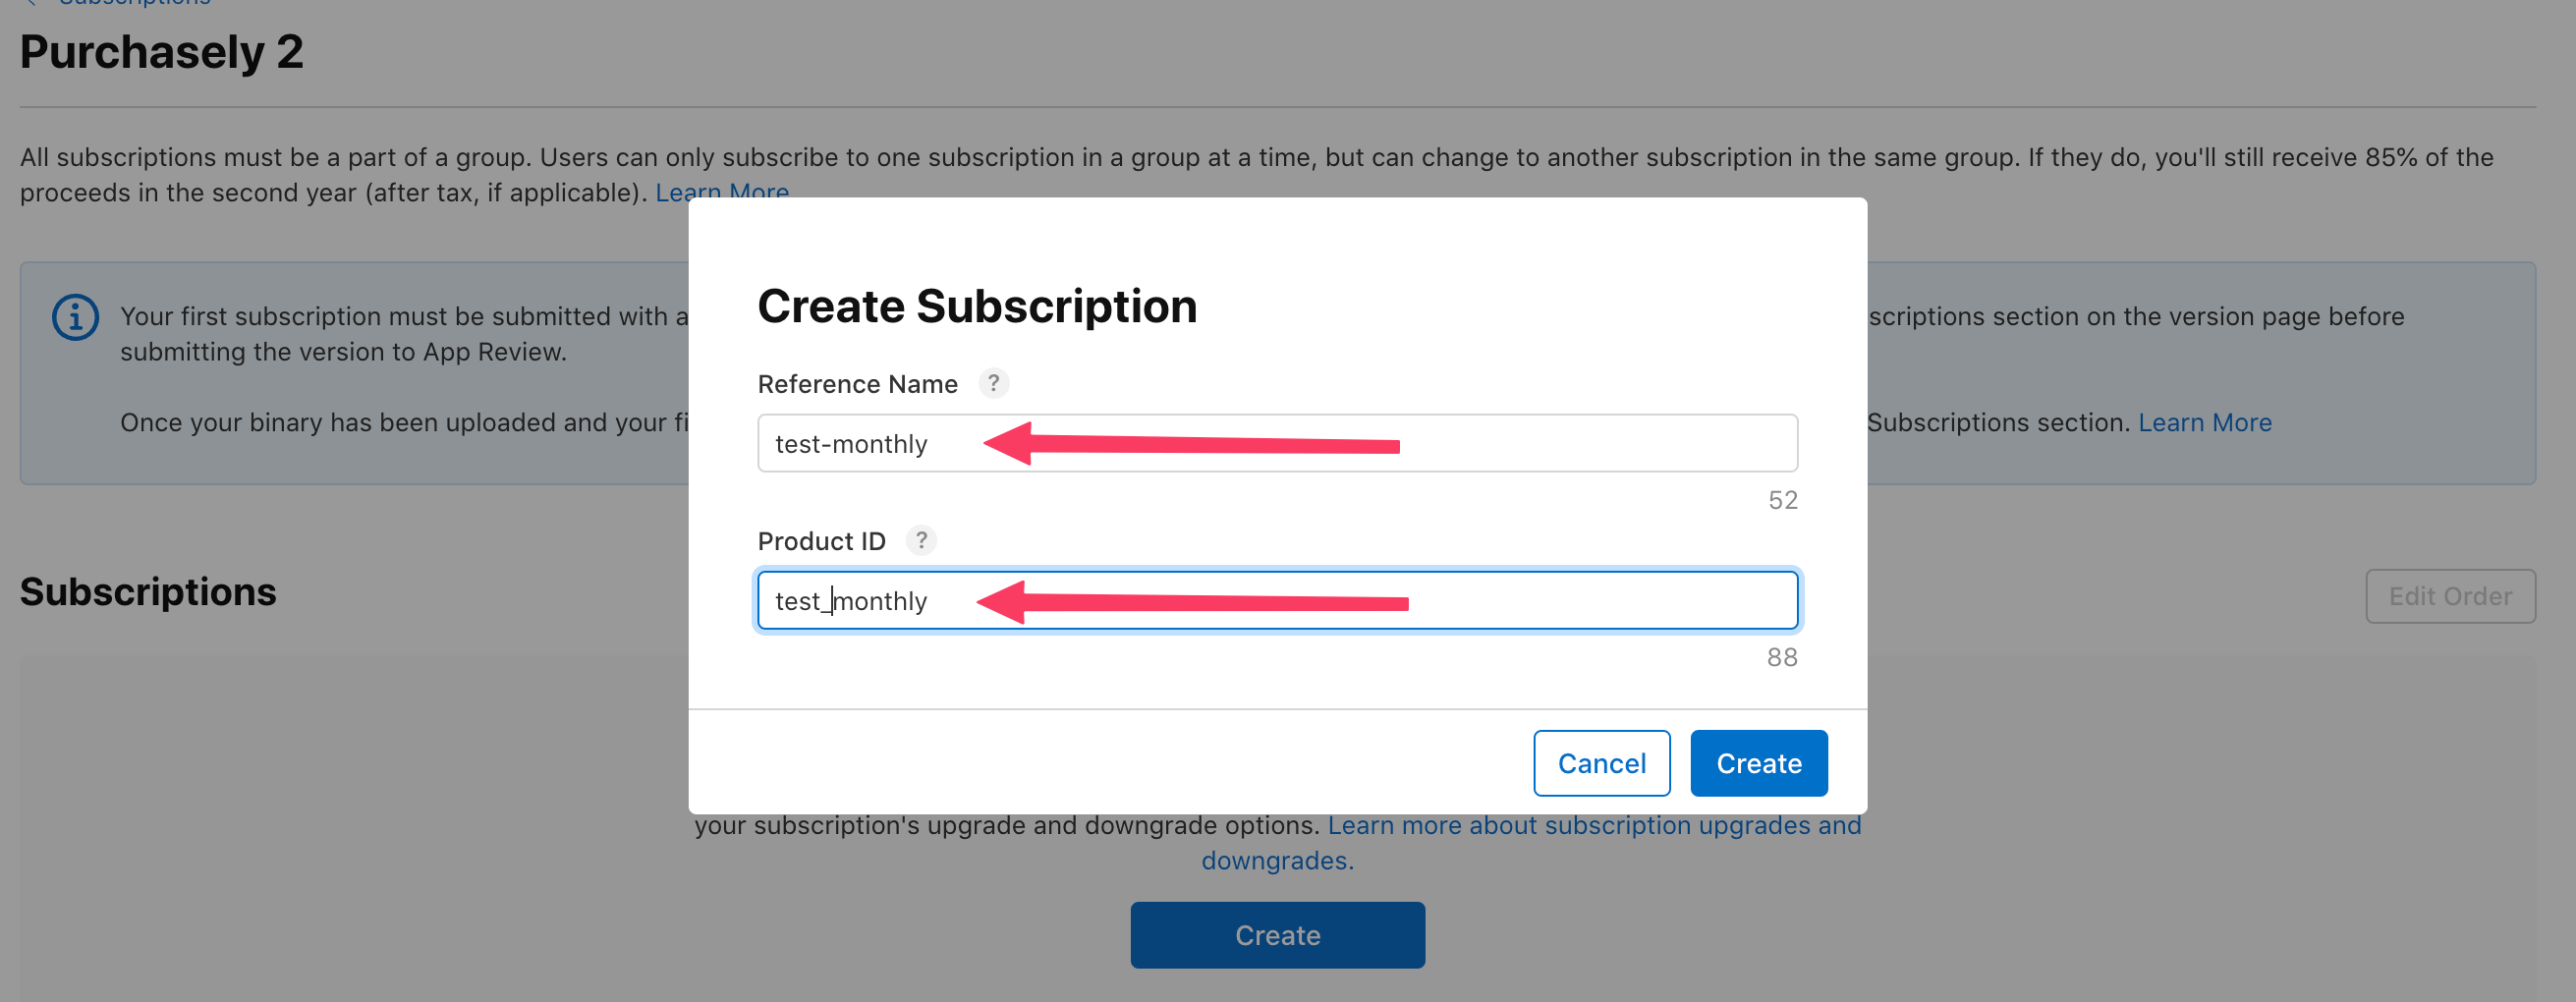
Reference Name: The reference name will be used on App Store Connect and in Sales and Trends reports. It won’t be displayed on the App Store. The name can’t be longer than 64 characters.Product ID: A unique alphanumeric ID that is used for reporting. Only alphanumeric characters, periods, and underscores are allowed. After you use aProduct IDfor one product, it can’t be used again, even if the product is deleted. We recommend you to use consistent nomenclature across all your plans for your easy of use. ThisProduct IDwill have to be mapped with the corresponding Plan in the Purchasely Console.
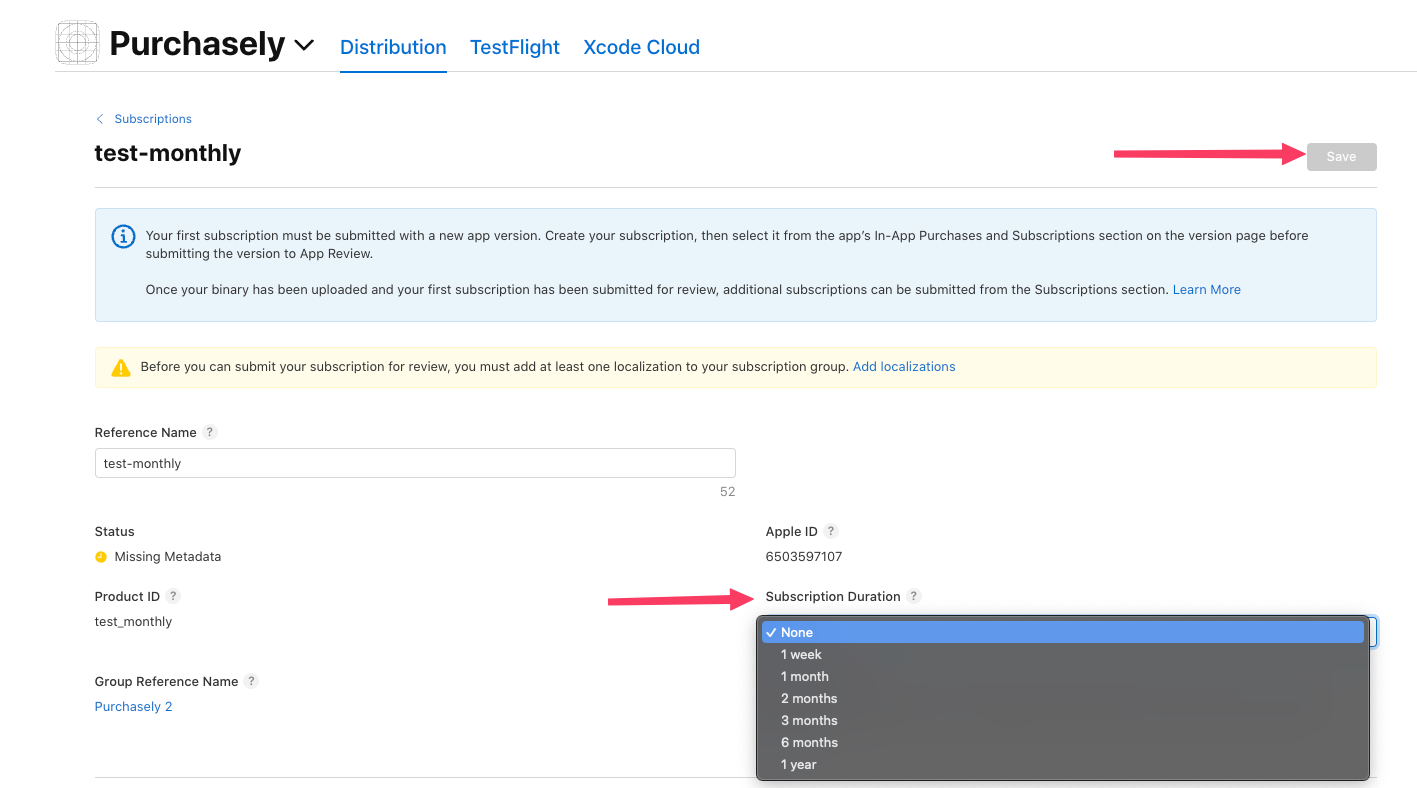
Setting Subscription Duration
Once your product is created, you'll be able to set the duration of the auto-renewable subscription. Use the duration dropdown to choose an option, and click Save.
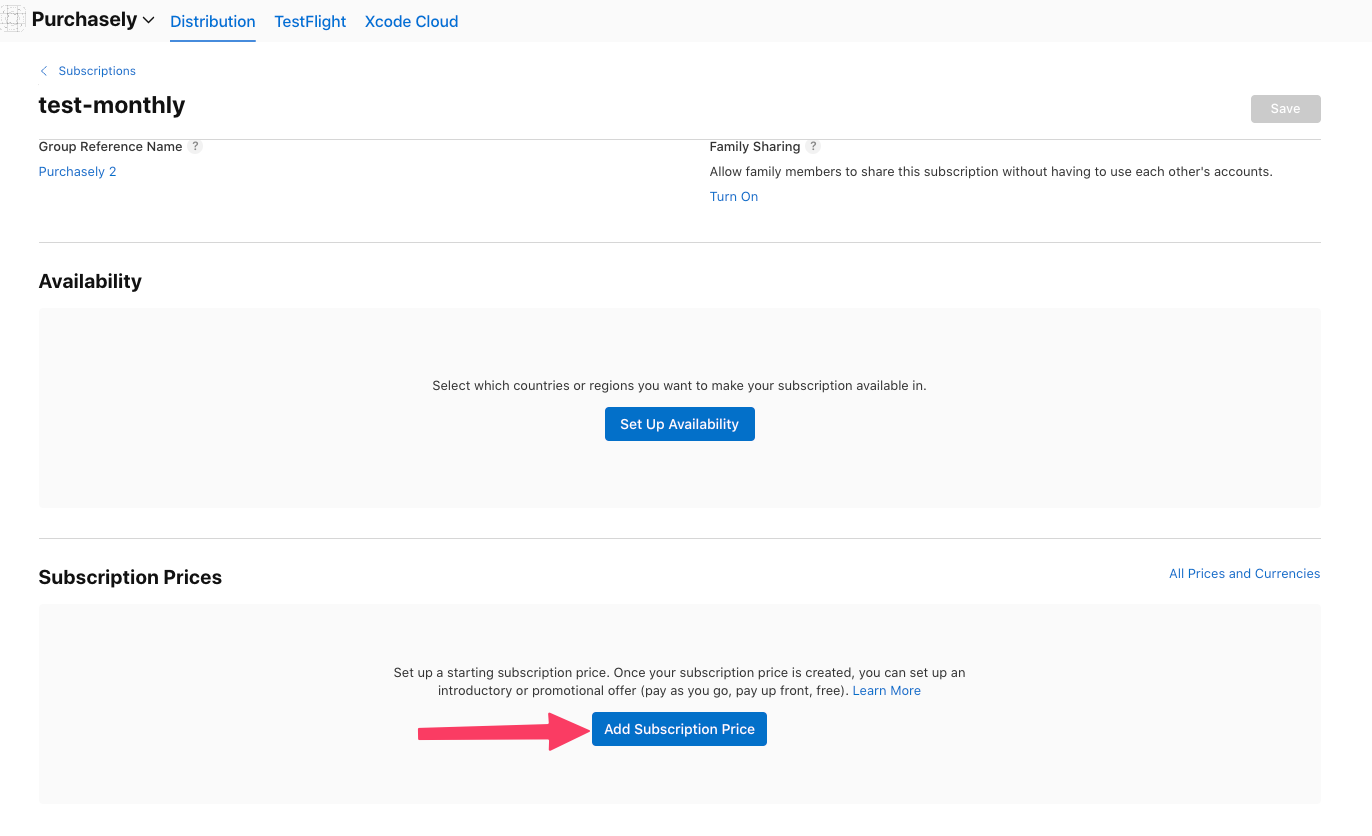
Setting Subscription Price
To set the regular price of your subscription, scroll the same page and you will find Subscription prices
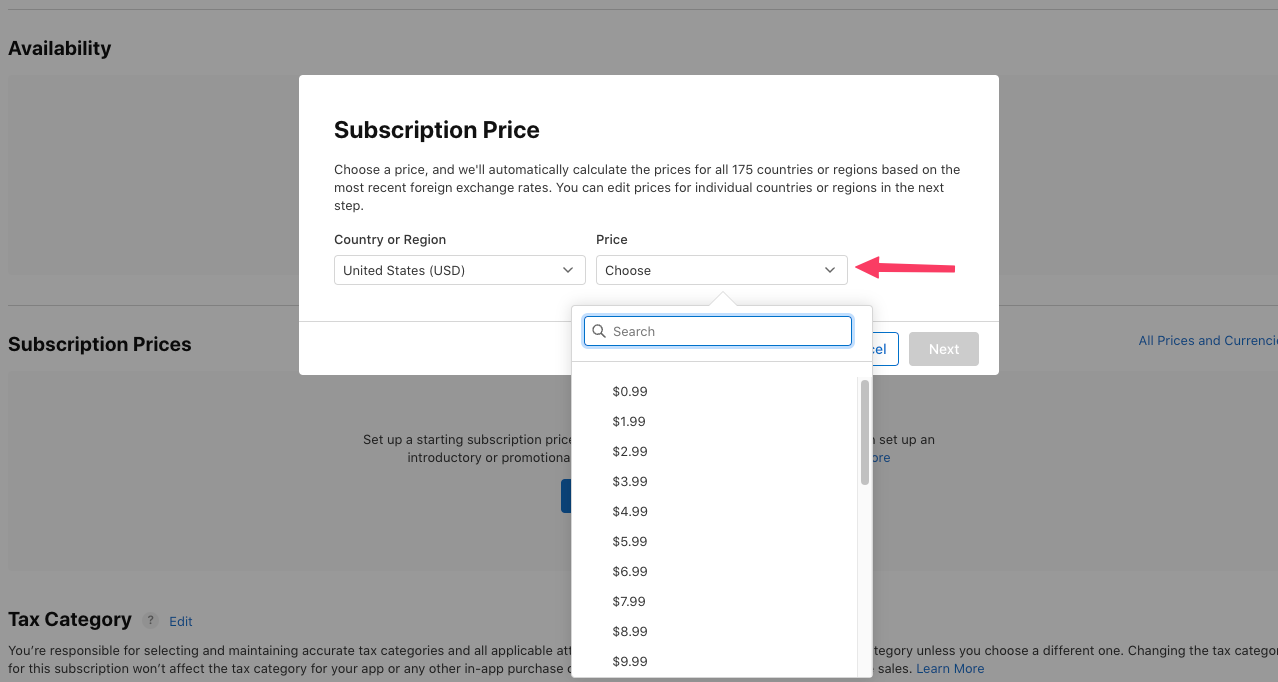
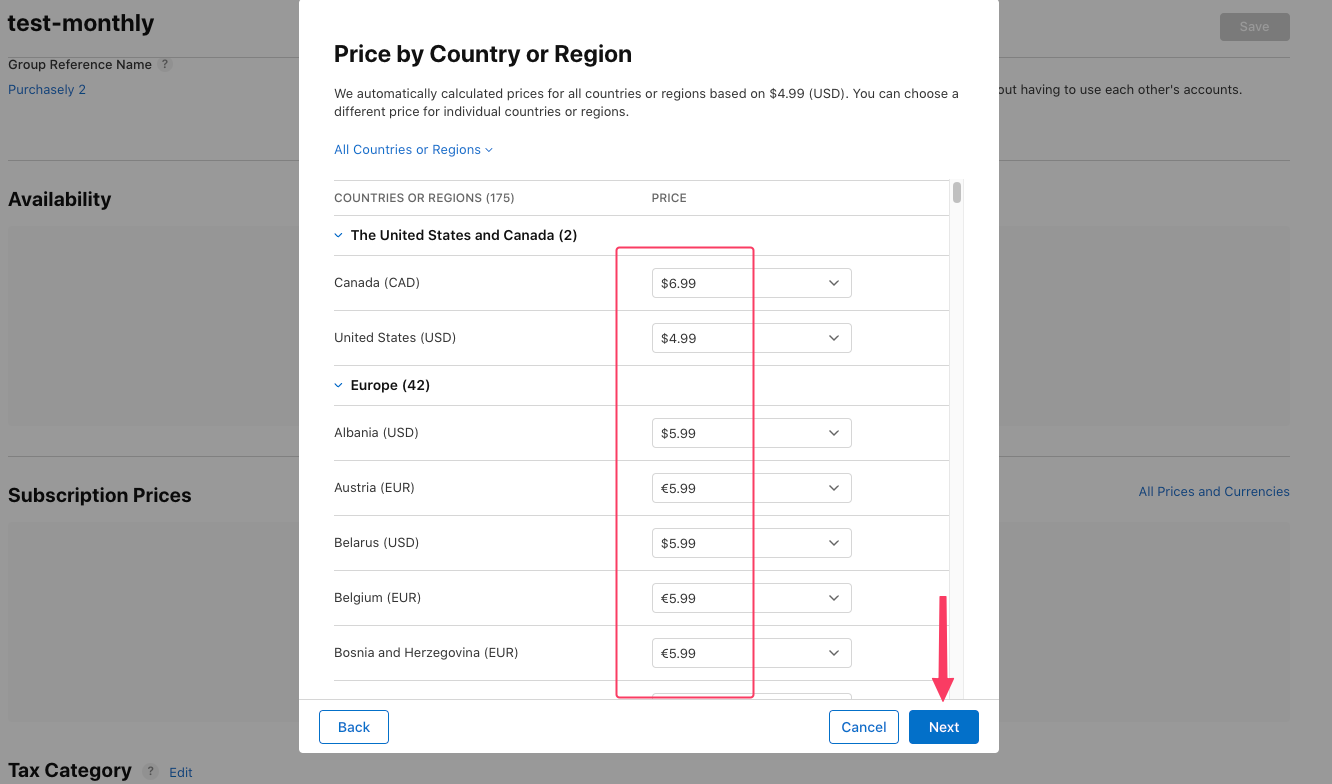
You'll be presented with a modal where you can select a Price from a dropdown in your default currency. The price you select here is inclusive of tax.
When you click Next,
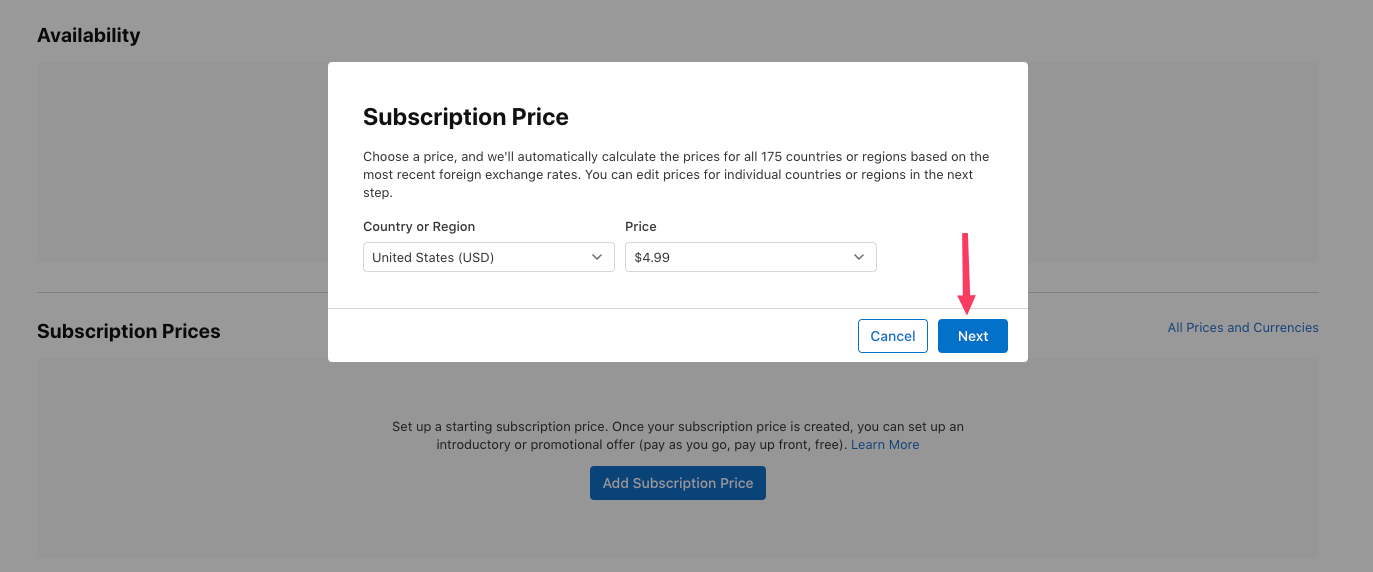
Apple will automatically set the price in all App Store regions based off the price and currency you selected. You'll have the option to edit price for any country. If all good, then click Next.
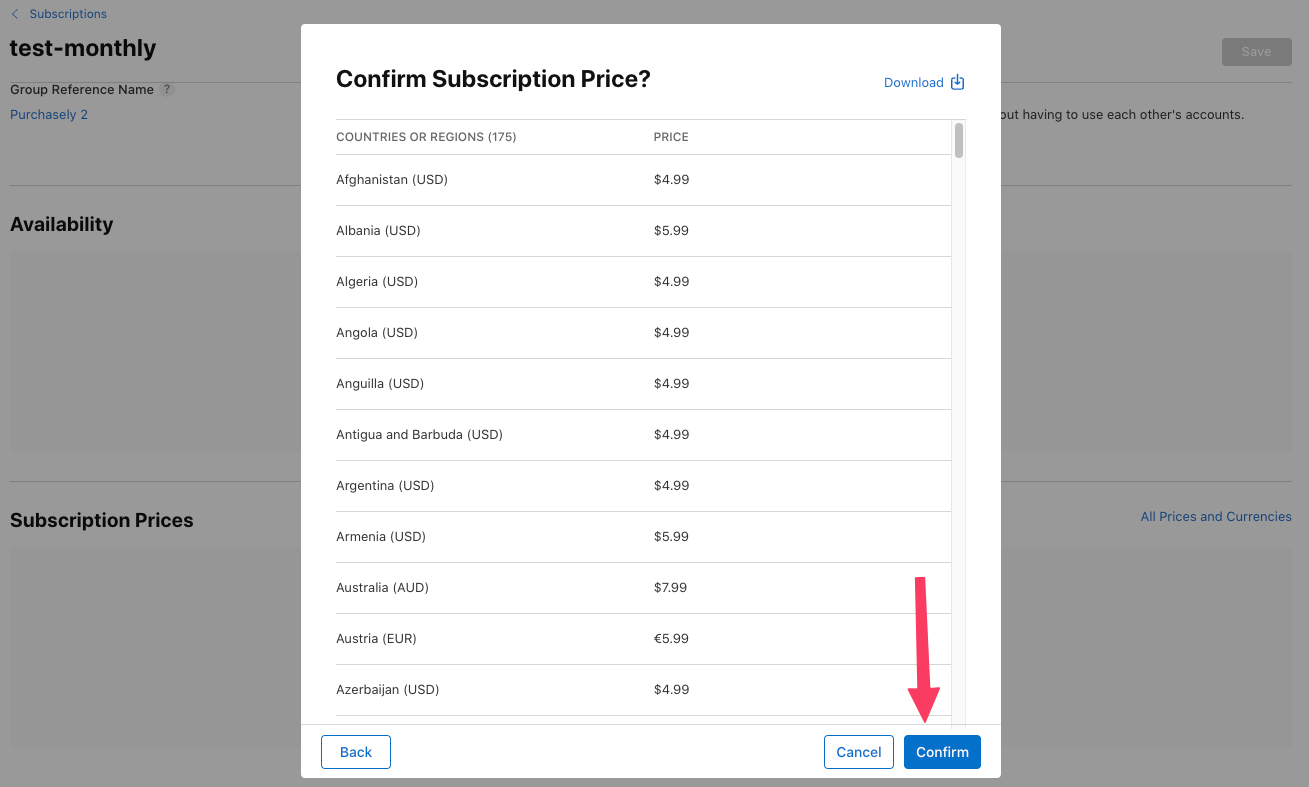
In the following screen, you can review once again the price set for the subscription. If you have checked it, you can click on confirm. This will create the subscription price.
Adding Localization
The next step is to set up localization information of the plan created above. This is the name and description of the in-app purchase that the user will see.
In the App Store Information section, click the Add localization button.
Choose the language, display name and add a description and click add once done.
The Subscription Display Name and Description will be visible to the user on the App Store and in their subscription management settings.
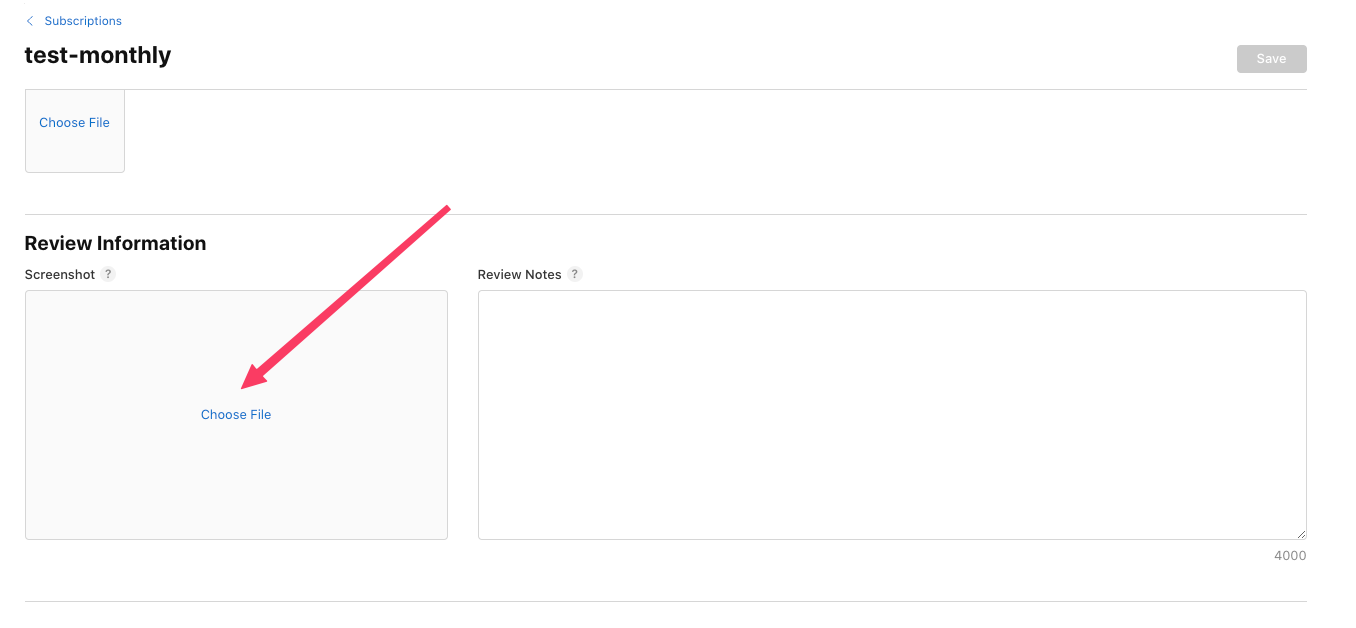
Add Reviewer Information
The last part of setting up an In-app subscription in iOS is adding information for the reviewer. This is a Screenshot, and optional Review Notes. You'll be unable to submit your product for review without it.
Screenshot: A required image of your in-app purchase paywall for the reviewer. While testing, it's okay to upload an empty 640 x 920 image here of whatever you want. Before submitting for review, you should add a picture of your paywall.
Review Notes: An optional text area to clarify anything about your in-app purchase for the reviewer.
Adding Introductory Offers and Free Trials
To add an introductory offer or free trial to your product, from the same Subscription prices section, click on the View all subscription pricing
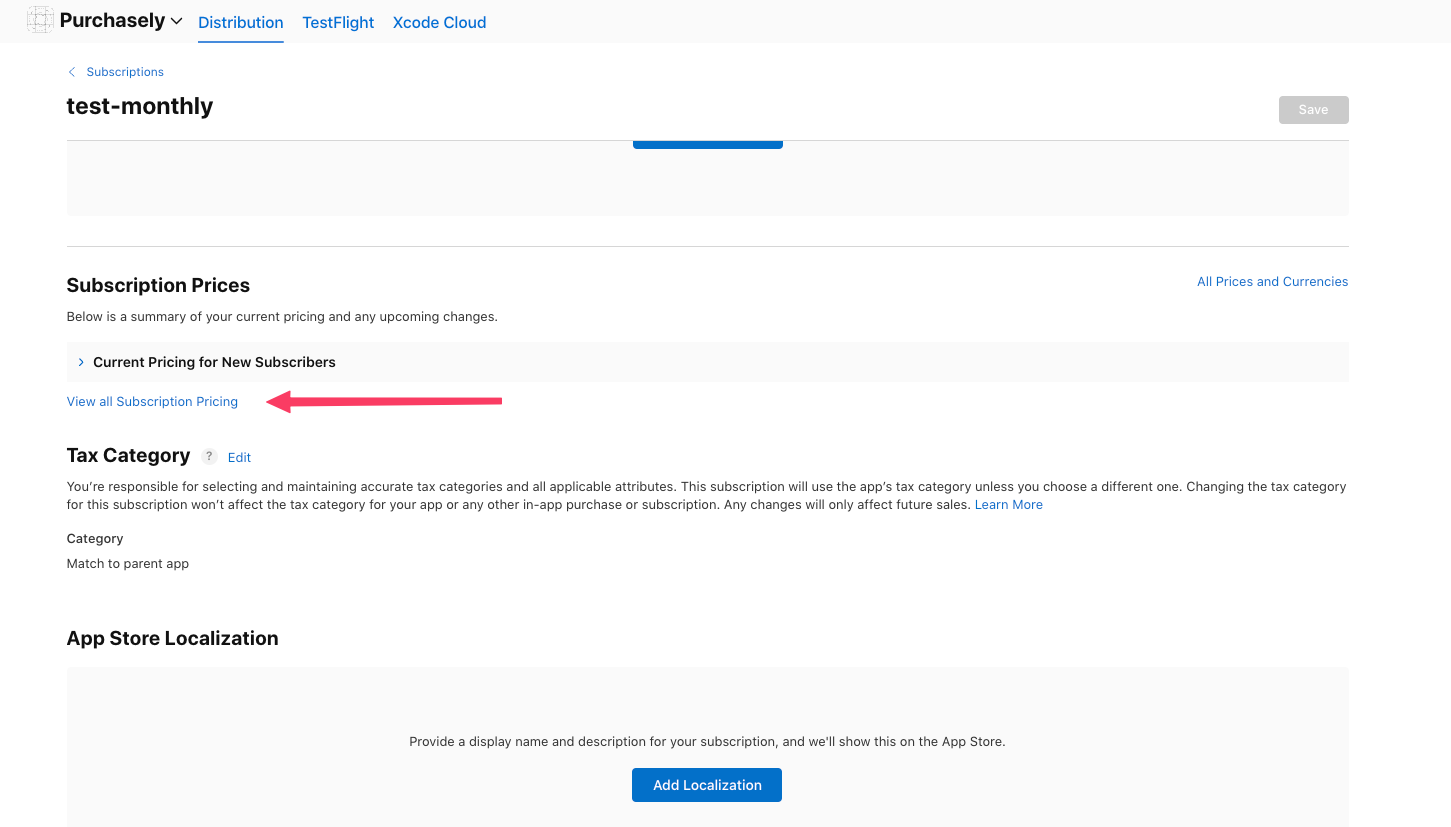
In the Introductory Offers tab
on the same page you just configured pricing. Click the Set up Introductory Offers button.

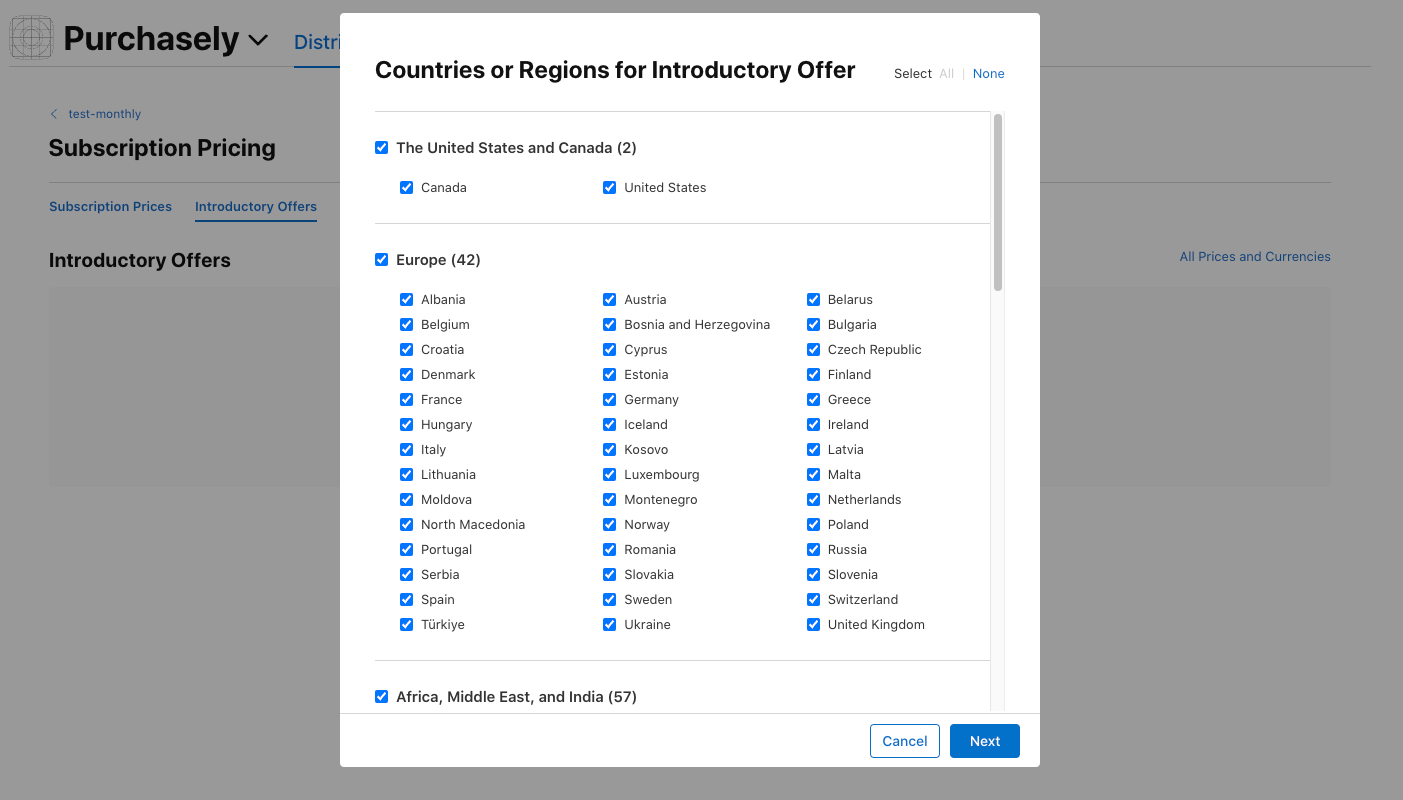
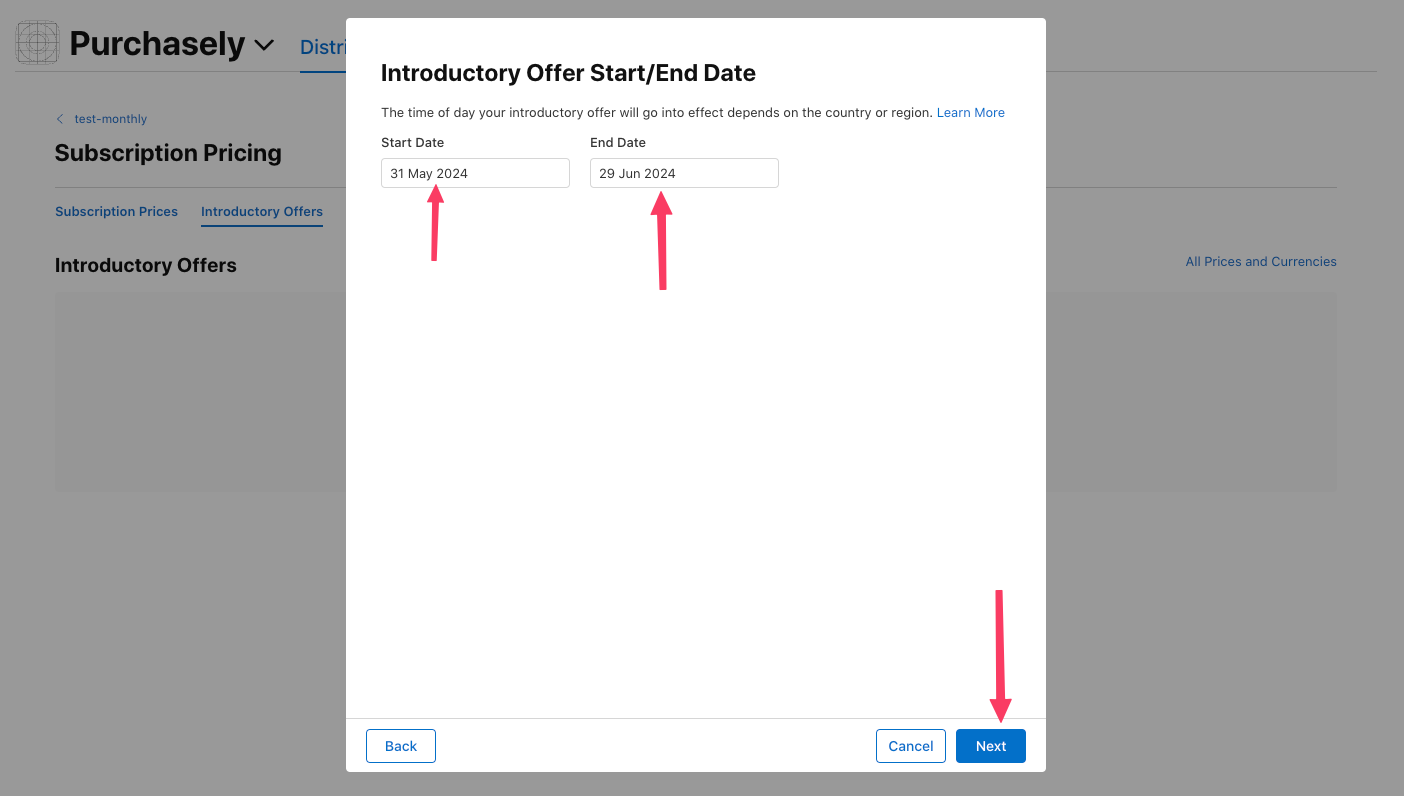
You'll be presented with a modal with a following configuration screens:
Countries or Regions for Introductory Offer: Use this if you want the introductory offer or trial to be region specific. Most of the time the answer here is "no", so go ahead and click Next.
Introductory Offer Start/End Date: Set the start and end dates if you want the introductory offer or trial to be a limited time deal. In most cases, you'll be setting the Start Date to today and No End Date, then click Next.
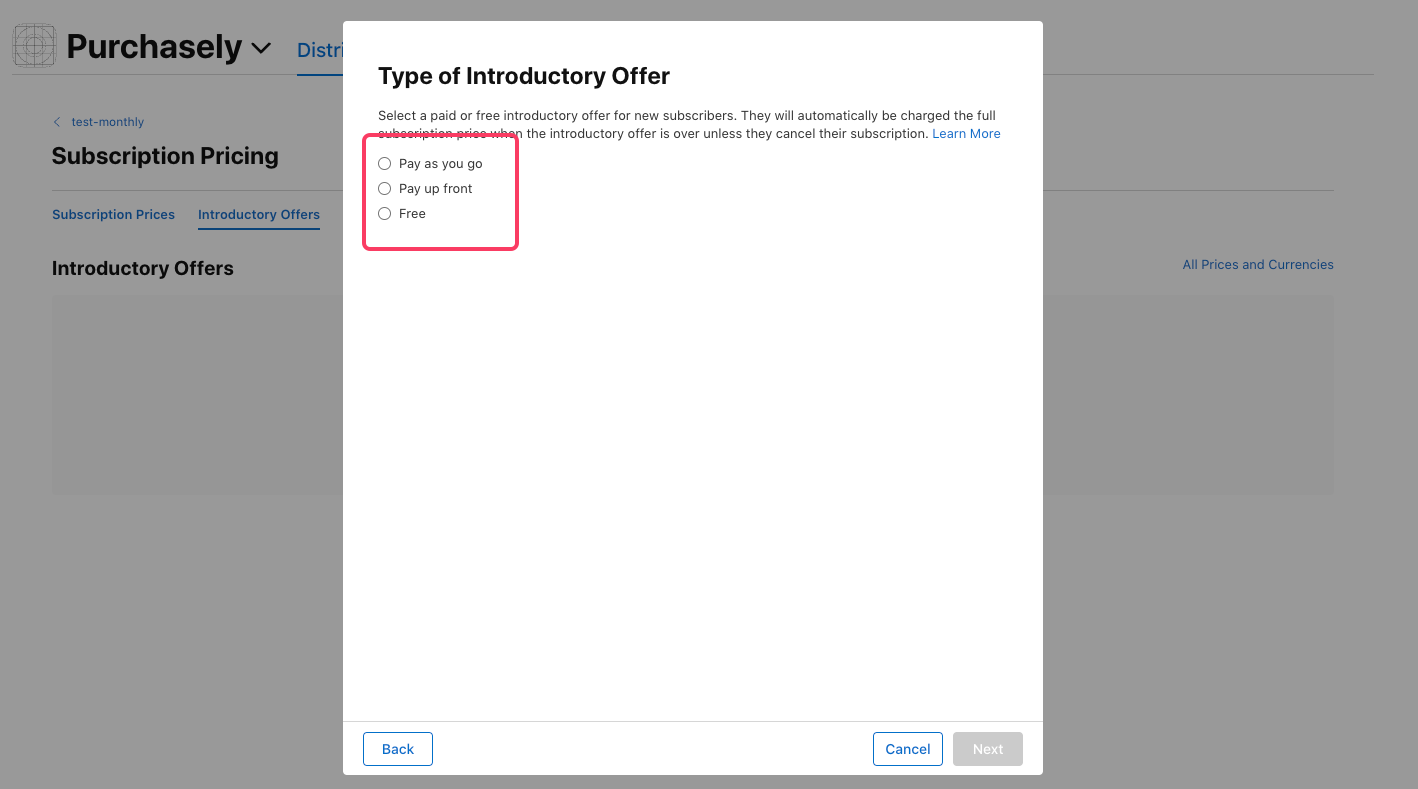
On the last screen, you'll get to choose the type of Introductory Offer.
- Free is the free trial,
- Pay as you go - the subscriber will pay for the plan periodically
- Pay upfront - the subscriber will pay for the entire period of promotion and then revert to the default pricing.
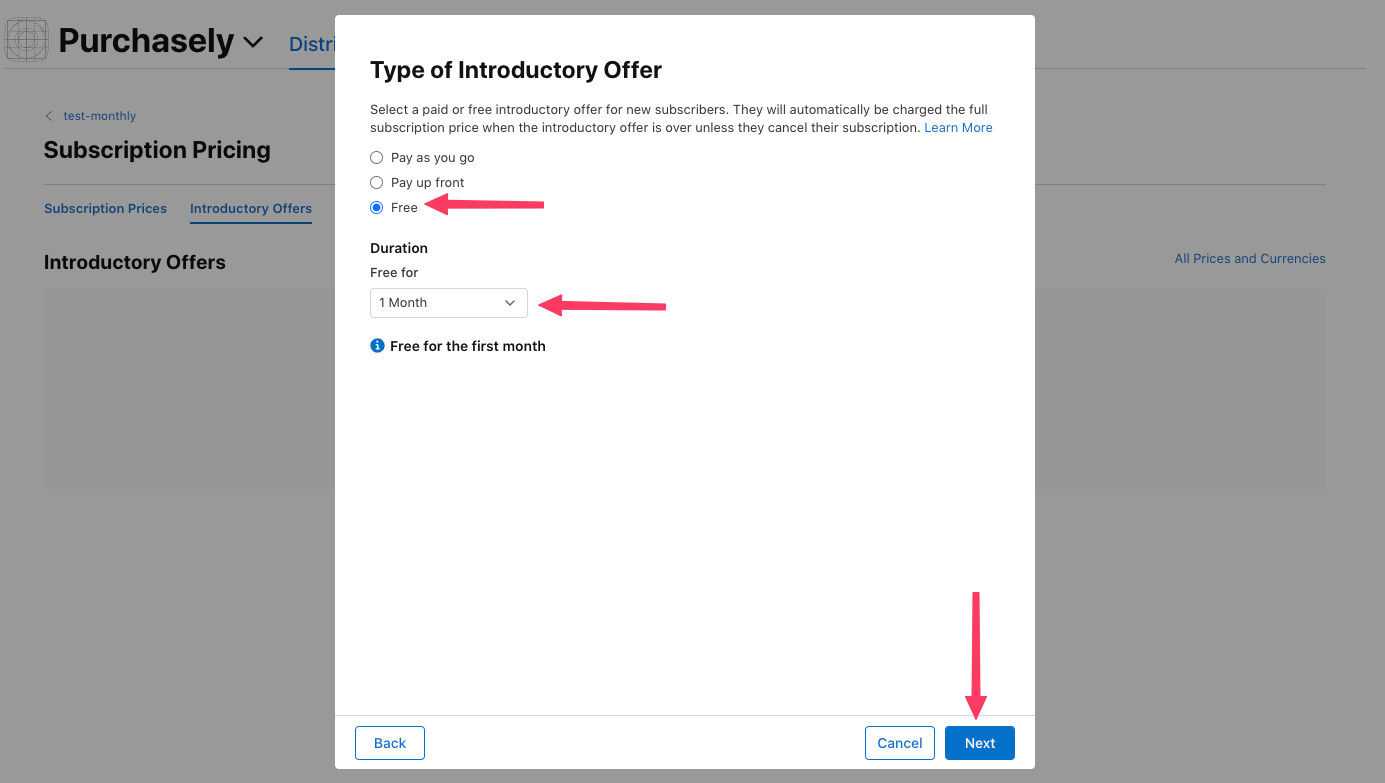
We'll set up free trial in this demo. Please notes, you can have only one introductory offer active for a subscription.
Select the Free radio button and choose the desired Duration from the dropdown.
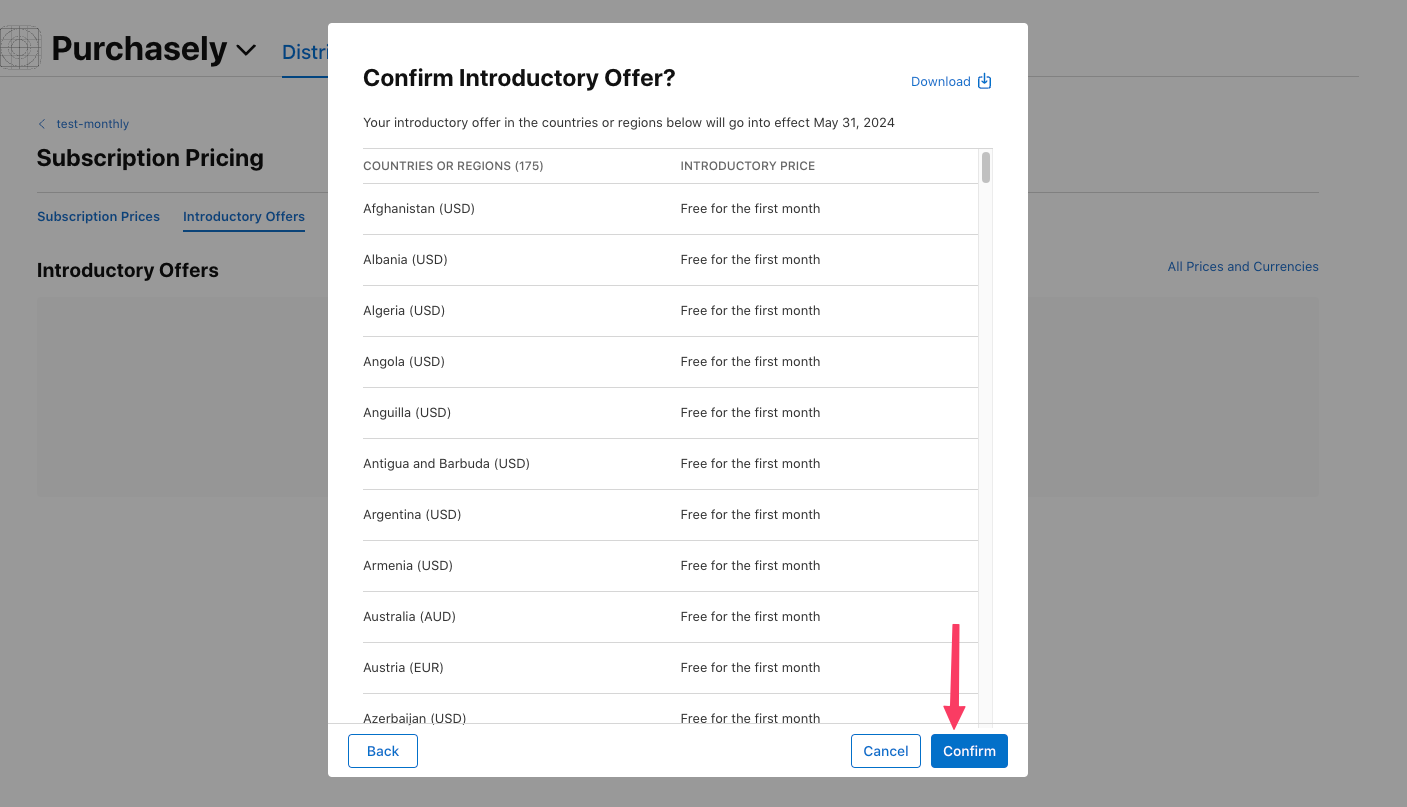
You will be presented the summary of the offer for different regions, check and confirm
You can read more about the different Introductory Offer strategies here.
Grace period:
A billing grace period lets subscribers retain access to your app's paid content even after their subscription expires due to a billing issue. If Apple successfully recovers the subscription during this grace period, you will not experience any interruption in your revenue. This step is optional.
You can choose the grace period in Apple App Store connect:
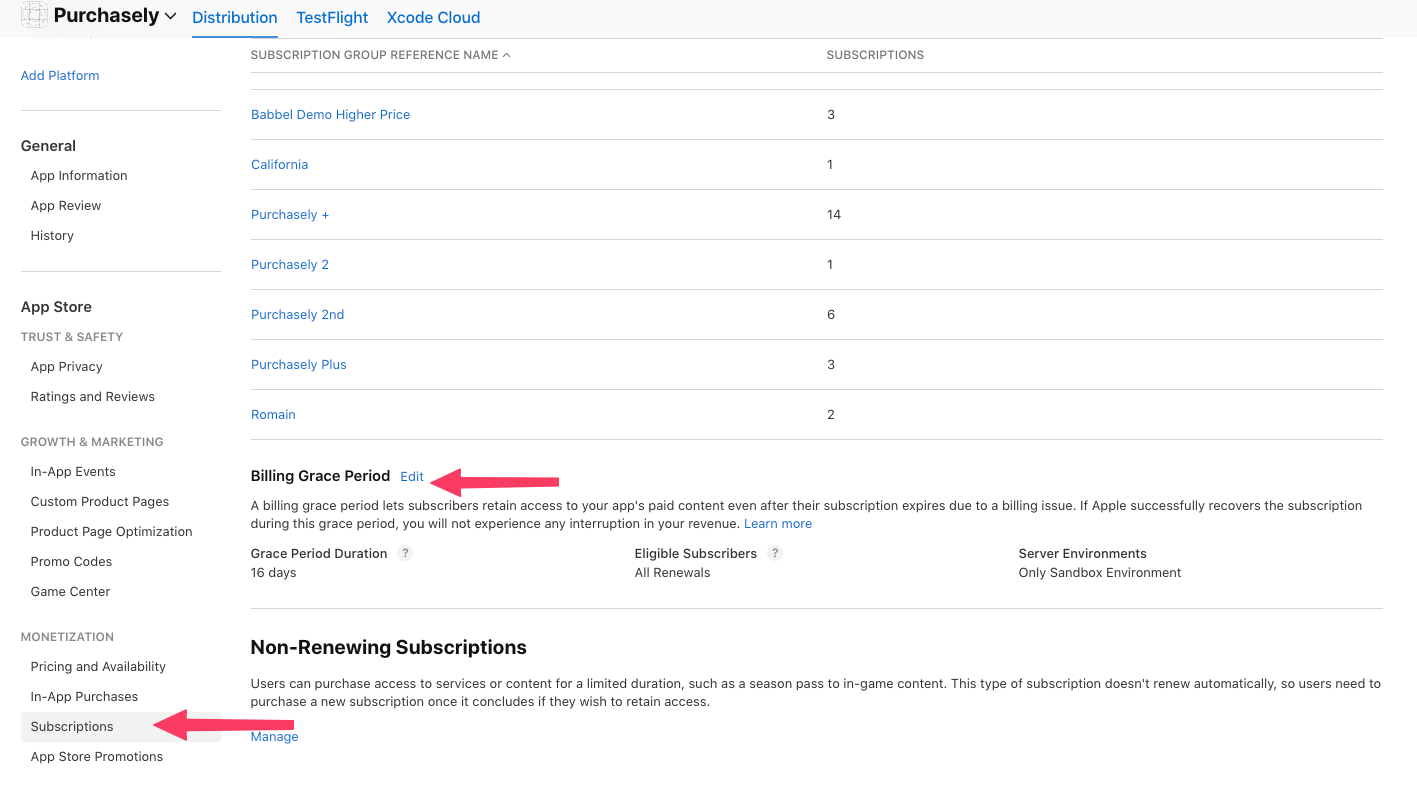
You can set the grace period duration, eligible subscribers and environments.
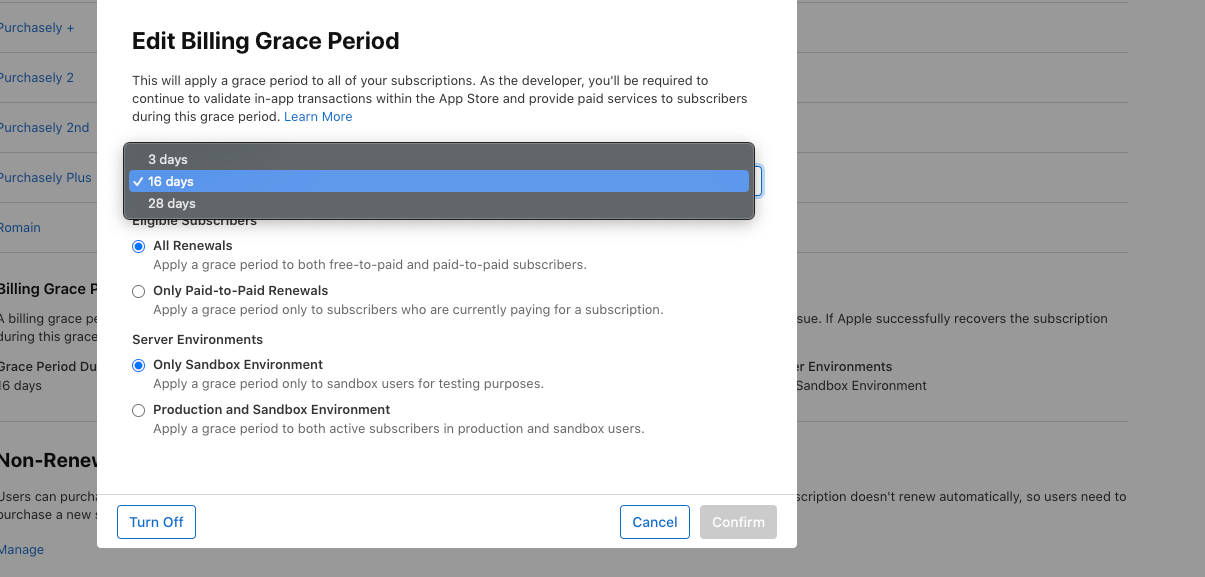
Avoid freeloadersTo avoid free trial users who never paid for your subscription to enjoy freely the benefits of your premium membership, we advise you to choose the option Only Paid-to-Paid
Once you are good with your set up you can confirm it. You can turn off this grace period any time you want.
Updated 9 months ago