Clevertap
This section describes how to integrate CleverTap with Purchasely
Overview
CleverTap is an all-in-one platform that combines the best analytics, segmentation, and engagement tools so that companies can build valuable, long-term relationships with their customers.
This integration will allow you to get all the available Purchasely events to CleverTap and get a better and deeper understanding of your subscription business and customer behavior. In addition you will be able to trigger automated communication based on those events, messages that could be linked to a Purchasely powered Screen to engage, upsell, retain customers.
Integrating Purchasely with Clevertap
The integration requires 5 steps:
- Associate the users with a
CleverTap Distinct ID(SDK implementation) - Activate the Clevertap integration in the Purchasely Console
- Enable the forwarding of Server Events in the Purchasely Console
- Enable the update of User Properties in the Purchasely Console
1 - Associate users with a CleverTap Distinct ID (SDK implementation)
This has to be done at the app level by using the following piece of code:
CleverTap.autoIntegrate()
if let clevertapId = CleverTap.sharedInstance()?.profileGetID() {
    Purchasely.setAttribute(.clevertapId, value: clevertapId)
}
val cleverTap = CleverTapAPI.getDefaultInstance(applicationContext)
cleverTap?.cleverTapID?.let {
    Purchasely.setAttribute(Attribute.CLEVER_TAP_ID, it)
}
CleverTap.getCleverTapID((err, res) => {
    Purchasely.setAttribute(Attributes.CLEVER_TAP_ID, res);
});
Purchasely.setAttribute(PLYAttribute.clever_tap_id, "clever_tap_id");
Purchasely.setAttribute(Purchasely.Attribute.CLEVER_TAP_ID, "clever_tap_id");
private PurchaselyRuntime.Purchasely _purchasely;

_purchasely.SetAttribute(PLYAttribute.CLEVER_TAP_ID, "clever_tap_id");
See the CleverTap Documentation for more information.
2 - Activate the Clevertap integration
The activation requires 3 steps:
- Retrieving your account's region from the CleverTap Dashboard.
- Retrieving your account's ID and passcode from the CleverTap Dashboard.
- Enabling the CleverTap integration in the Purchasely Console.
Retrieving your account's region from the CleverTap Dashboard
- Follow the CleverTap documentation and retrieve your account's region.
- Write down your account's region.
Retrieving your account's id and passcode from the CleverTap Dashboard
- Follow the CleverTap documentation and retrieve your account's ID and passcode.
- Write down your account's ID and passcode.
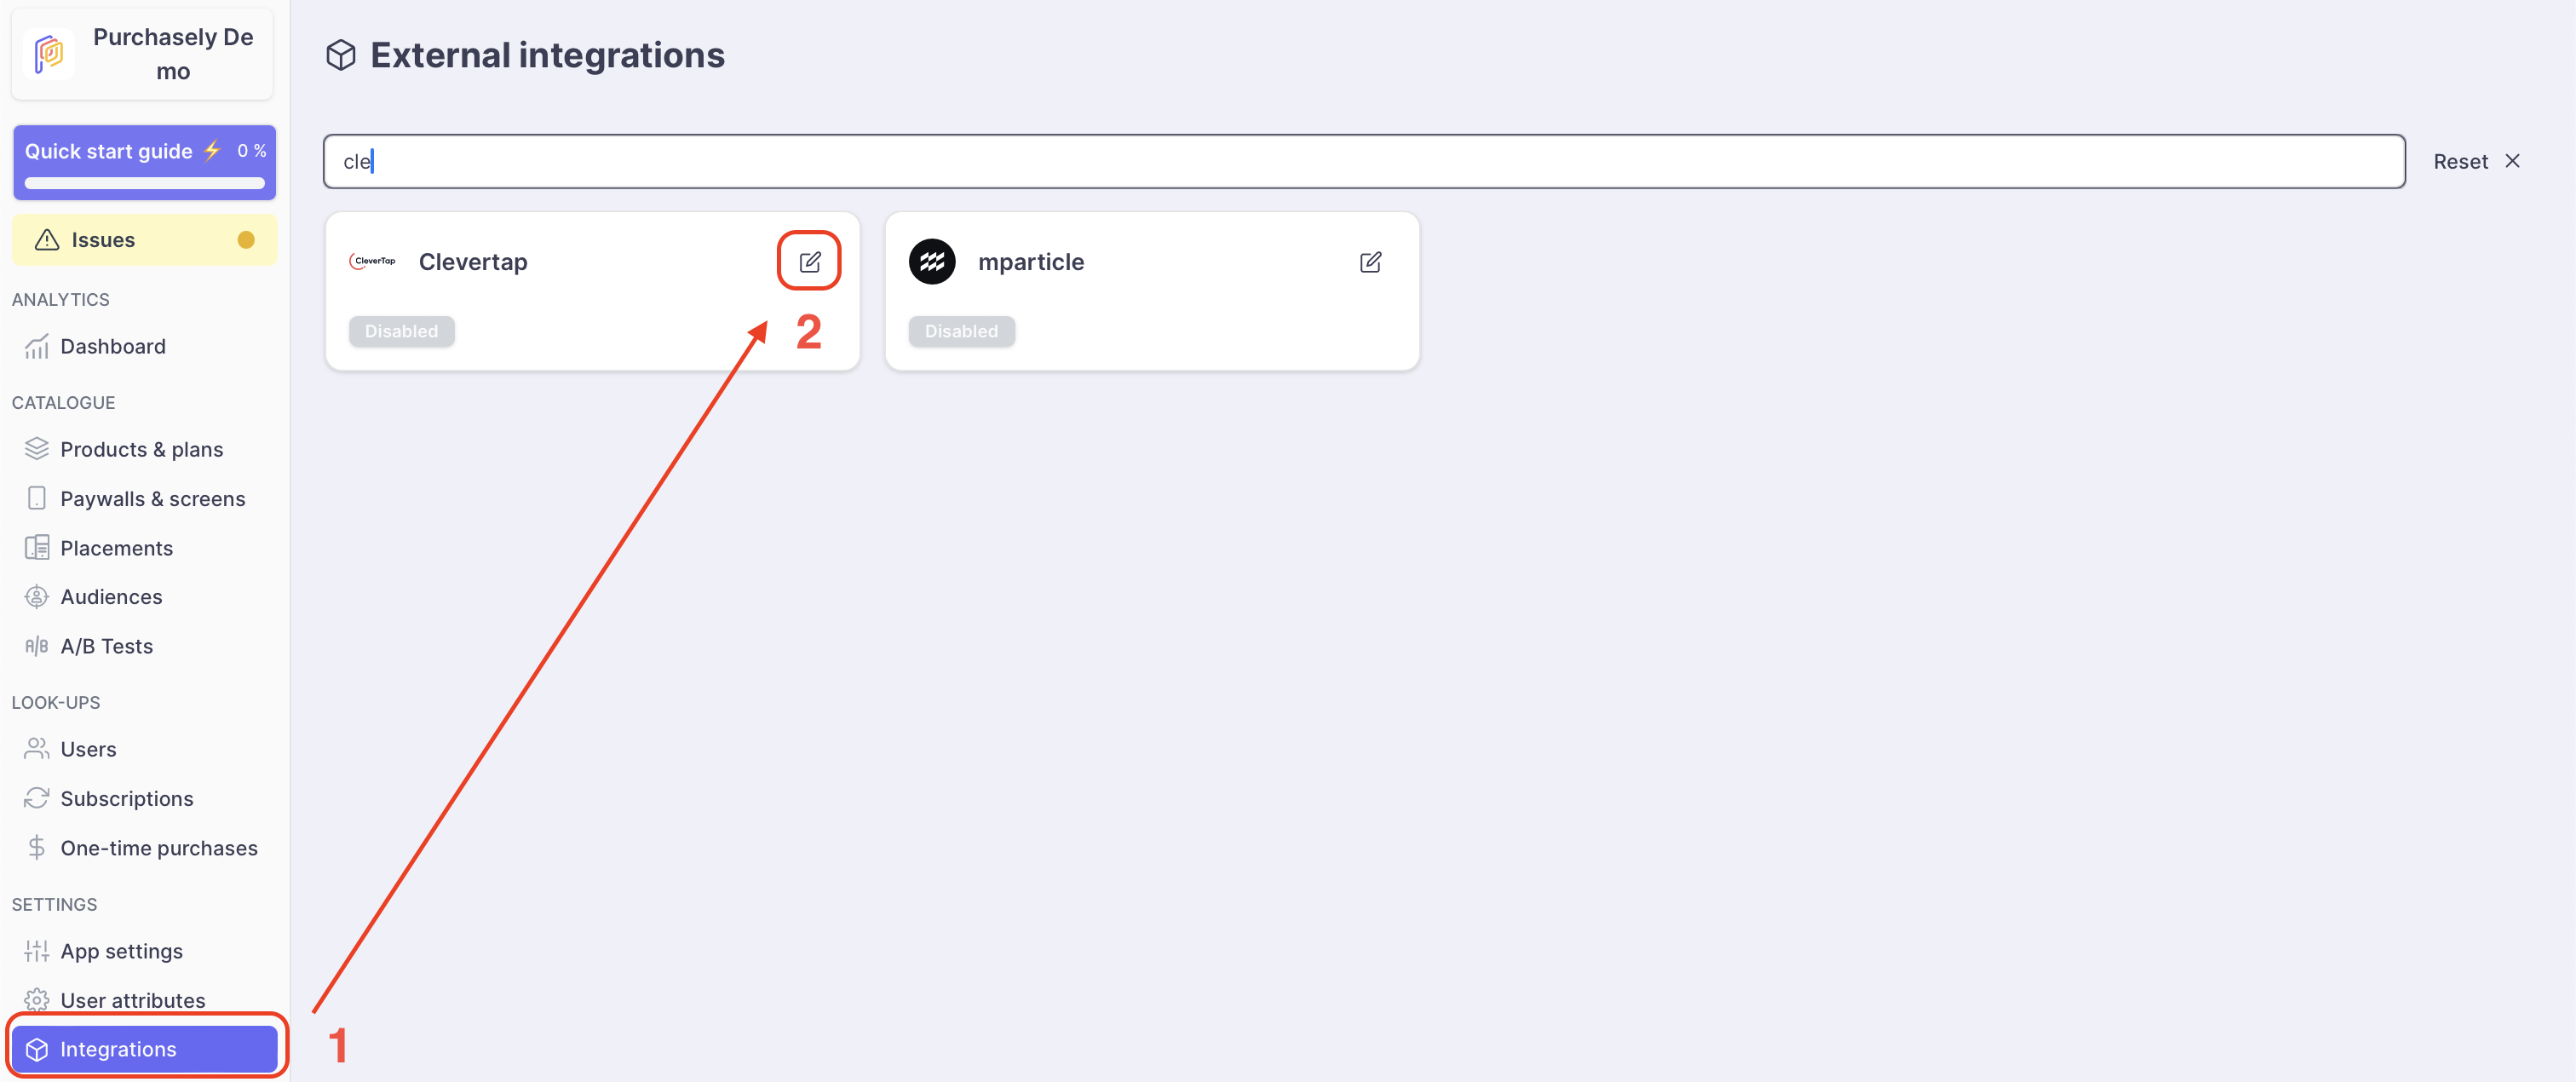
Enabling the CleverTap integration in the Purchasely Console
- Go in the "Integrations" section, and open the edition form for CleverTap :
-
Enable the integration
-
Set your CleverTap region. (Note that if you are in the EU region, you should put EU1)
-
Set your CleverTap account ID
-
Set your CleverTap account passcode
3 - Enable the forwarding of Server Events in the Purchasely Console
In the Purchasely Console, under the tab Server Events, you can choose with Server Events must be forwarded to Clevertap.
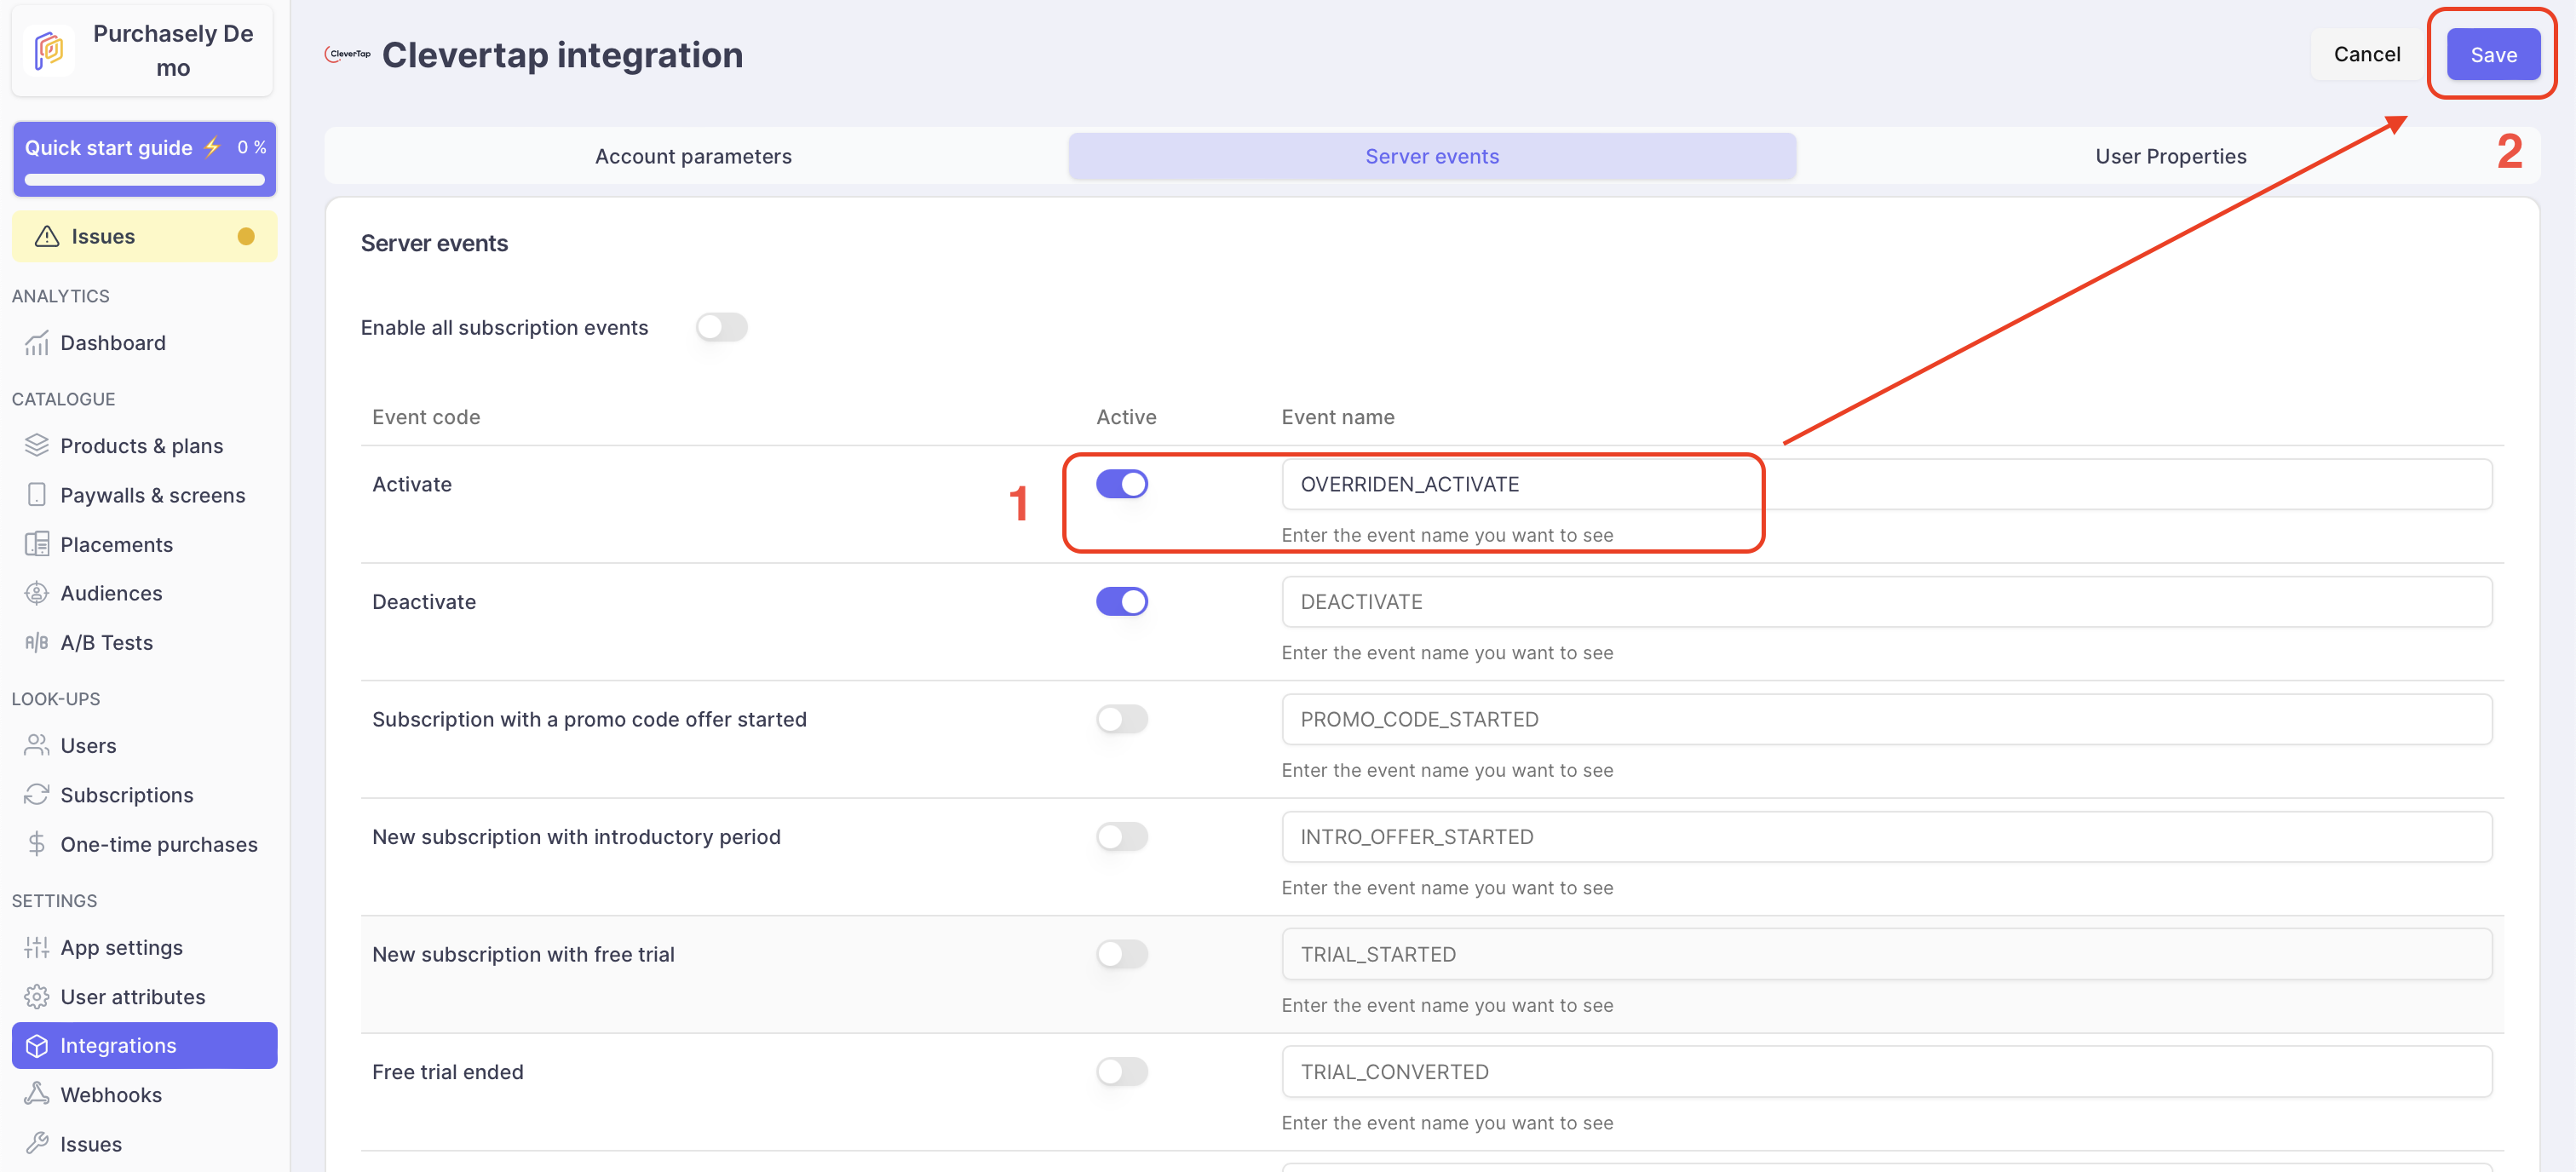
(Optional) Events names can be overridden to match with your tacking plan.
4 - Enable the update of User Properties in the Purchasely Console
In the Purchasely Console, under the tab User Properties, you can choose with User Properties should be updated in real time along the subscription lifecycle.
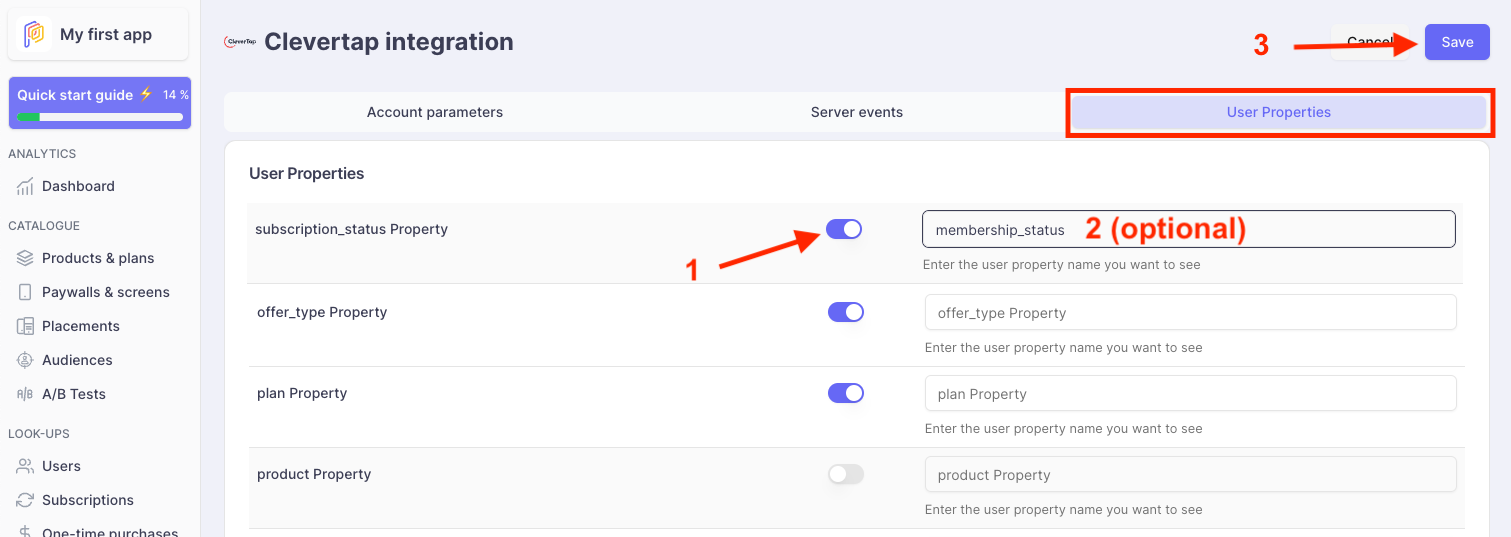
(Optional) User Properties names can be overridden to match with your nomenclature.
Details on User Properties are accessible here.
Updated about 1 month ago