Play Store - Configuring In-App Subscriptions
This section provides details on how to configure In-App Subscription in the Play Store Console
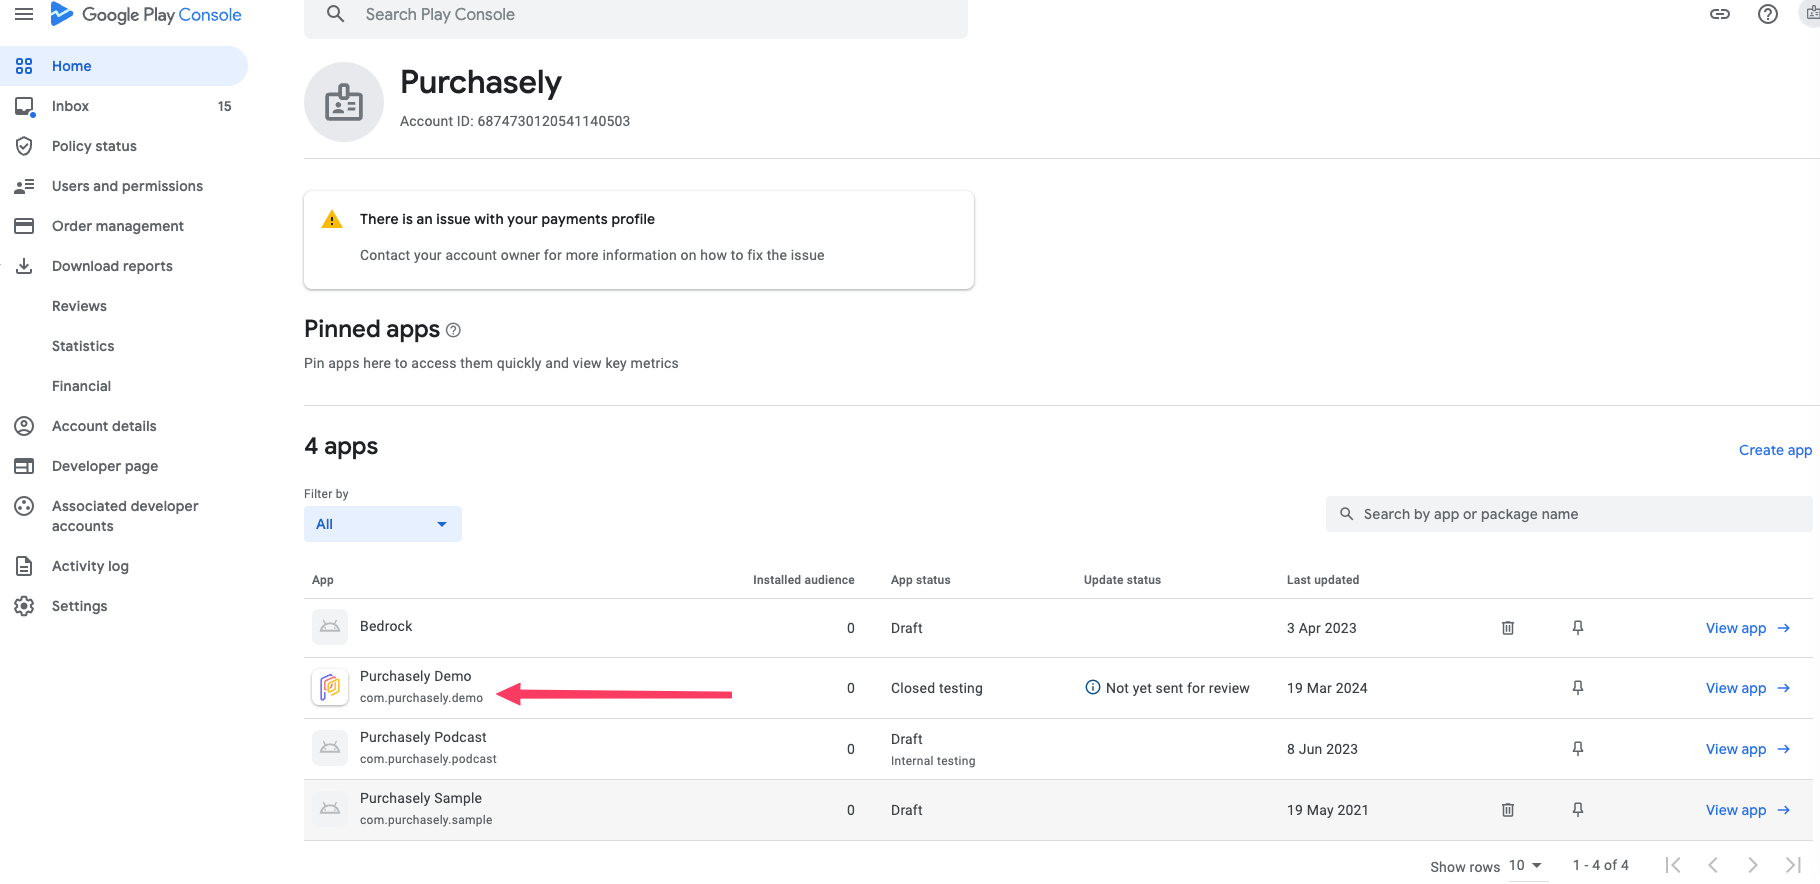
To set up products for Android devices, start by logging into Google Play Console. Google Play Console is Google's central hub for managing app releases, testing, in-app purchases, and more.
This guide assumes basic knowledge of Google Play Console, as well as having an app set up and ready for adding in-app purchases. For more information, visit Google's documentation and guides for Google Play Console.
Create a Subscription
Every subscription consists of one or more base plans and one or more offer plans. To create an in-app subscription, go to Google Play Console's 'All Applications' page and select your app from the list.
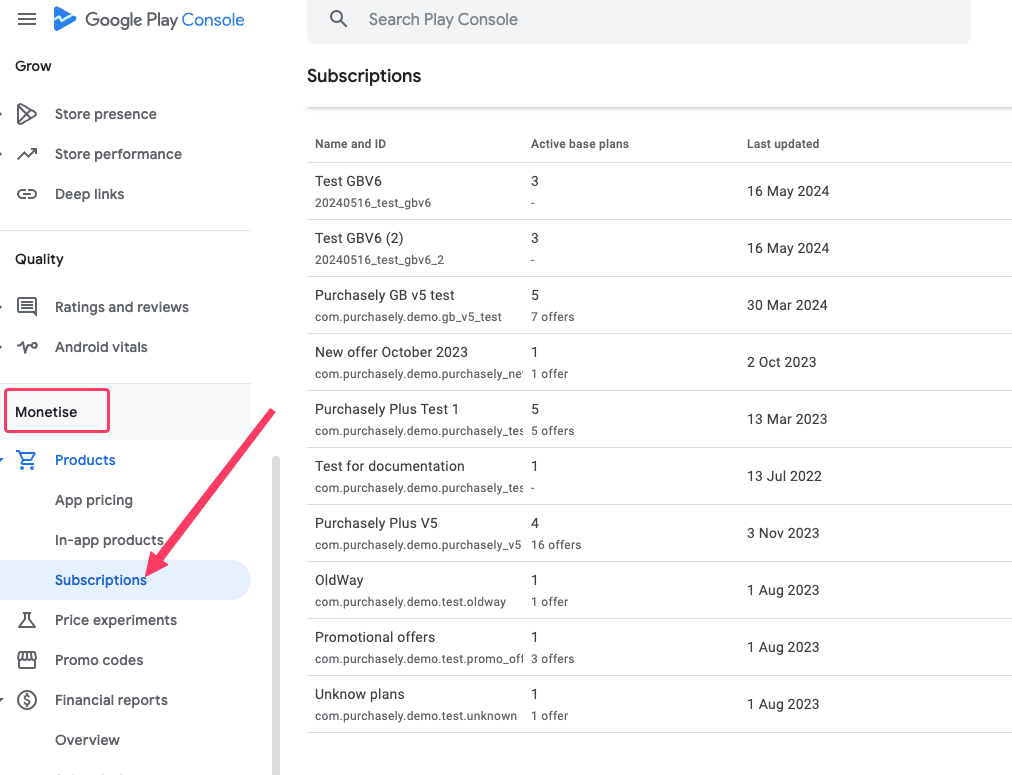
Then, Navigate to the following section:
Google Play Console > All apps > [YOUR APP] > Monetize > Products > Subscriptions
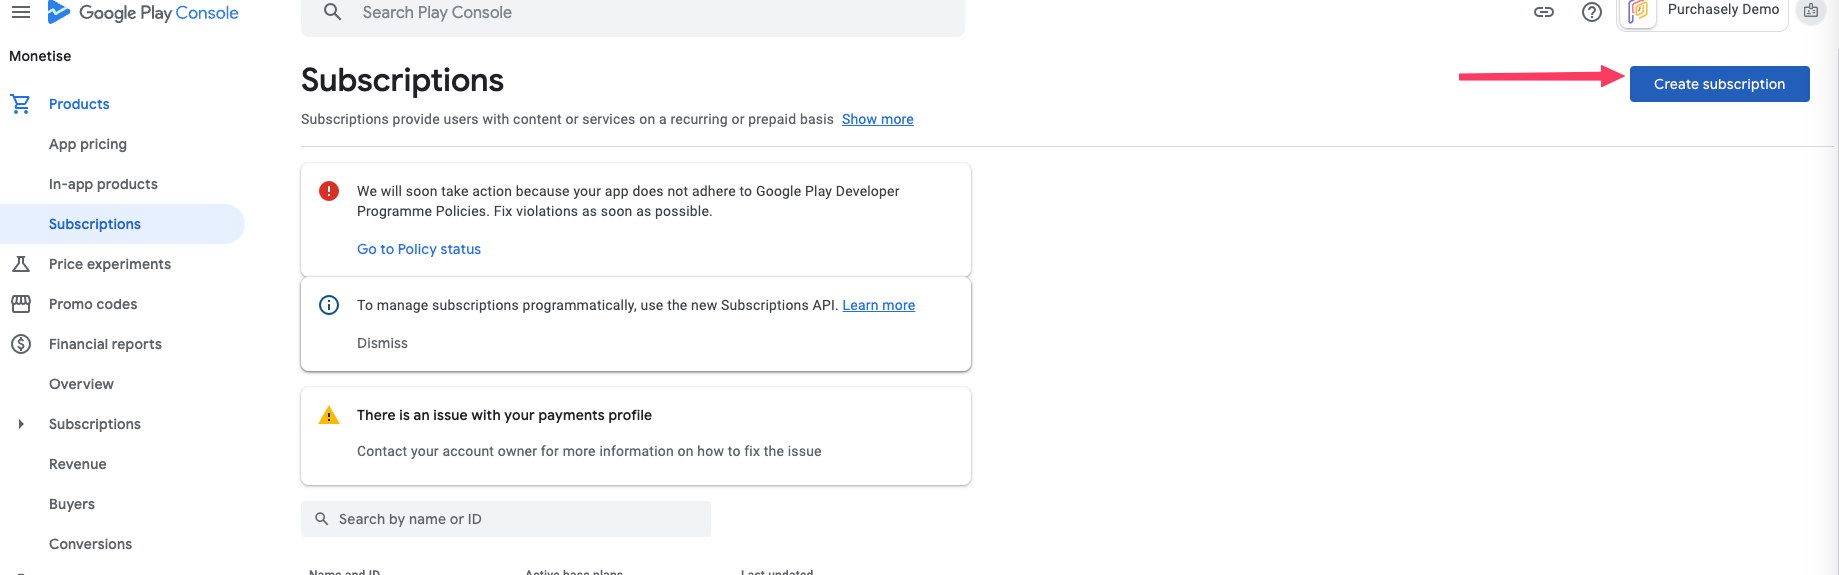
Click on Create subscription
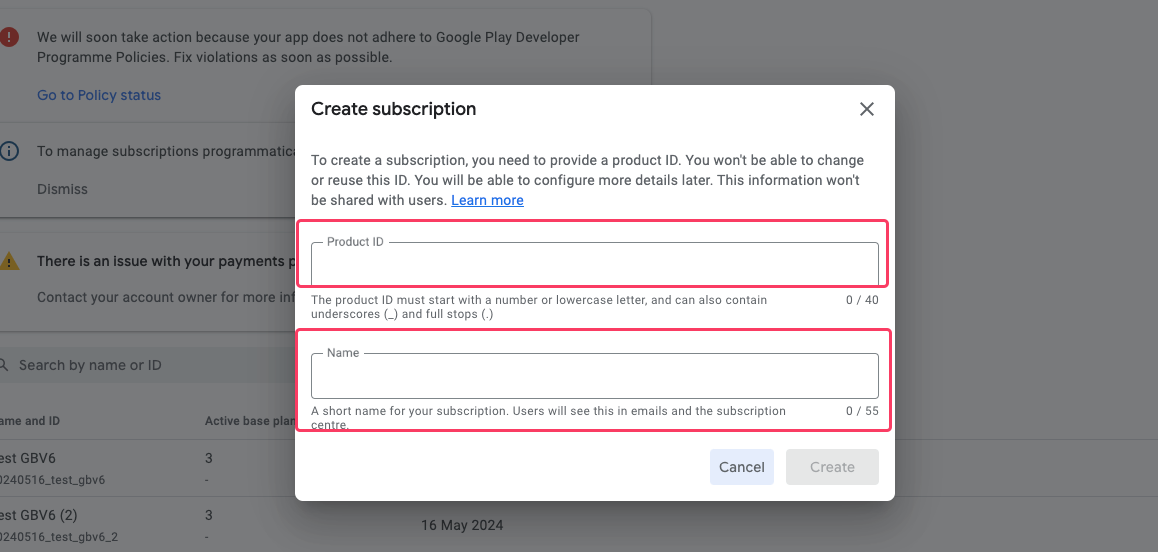
After clicking Create, provide a couple pieces of metadata to Google:
Fill in the Product ID and description
Product ID: The product ID is a unique alphanumeric ID that is used for accessing your product. After you use a Product ID for one product in Google Play Console, it can’t be used again across any of your apps, even if the product is deleted. ThisProduct IDwill have to be mapped with the corresponding Plan in the Purchasely Console.
Name: A short name of the item, up to 55 characters. This will be displayed on your Google Play Store listing.
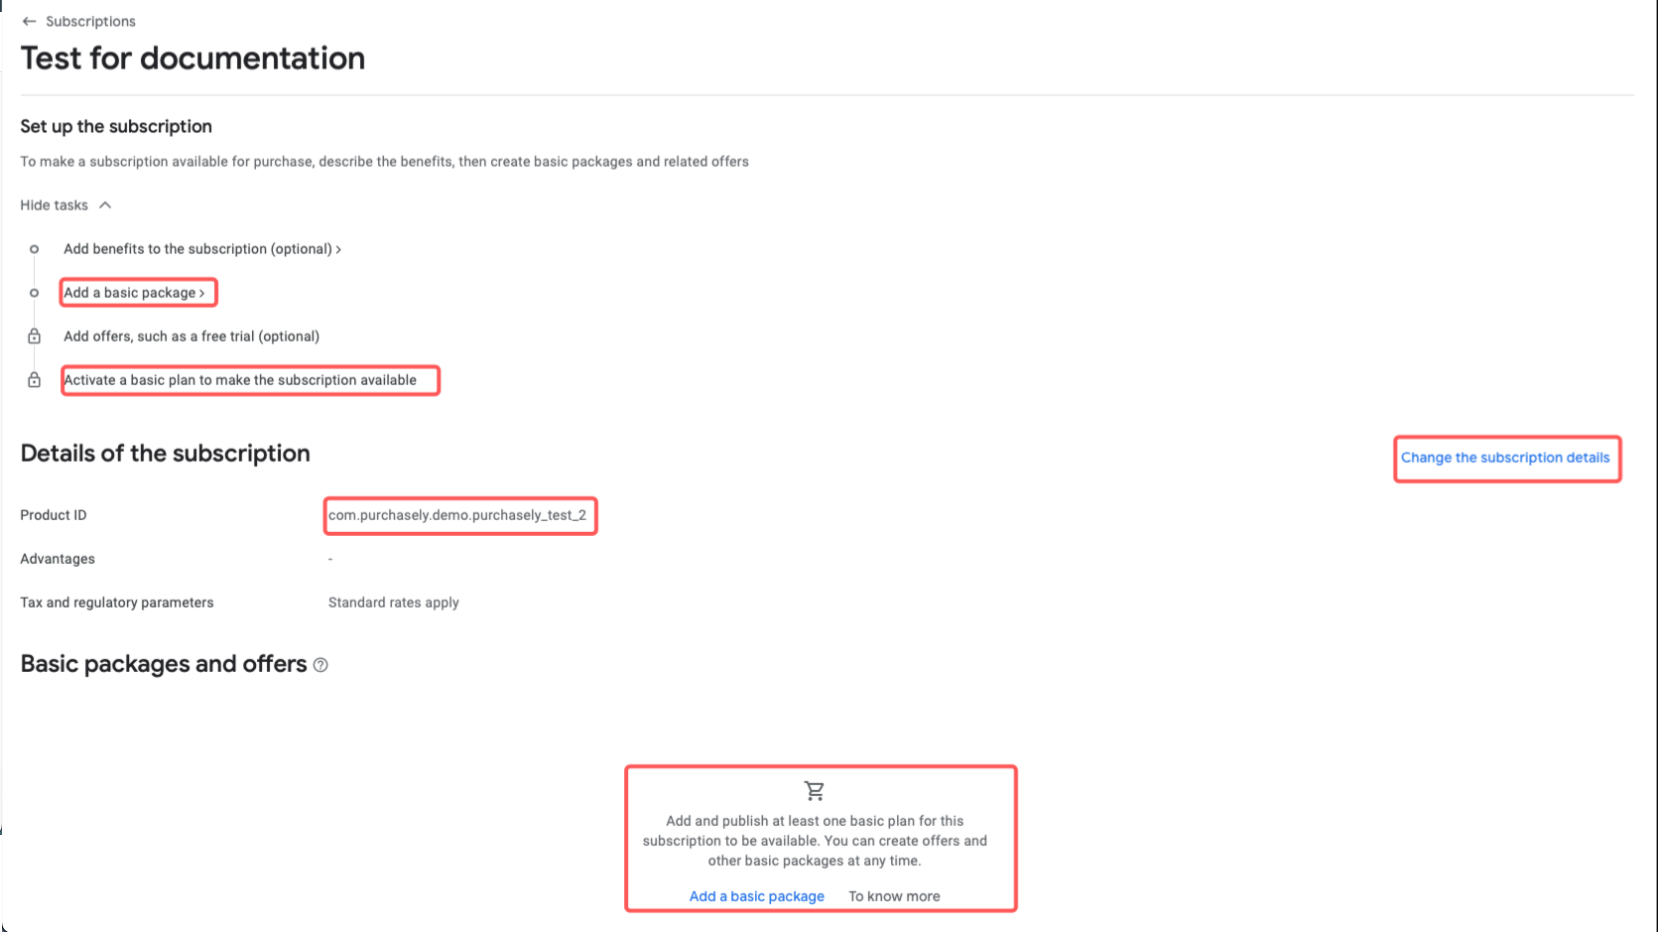
After creating a subscription, you have to add a basic package and activate it.
Subscription modeling in the Play Store
In the Play Store, starting with Google Billing v5, subscriptions are modeled this way
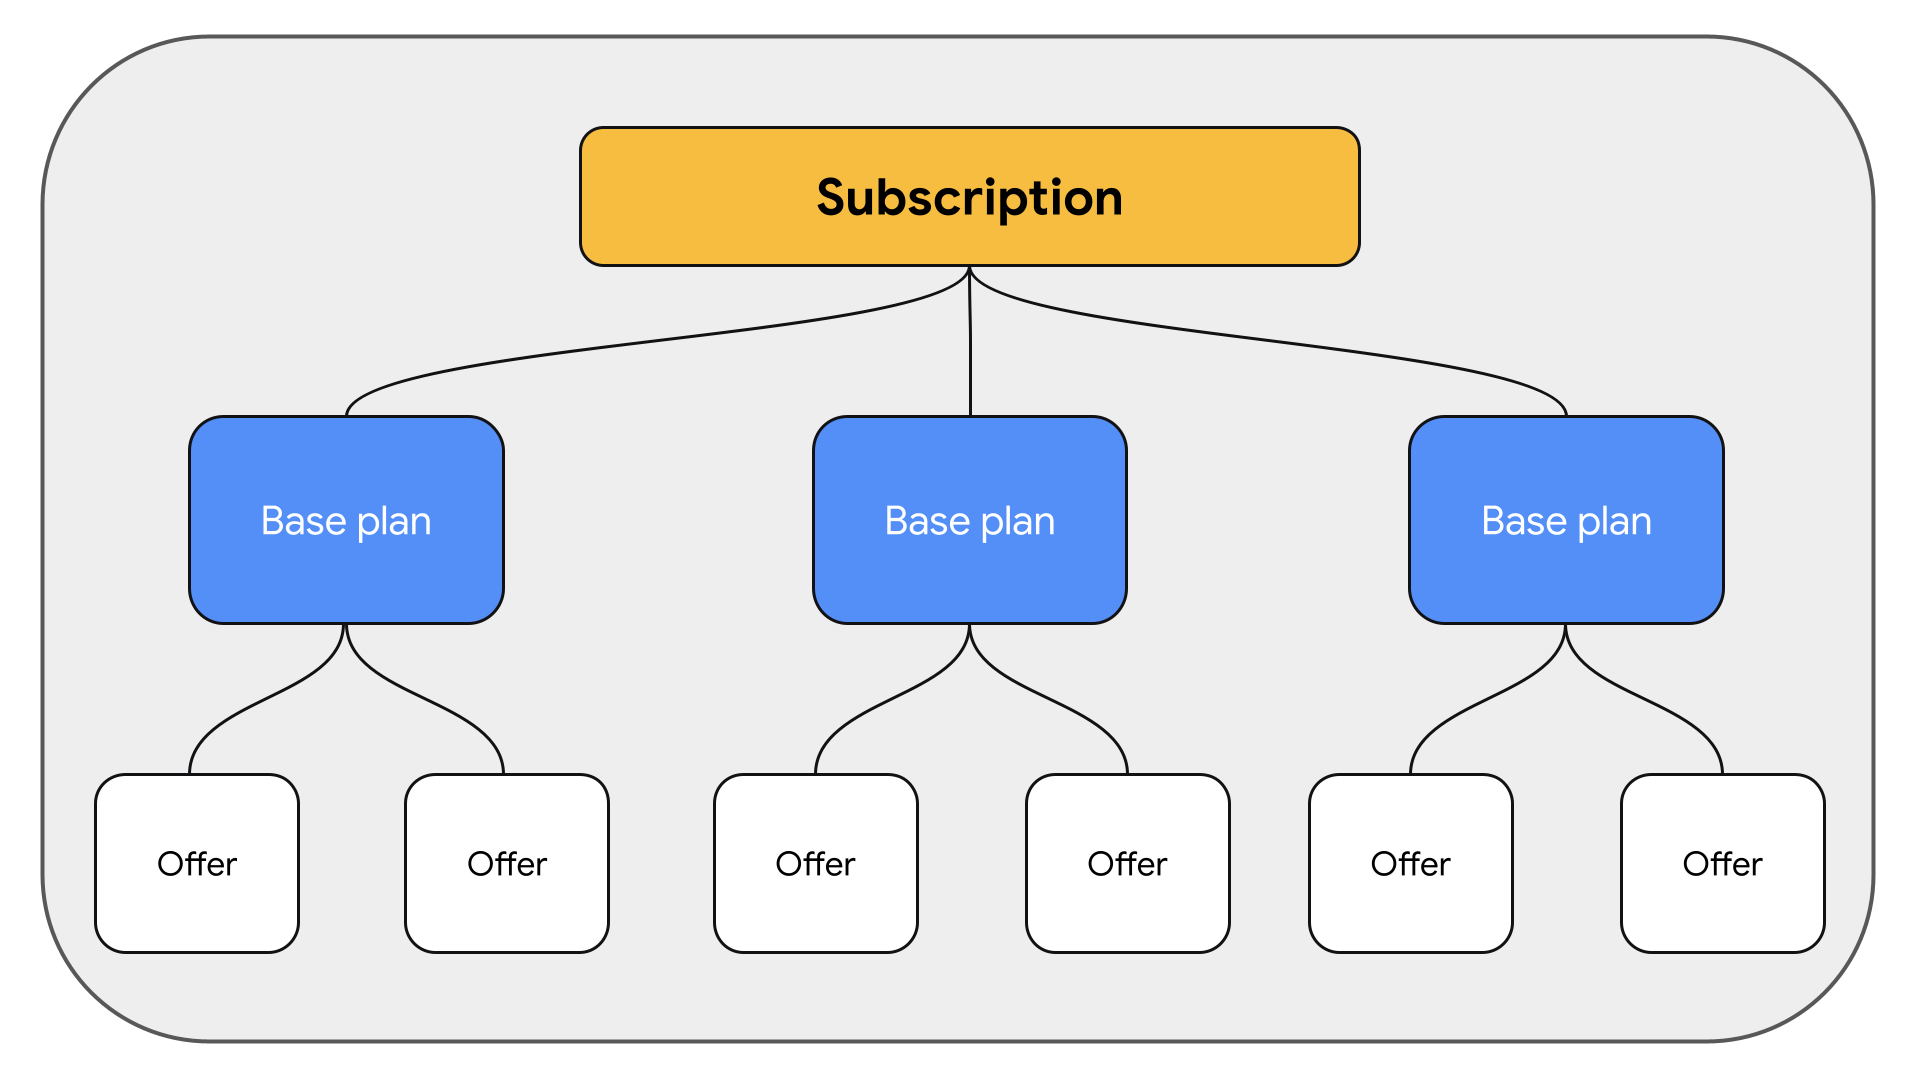
On subscription can have multiple base plans. Each base plan defined the billing period, renewal type and price. The price defined in the base plan is the regular price.
Each base plan can then have multiple offers, which can be used for Introductory Offers or Promotional Offers.
Creating base plans
For subscription products, you'll need to add a base plan. Base plans define a billing period, price, and renewal type for purchasing your subscription.
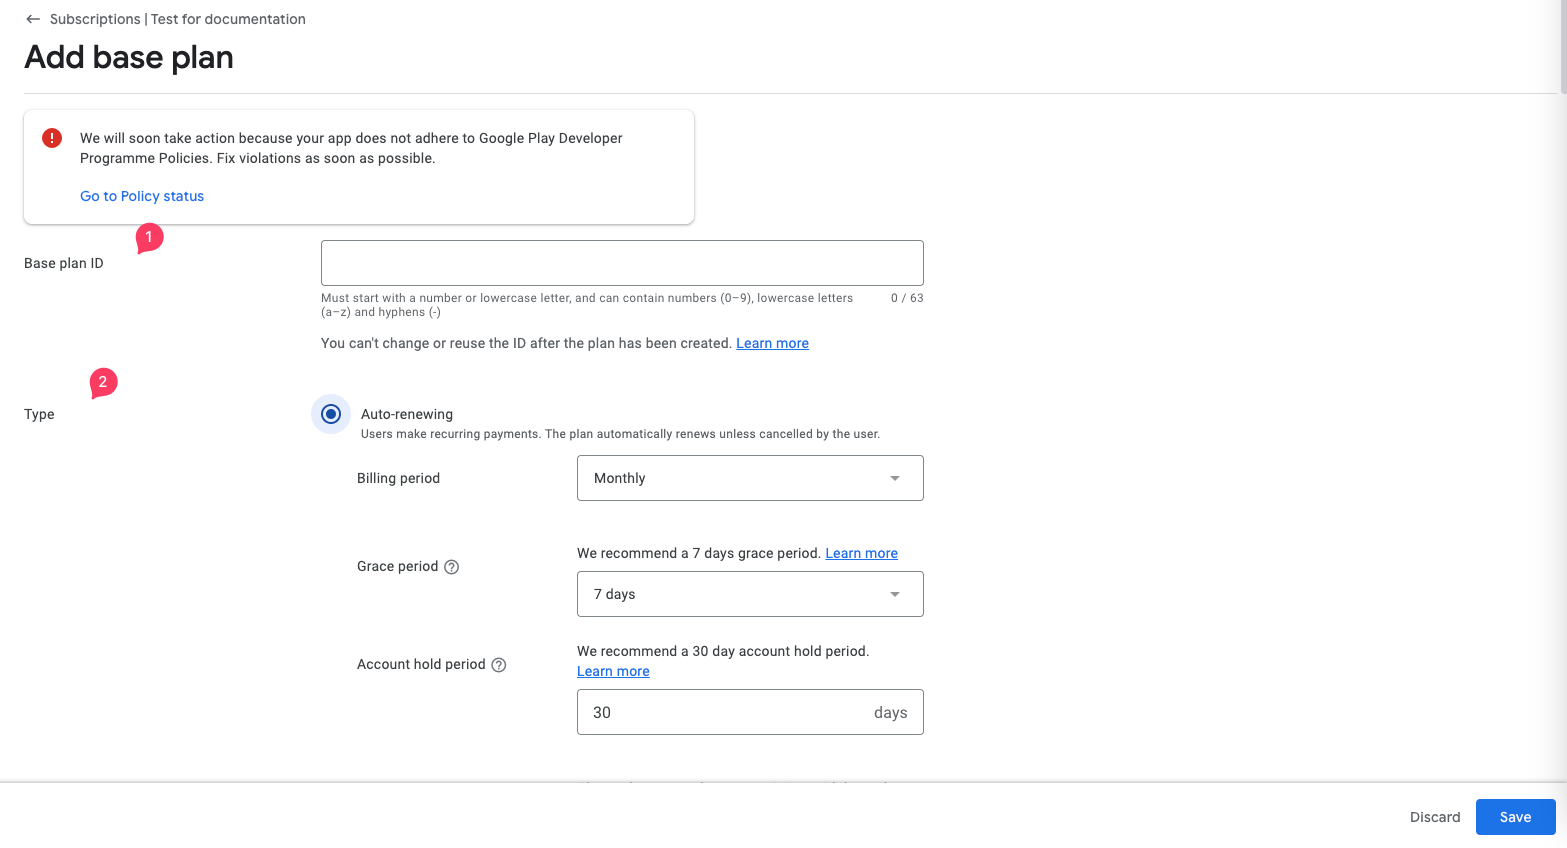
Click "Add base plan" and fill out the associated fields.
Base plan id: Before creating a base plan, carefully plan your base plan IDs. Base plan IDs must be unique to your app and can’t be changed or reused after they’ve been created.Type of renewal: We choose Auto-renewing for this demo. This type of subscription Automatically renews unless canceled by the user
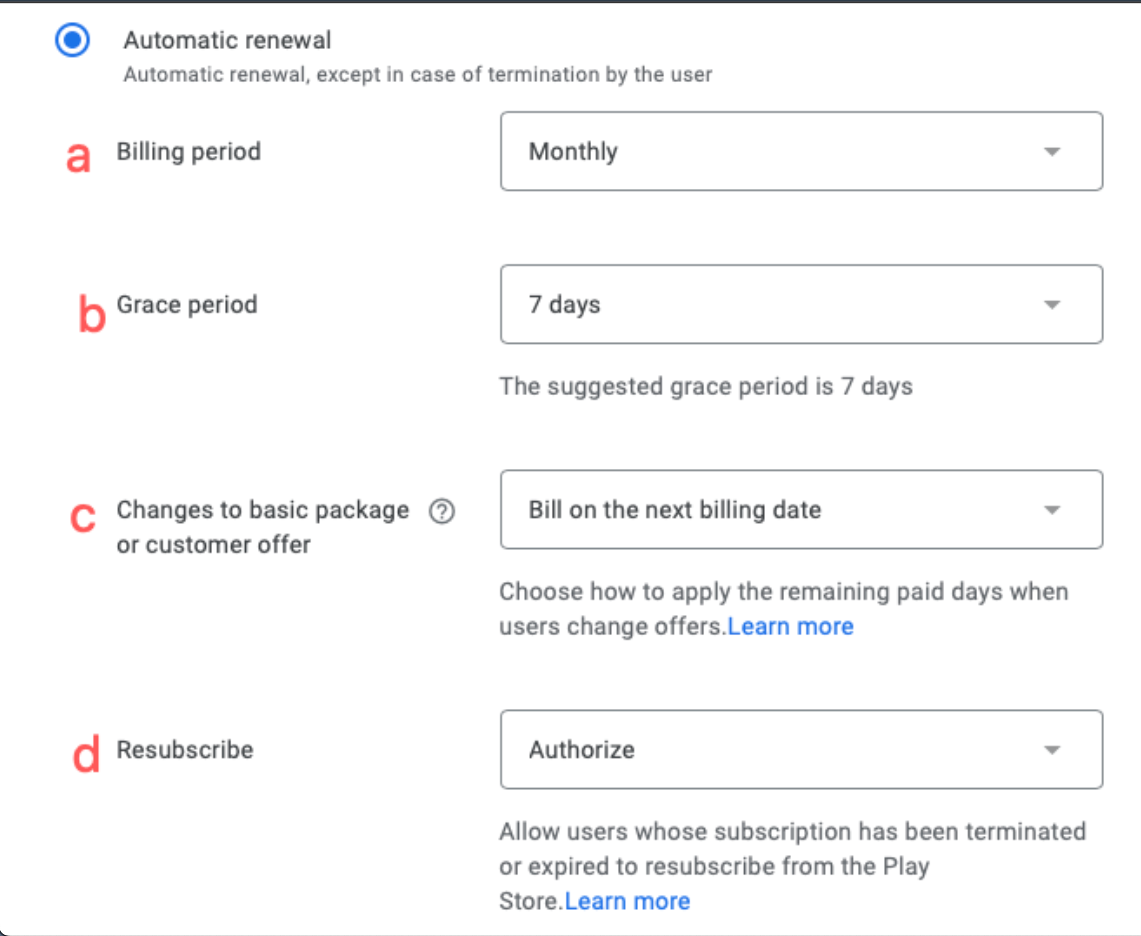
In the sub section of Auto renewing, you have the following information to choose
a. Billing period: Duration of subscription entitlement (1 week to 1 year)
b. Grace period: Duration of subscription retention during the payment issue. The length can vary between one to 30 days.
c. Changes to basic package or customer offer: Choose how to apply any remaining paid days when users change offers.
d. Resubscribe: Allow/deny the user from resubscribing after cancellation or expiration of their subscription.
Setting up tags are optional. Click on Set price to define price for this base plan.
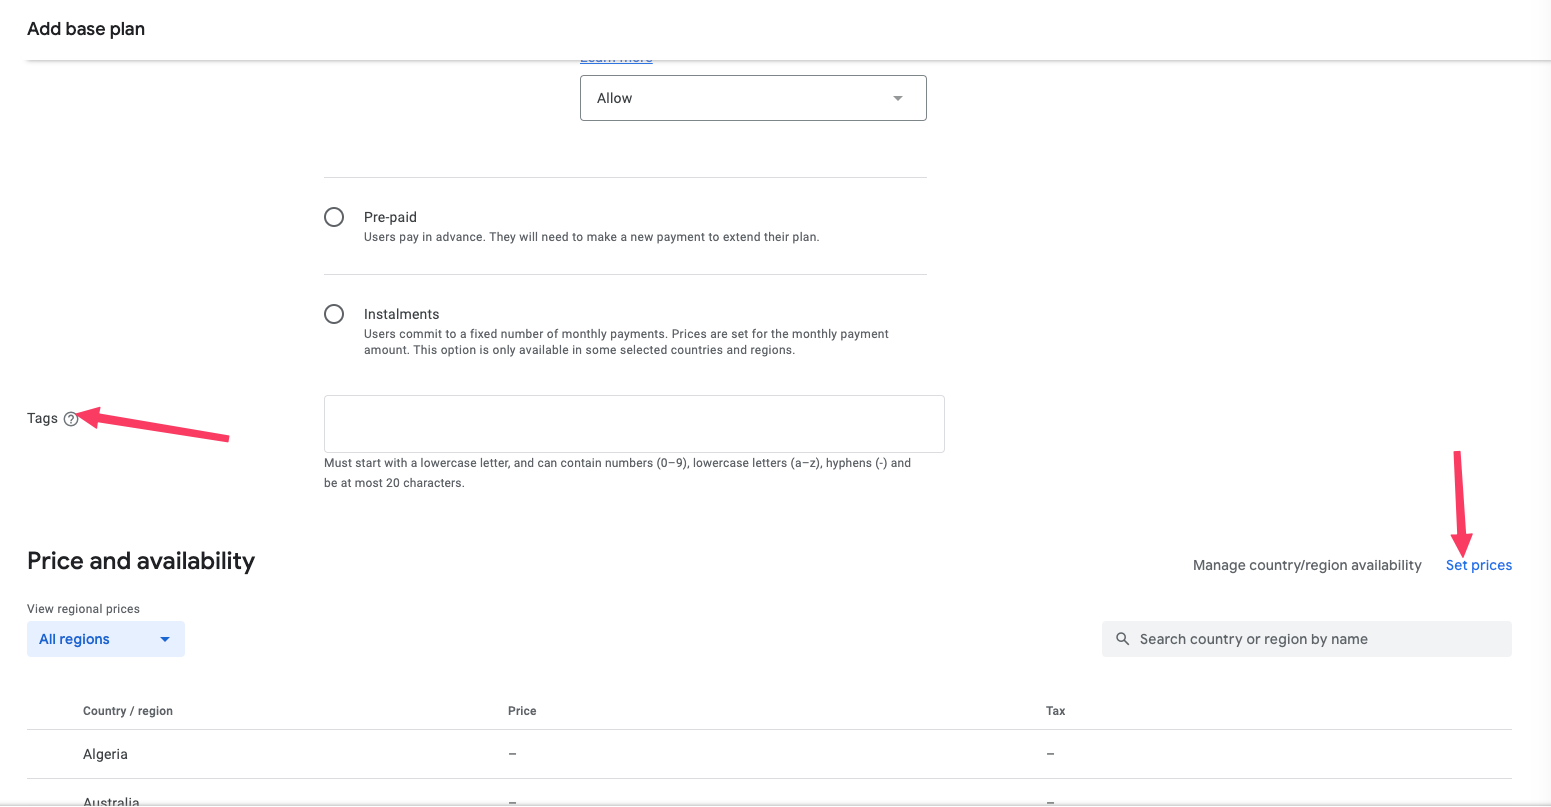
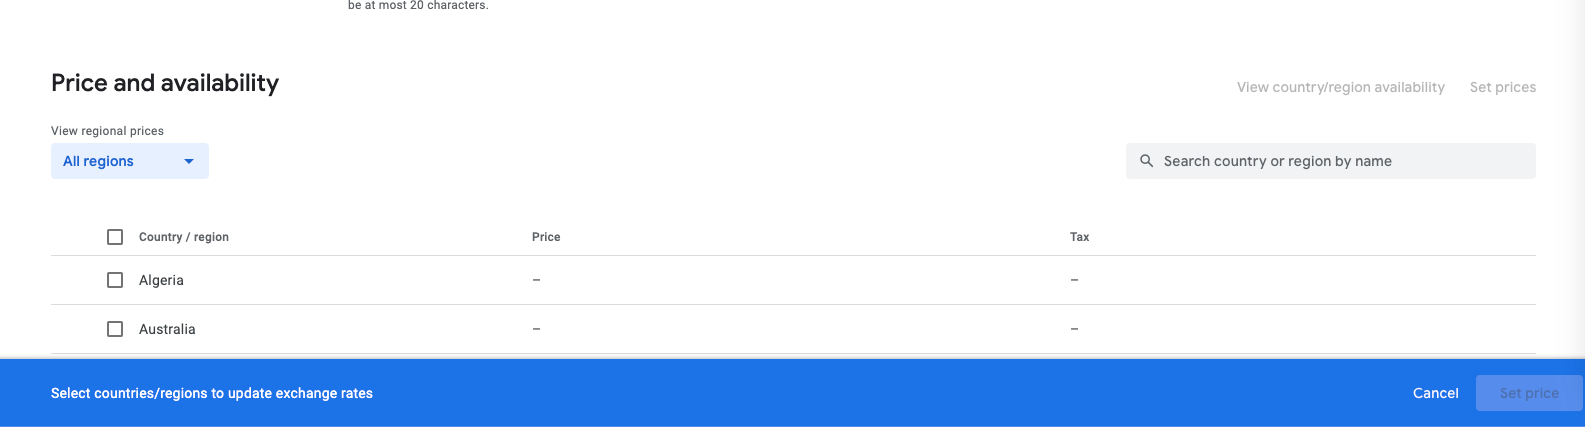
You will be prompted to select the countries
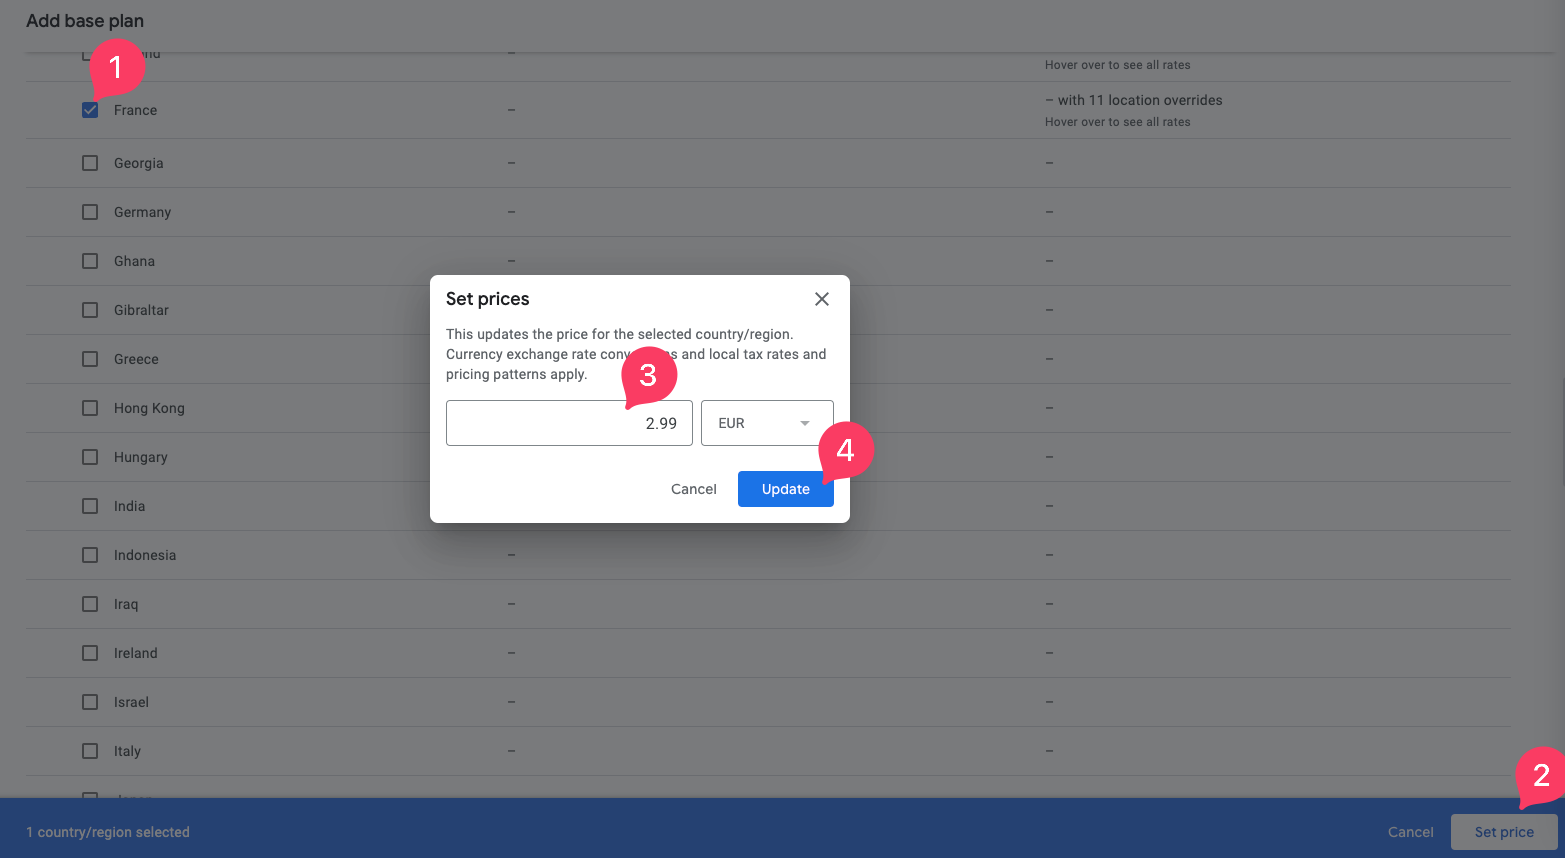
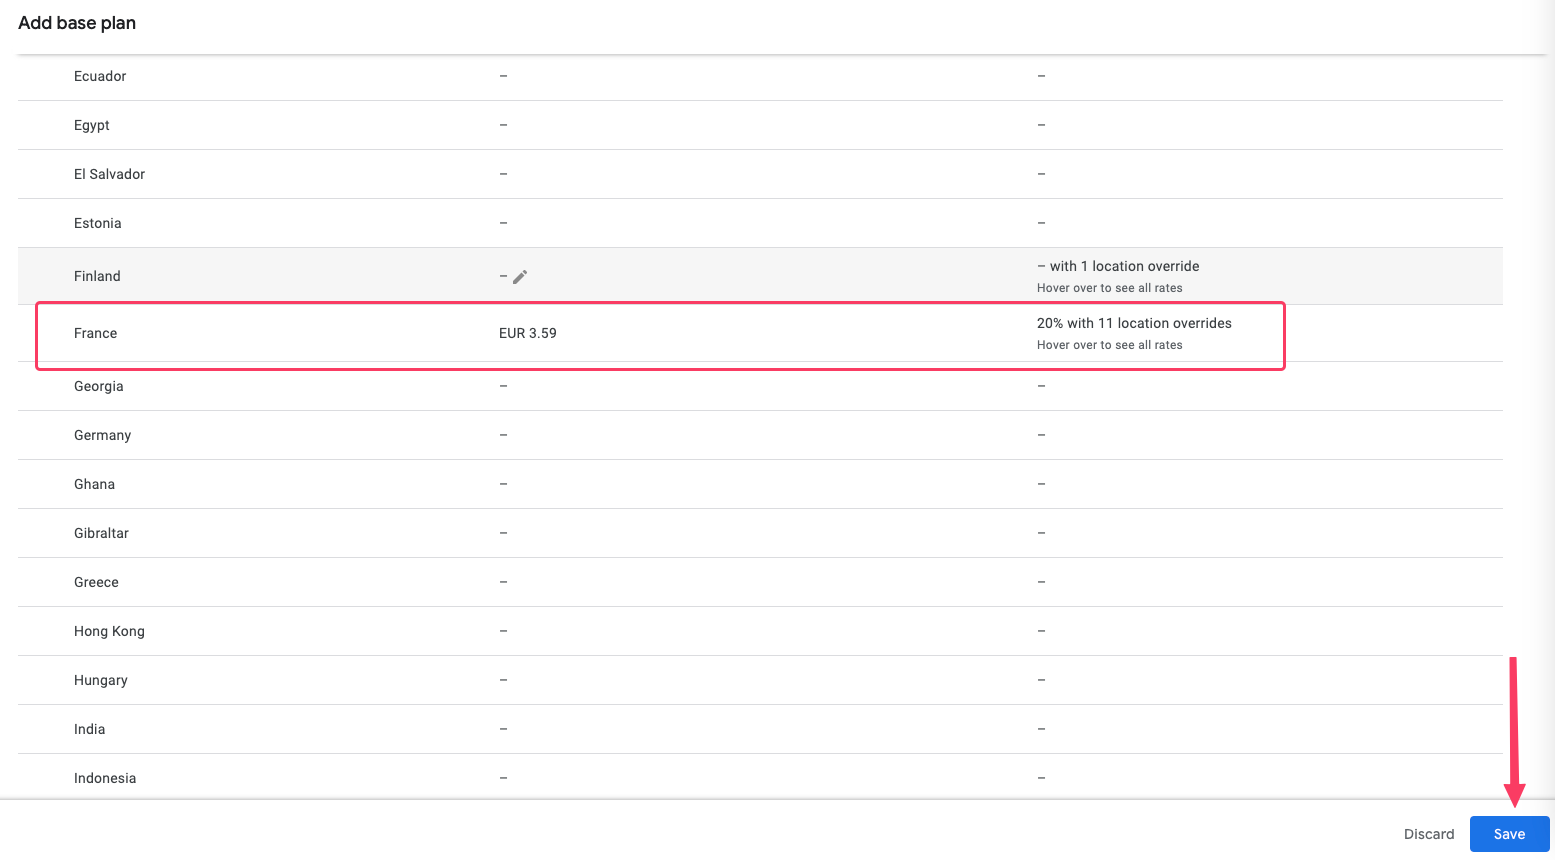
Once you have selected the country, you will see the option to type the price. Type the price and update. This price is tax excluded, once you select update, you will see the subscription price with tax.
If its good for you, please click on Save
Creating Offer plans
If you decide to create an offer for your base plan, you can follow this step, else you can skip this.
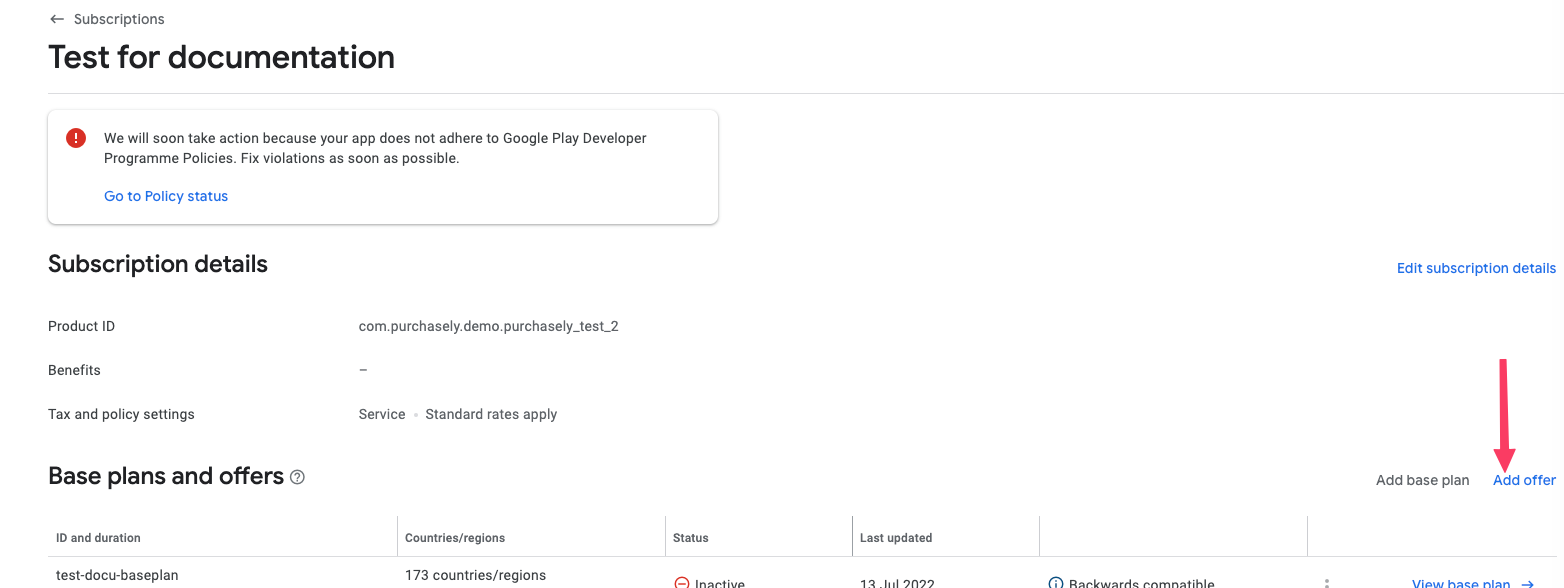
To create an offer plan, in the subscription page click Add offer.
Types of offers can be free trials, discounts, or simply special price setups that apply when a customer first purchases a subscription.
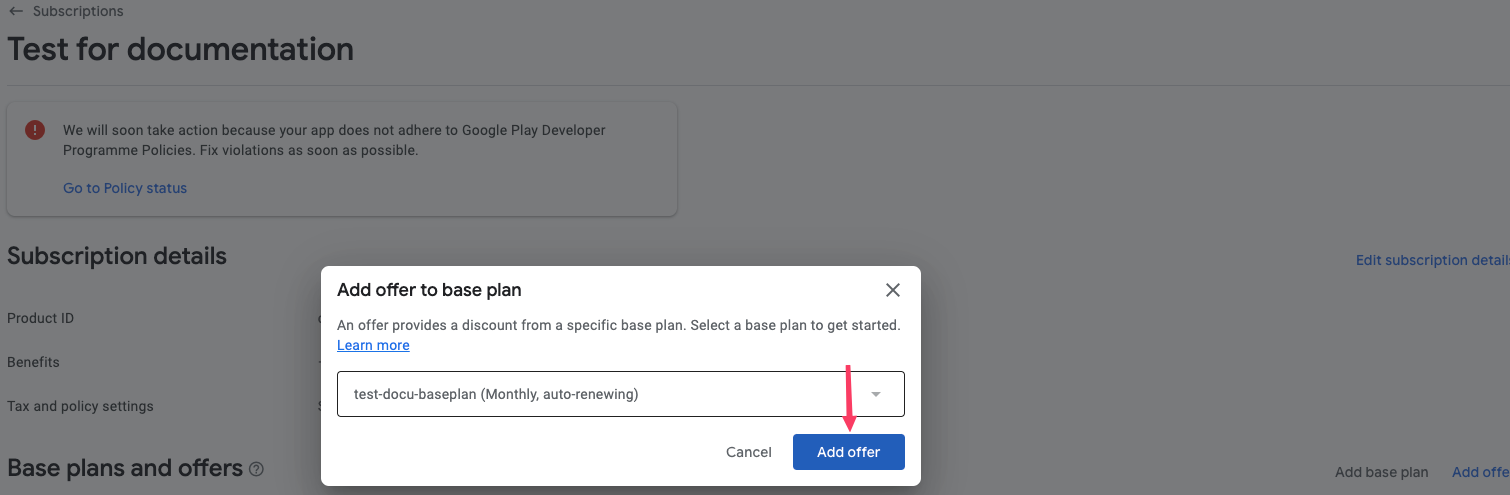
Select the base plan you want this offer to be attached with and click on Add offer
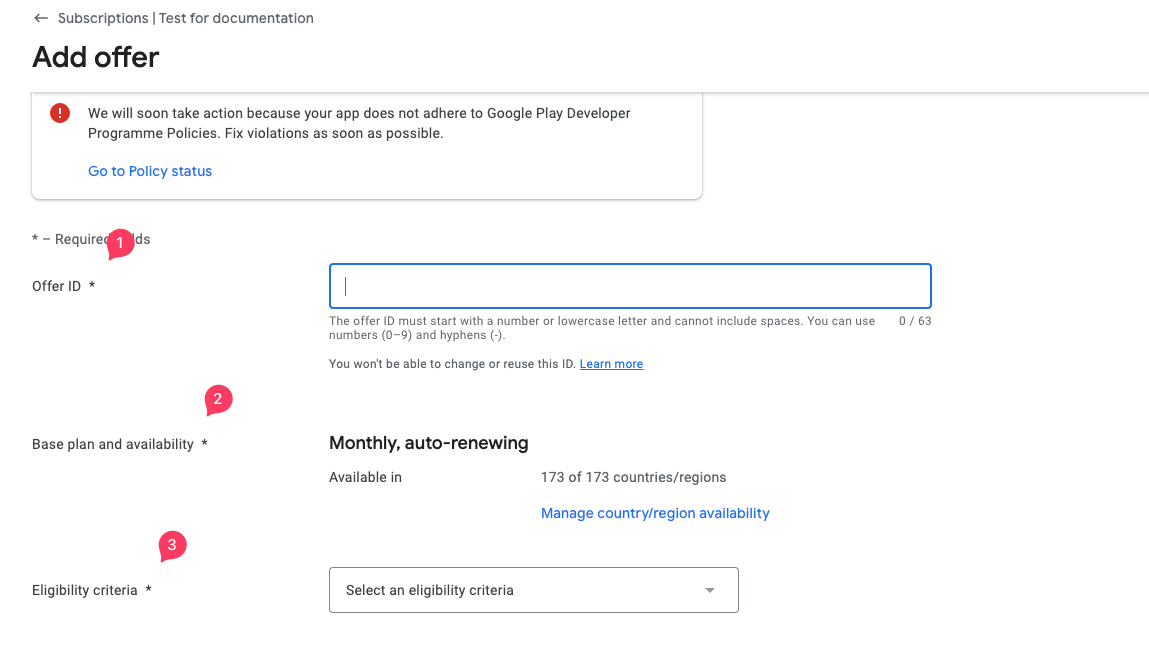
Offer ID: The offer ID must be unique to your app, and it can’t be changed or reused after it's been created.
Base plan and availability: Your offer automatically inherits the availability of the base plan it's associated with. To change this, click Manage country/region availability.
Eligibility criteria: Select the offer's eligibility criteria to determine which customers the offer is available to
In the Eligibility criteria option, you have different options for different types of of offer.
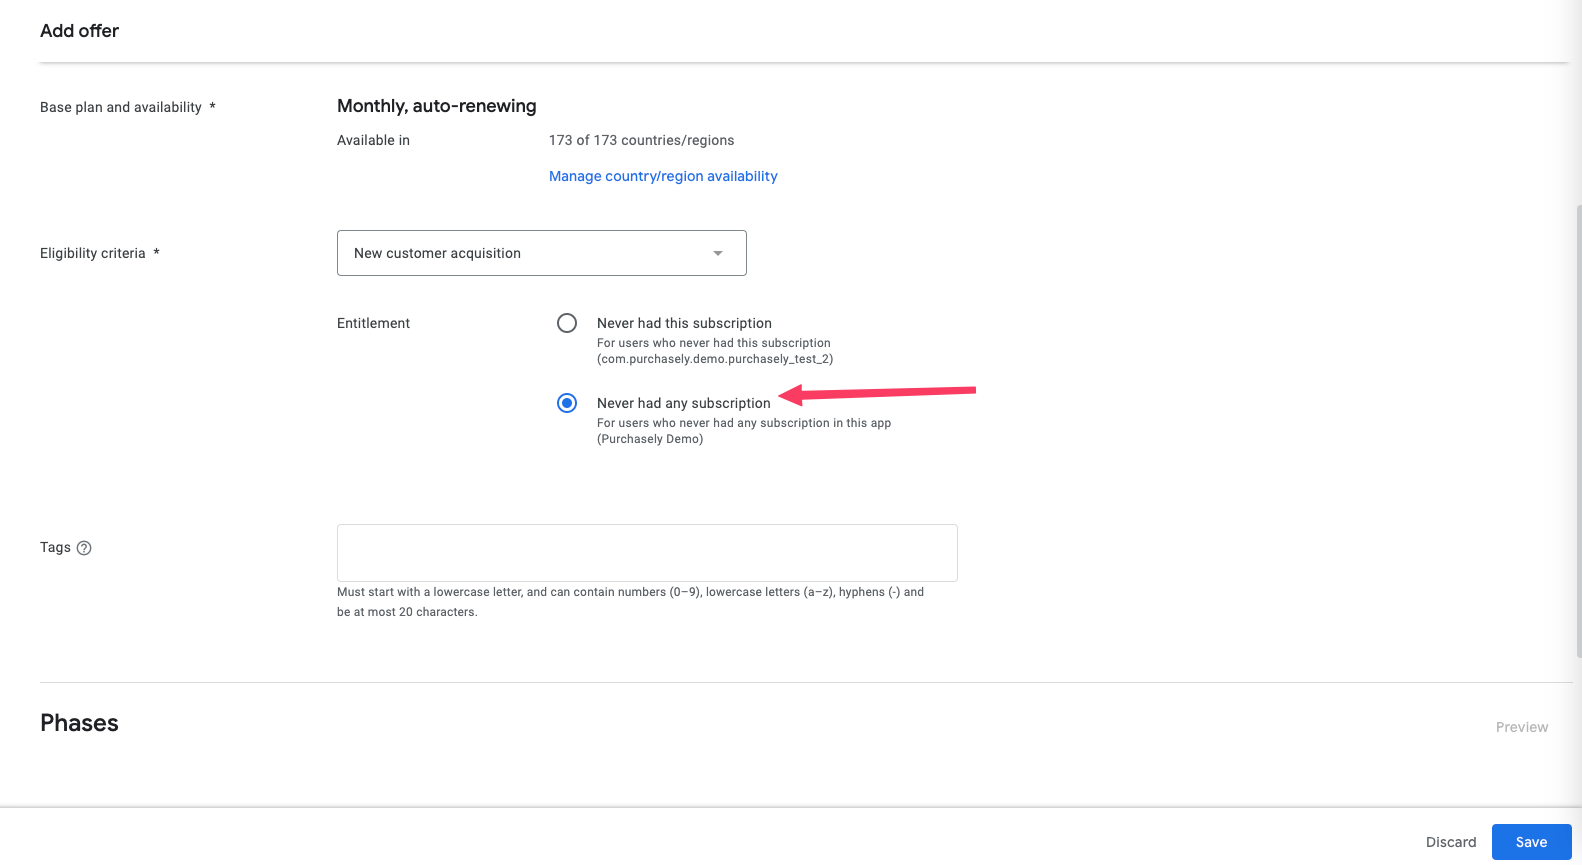
New customer acquisition, Upgrade or Developer determined
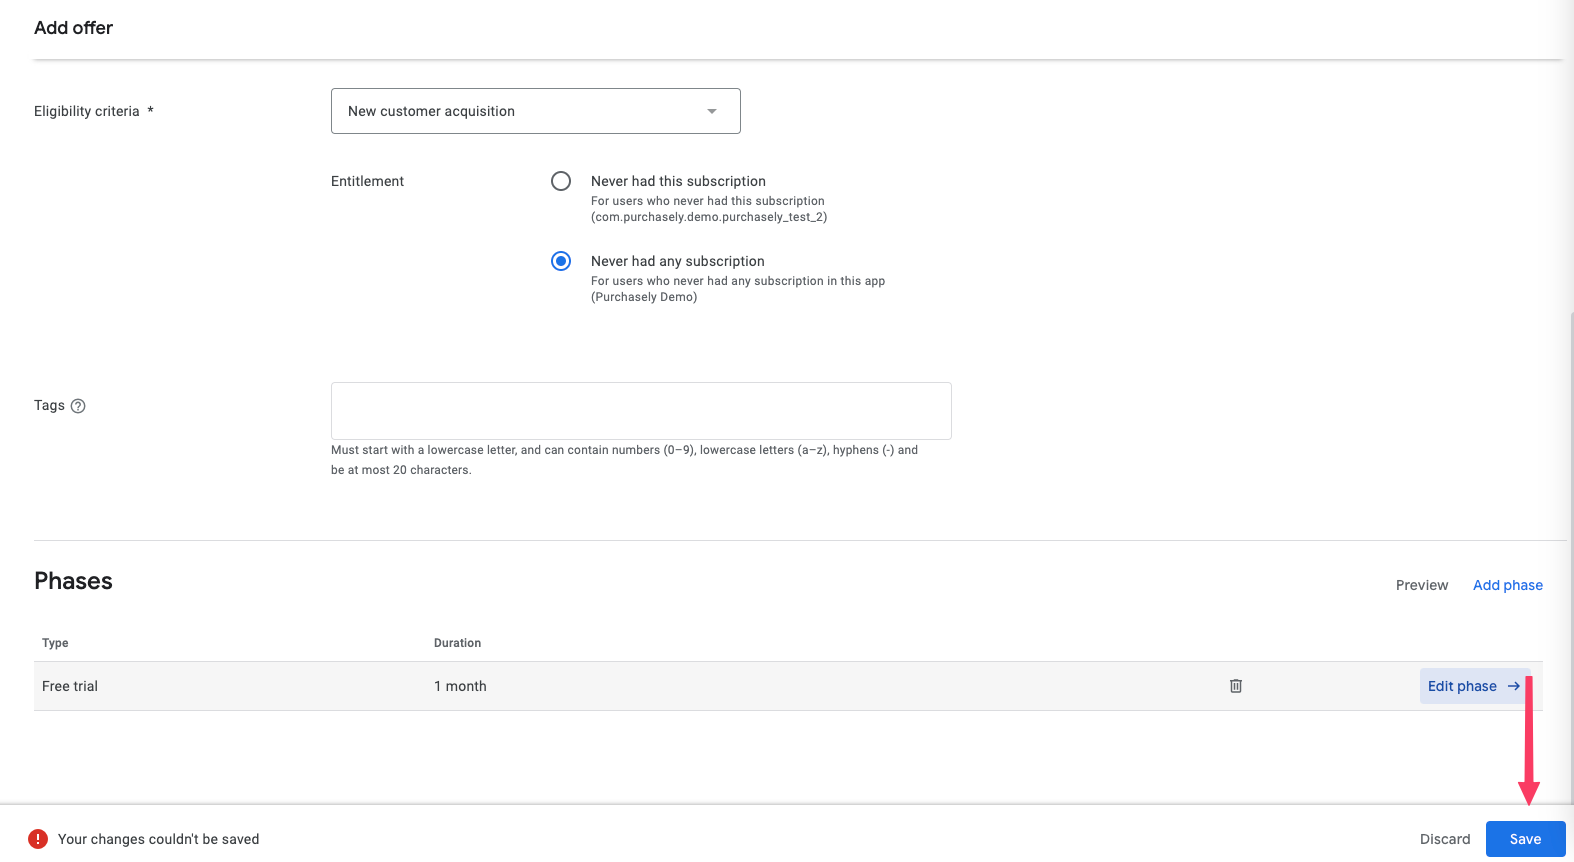
We create an offer for new customer acquisition in this demo: you can select if you would like to provide this offer to someone who already had this subscription or never had any subscription in your app. We chose the Never had any subscription option for this demo.
Tags: It's optional, tags are added to identify the base plan or the offer in the API.
More details on Promotional Offers
Creating phases
Once you have chosen the eligibility criteria for your offer plan, the next step is to choose the offer phases. Unlike Apple, you can create more than one offer to a base plan. It goes like: the user gets free trial then -> discounted price -> then starts paying full price. For our demo, we will consider one phase offer which is a free trial we will explain what are the other offers you can provide to your user other than free trial.
If you choose to create a sequential offers to a base subscription plan. This is achieved by creating phases to the offer plan. We can add up to 2 phases.
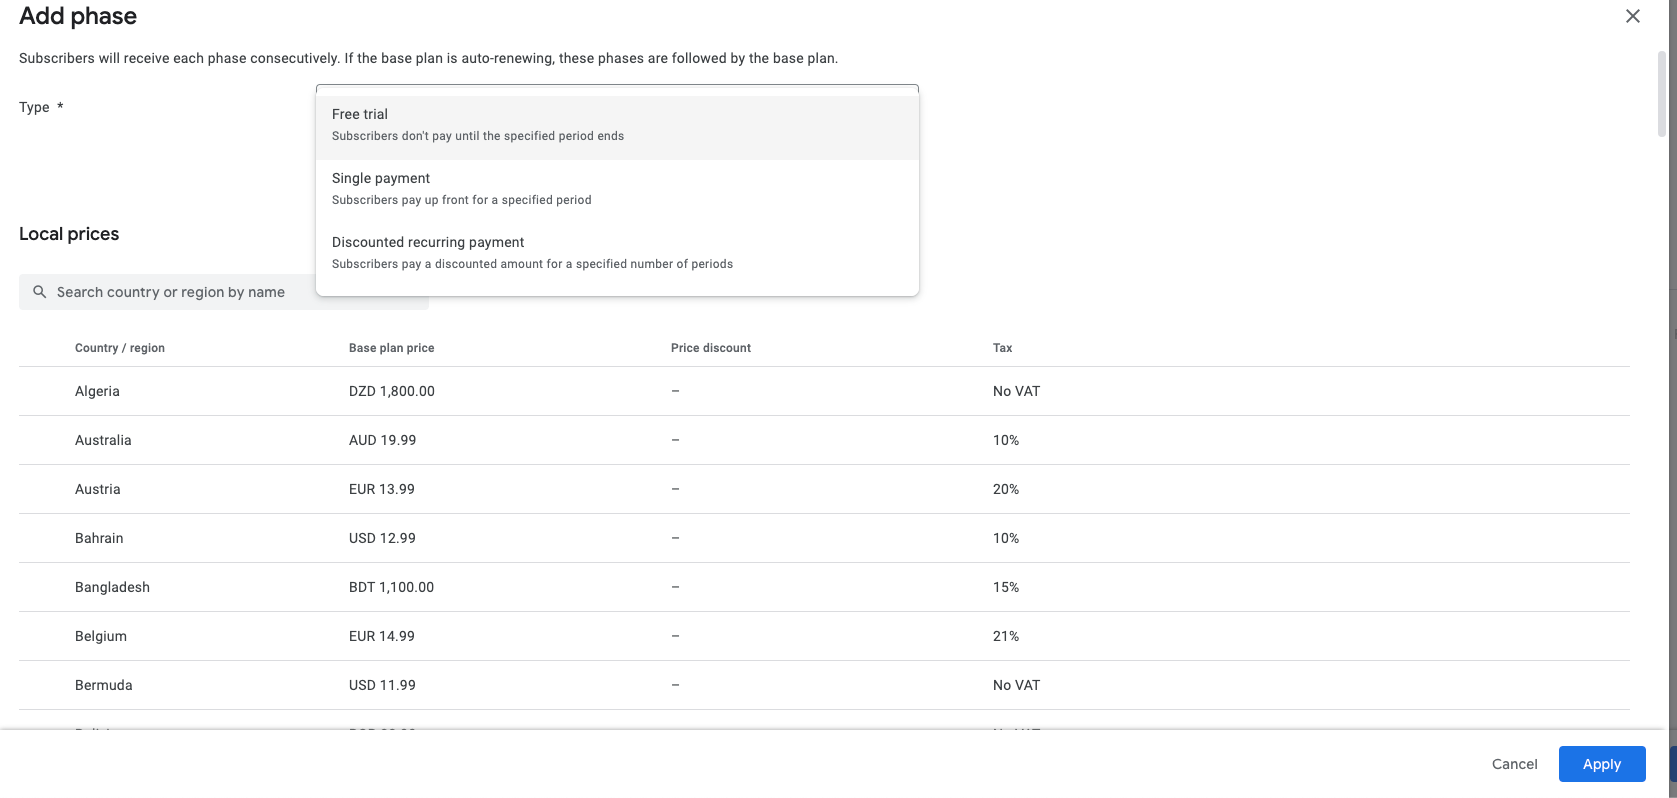
Type: Choose the phase type from any of the following:
- Free trial: Subscribers are granted with a specified number of days, weeks, months, or years at no charge(3 days to 3 years)
Other offers are:
- Single payment: Subscribers pay upfront for a specified period
- Recurring payment: Subscribers pay for each and a specified number of periods
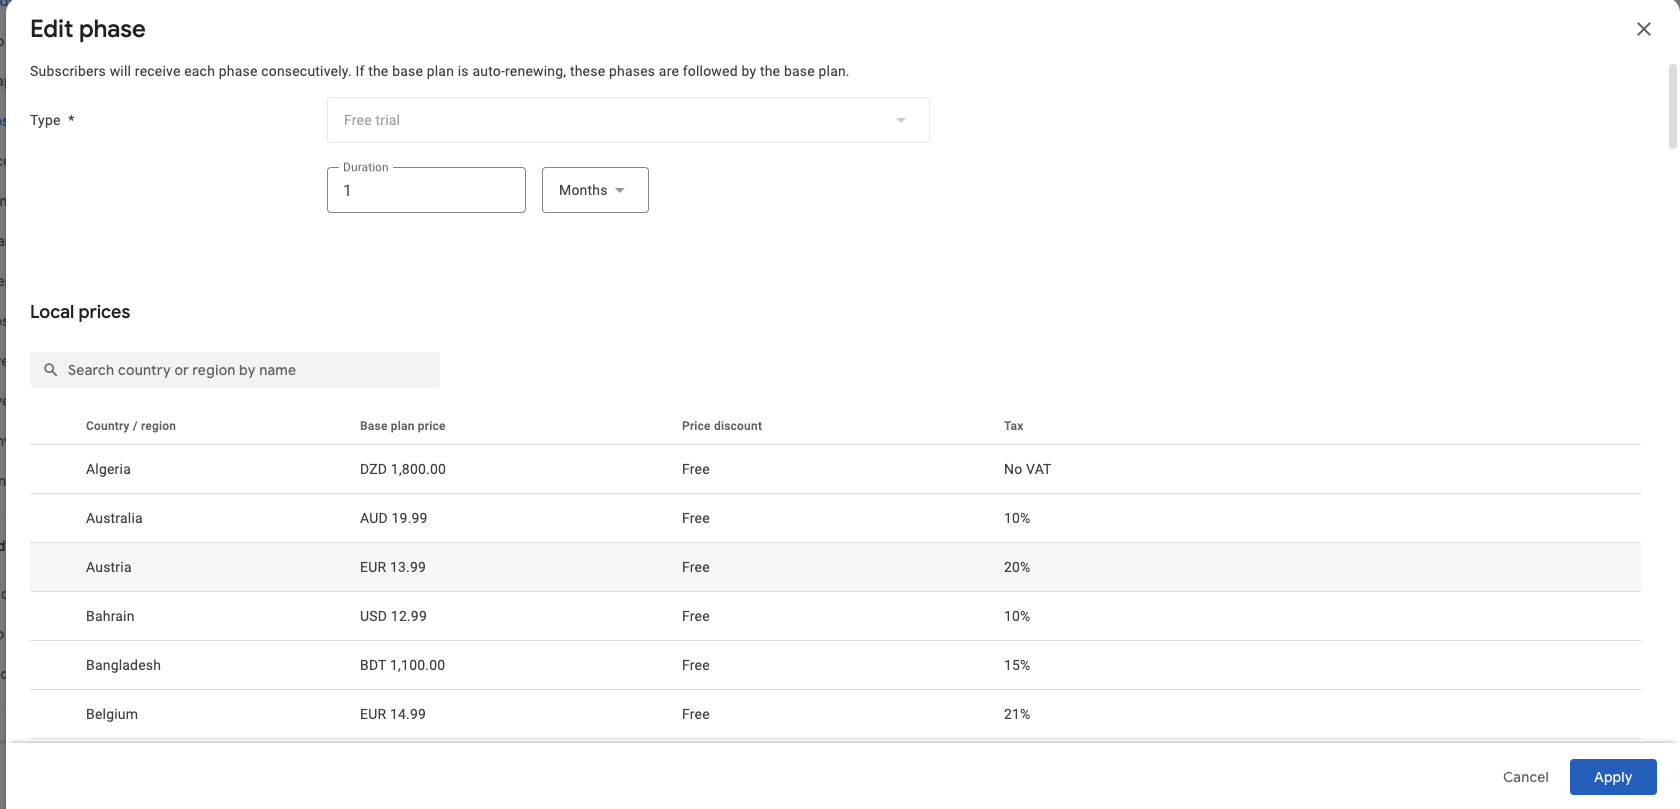
Free trial:
For free trial you can type the number and choose the duration and then click on Apply button to finish the phase set up.
Click on the save in the Offer plan page to save the offer successfully to the base plan
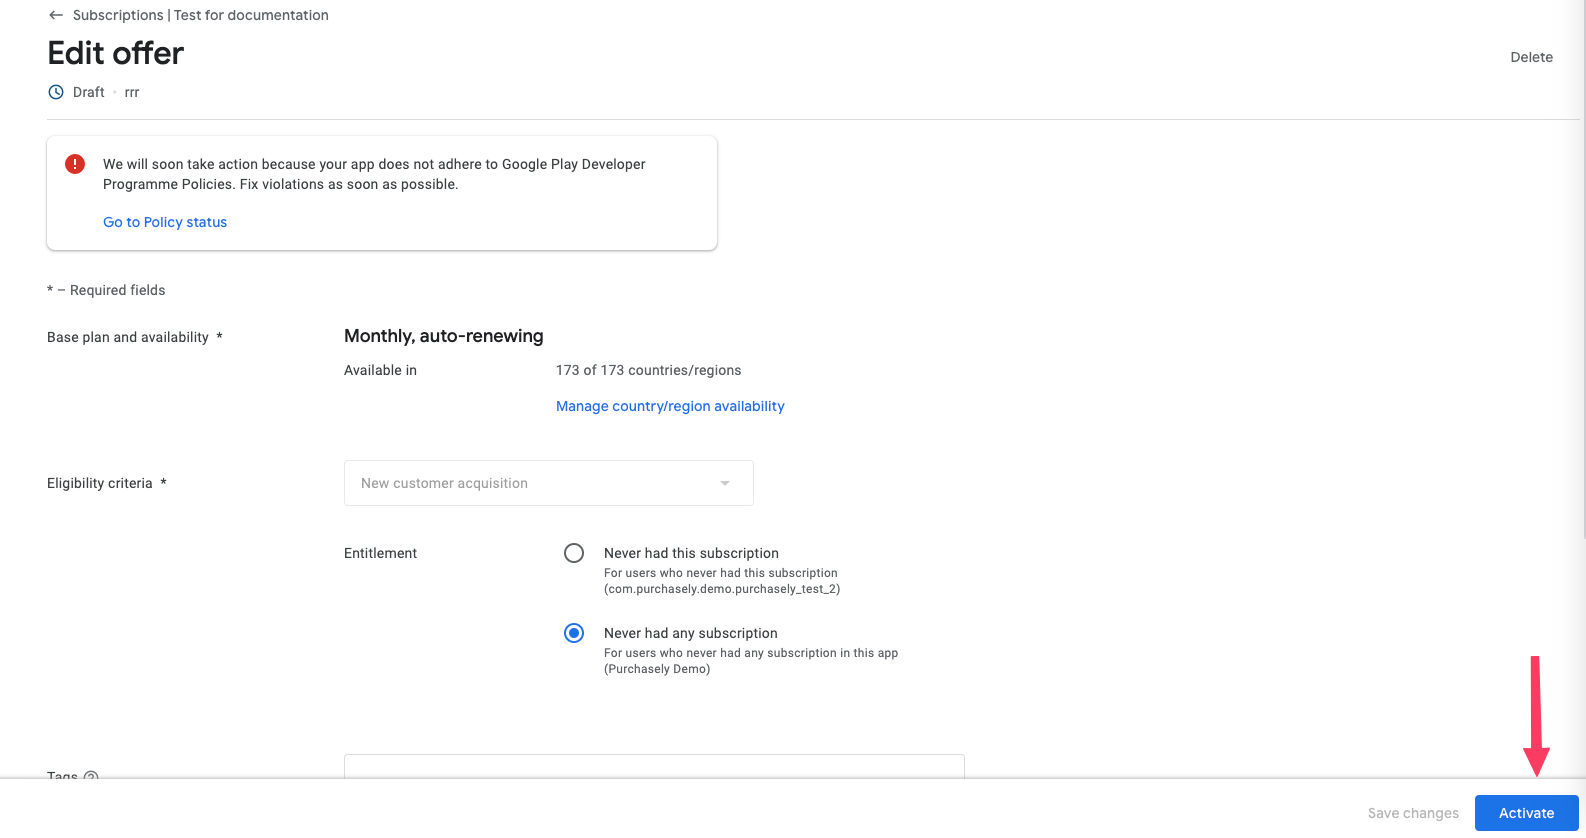
You can activate the offer whenever you wish to launch this offer.
Updated 3 months ago