
MoEngage
This section describes how to integrate MoEngage with Purchasely
The minimal version of the Purchasely SDK supporting this integration is 3.6.0. If the Purchasely SDK integrated in your app is under the minimal version, please update it. The MoEngage SDK also needs to be integrated inside the app.
General overview
MoEngage is a leading Customer Engagement Platform.
This integration will allow you to get all the available Purchasely events to CleverTap and get a better and deeper understanding of your subscription business and customer behavior. In addition you will be able to trigger automated communication based on those events, messages that could be linked to a Purchasely powered Screen to engage, upsell, retain customers.
Integrating Purchasely with MoEngage
The integration requires 5 steps:
- Associate users with the
MoEngage Unique ID(SDK implementation) - Activate the MoEngage integration in the Purchasely Console
- Enable the forwarding of Server Events in the Purchasely Console
- Enable the update of User Properties in the Purchasely Console
1 - Associating users with the MoEngage Unique ID (SDK implementation)
Associate the user to events by providing the MoEngage Unique ID to the Purchasely SDK
Purchasely.setAttribute(.moEngageUniqueId, value: "your moEngage Unique Id")Purchasely.setAttribute(Attribute.MOENGAGE_UNIQUE_ID, "Your unique id")Purchasely.setAttribute(Attributes.MOENGAGE_UNIQUE_ID, id);Purchasely.setAttribute(Purchasely.Attribute.MOENGAGE_UNIQUE_ID, id);Purchasely.setAttribute(PLYAttribute.moengageUniqueId, id);private PurchaselyRuntime.Purchasely _purchasely;
...
_purchasely.SetAttribute(PLYAttribute.MOENGAGE_UNIQUE_ID, id);See the MoEngage Documentation for more information
2 - Activating the MoEngage integration
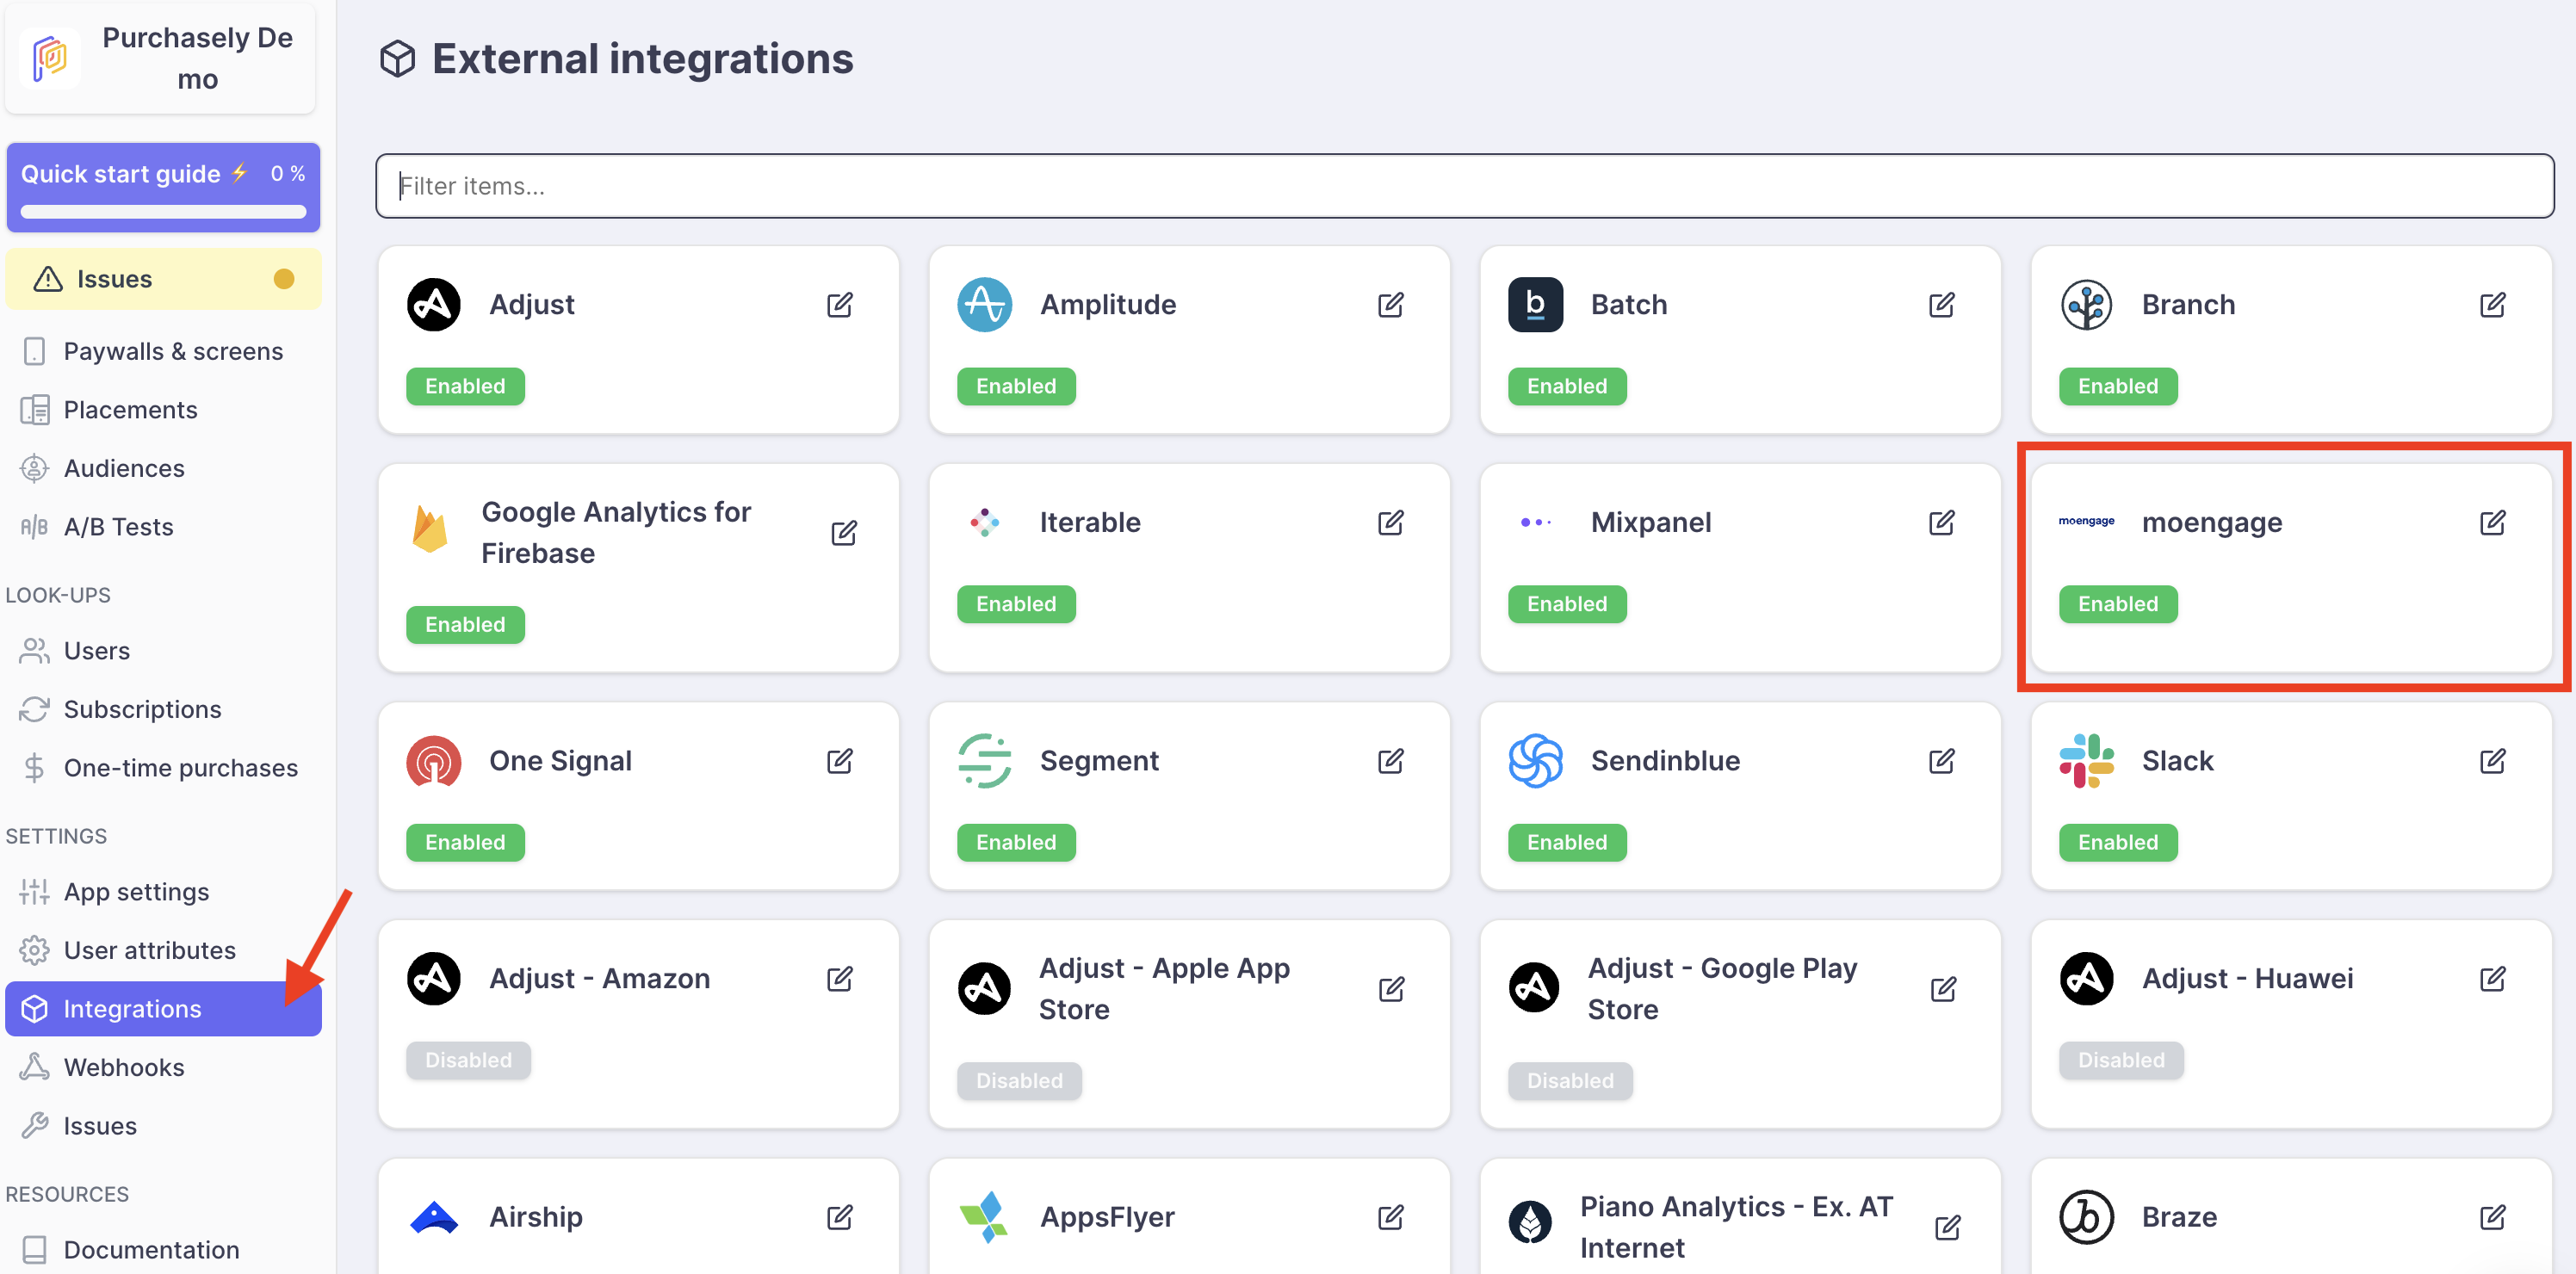
Enabling the MoEngage integration in the Purchasely Console
Go in the "External integrations" section, and open the edition form for MoEngage:
Enable the integration and configure it
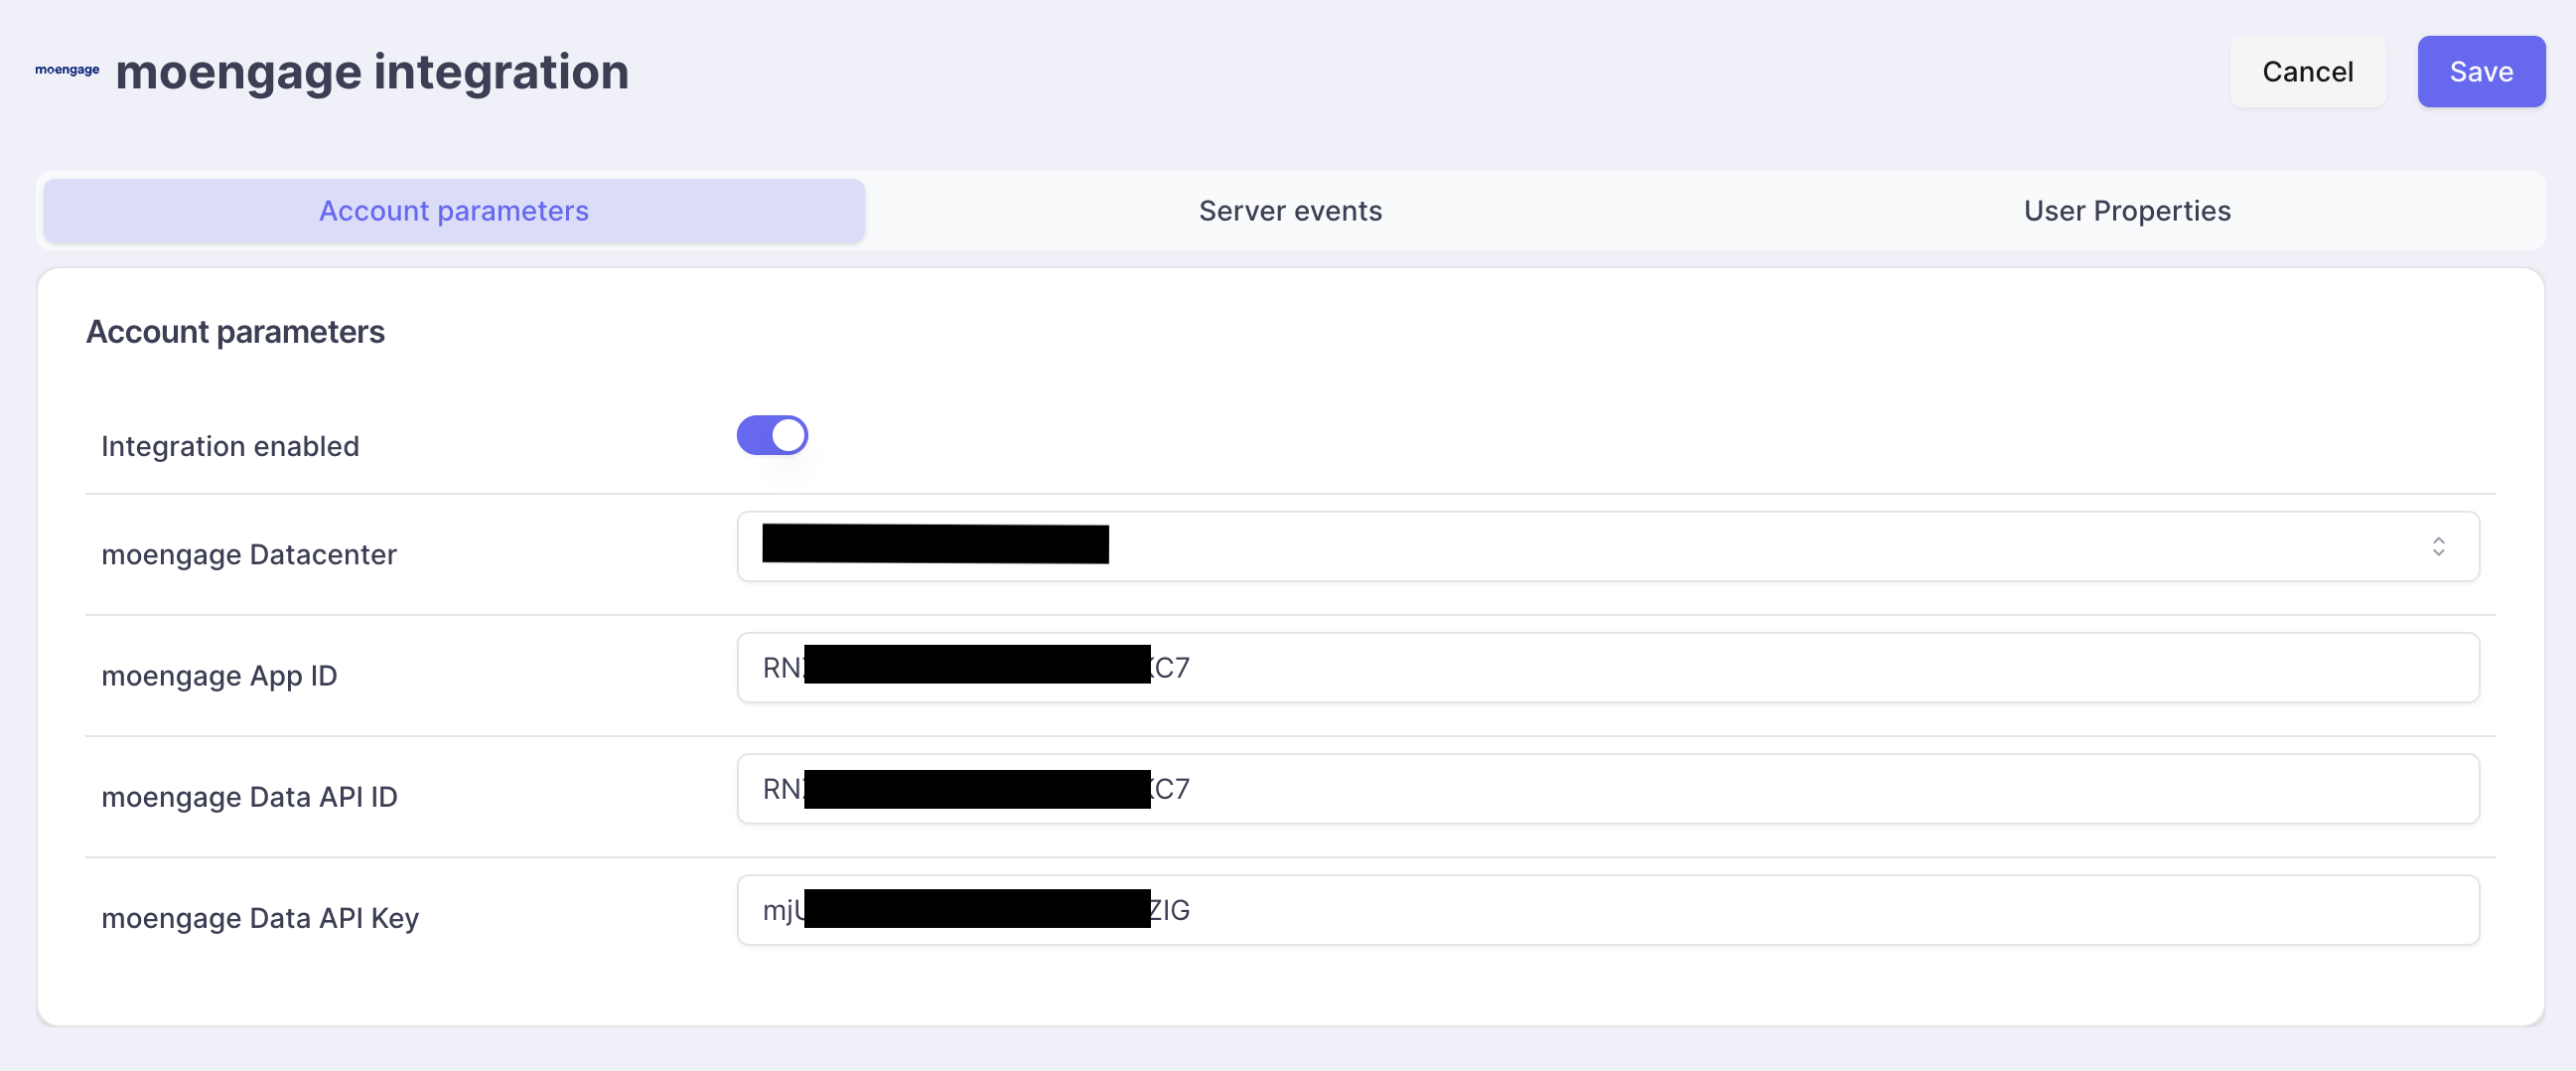
- Set your MoEngage APP_ID
- Set your MoEngage DATA API ID
- Set your MoEngageDATA API KEY
Retrieving your MoEngage APP ID from MoEngage's dashboard
- The APP_ID for your MoEngage account is available on the MoEngage Dashboard in Settings > App Settings > General Settings > Account Settings > APP ID.
- Write down your APP ID
Retrieving your MoEngage DATA API ID from MoEngage's dashboard
- The APP_ID for your MoEngage account is available on the MoEngage Dashboard in Settings > App Settings > General Settings > Data API settings > DATA API ID
- Write down your DATA API ID
Retrieve your MoEngage DATA API ID from MoEngage's dashboard
- The APP_ID for your MoEngage account is available on the MoEngage Dashboard in Settings > App Settings > General Settings > Data API settings > DATA API KEY
- Write down your DATA API KEY
3 - Enable the forwarding of Server Events in the Purchasely Console
-
Enable the events you want to be sent to MoEngage
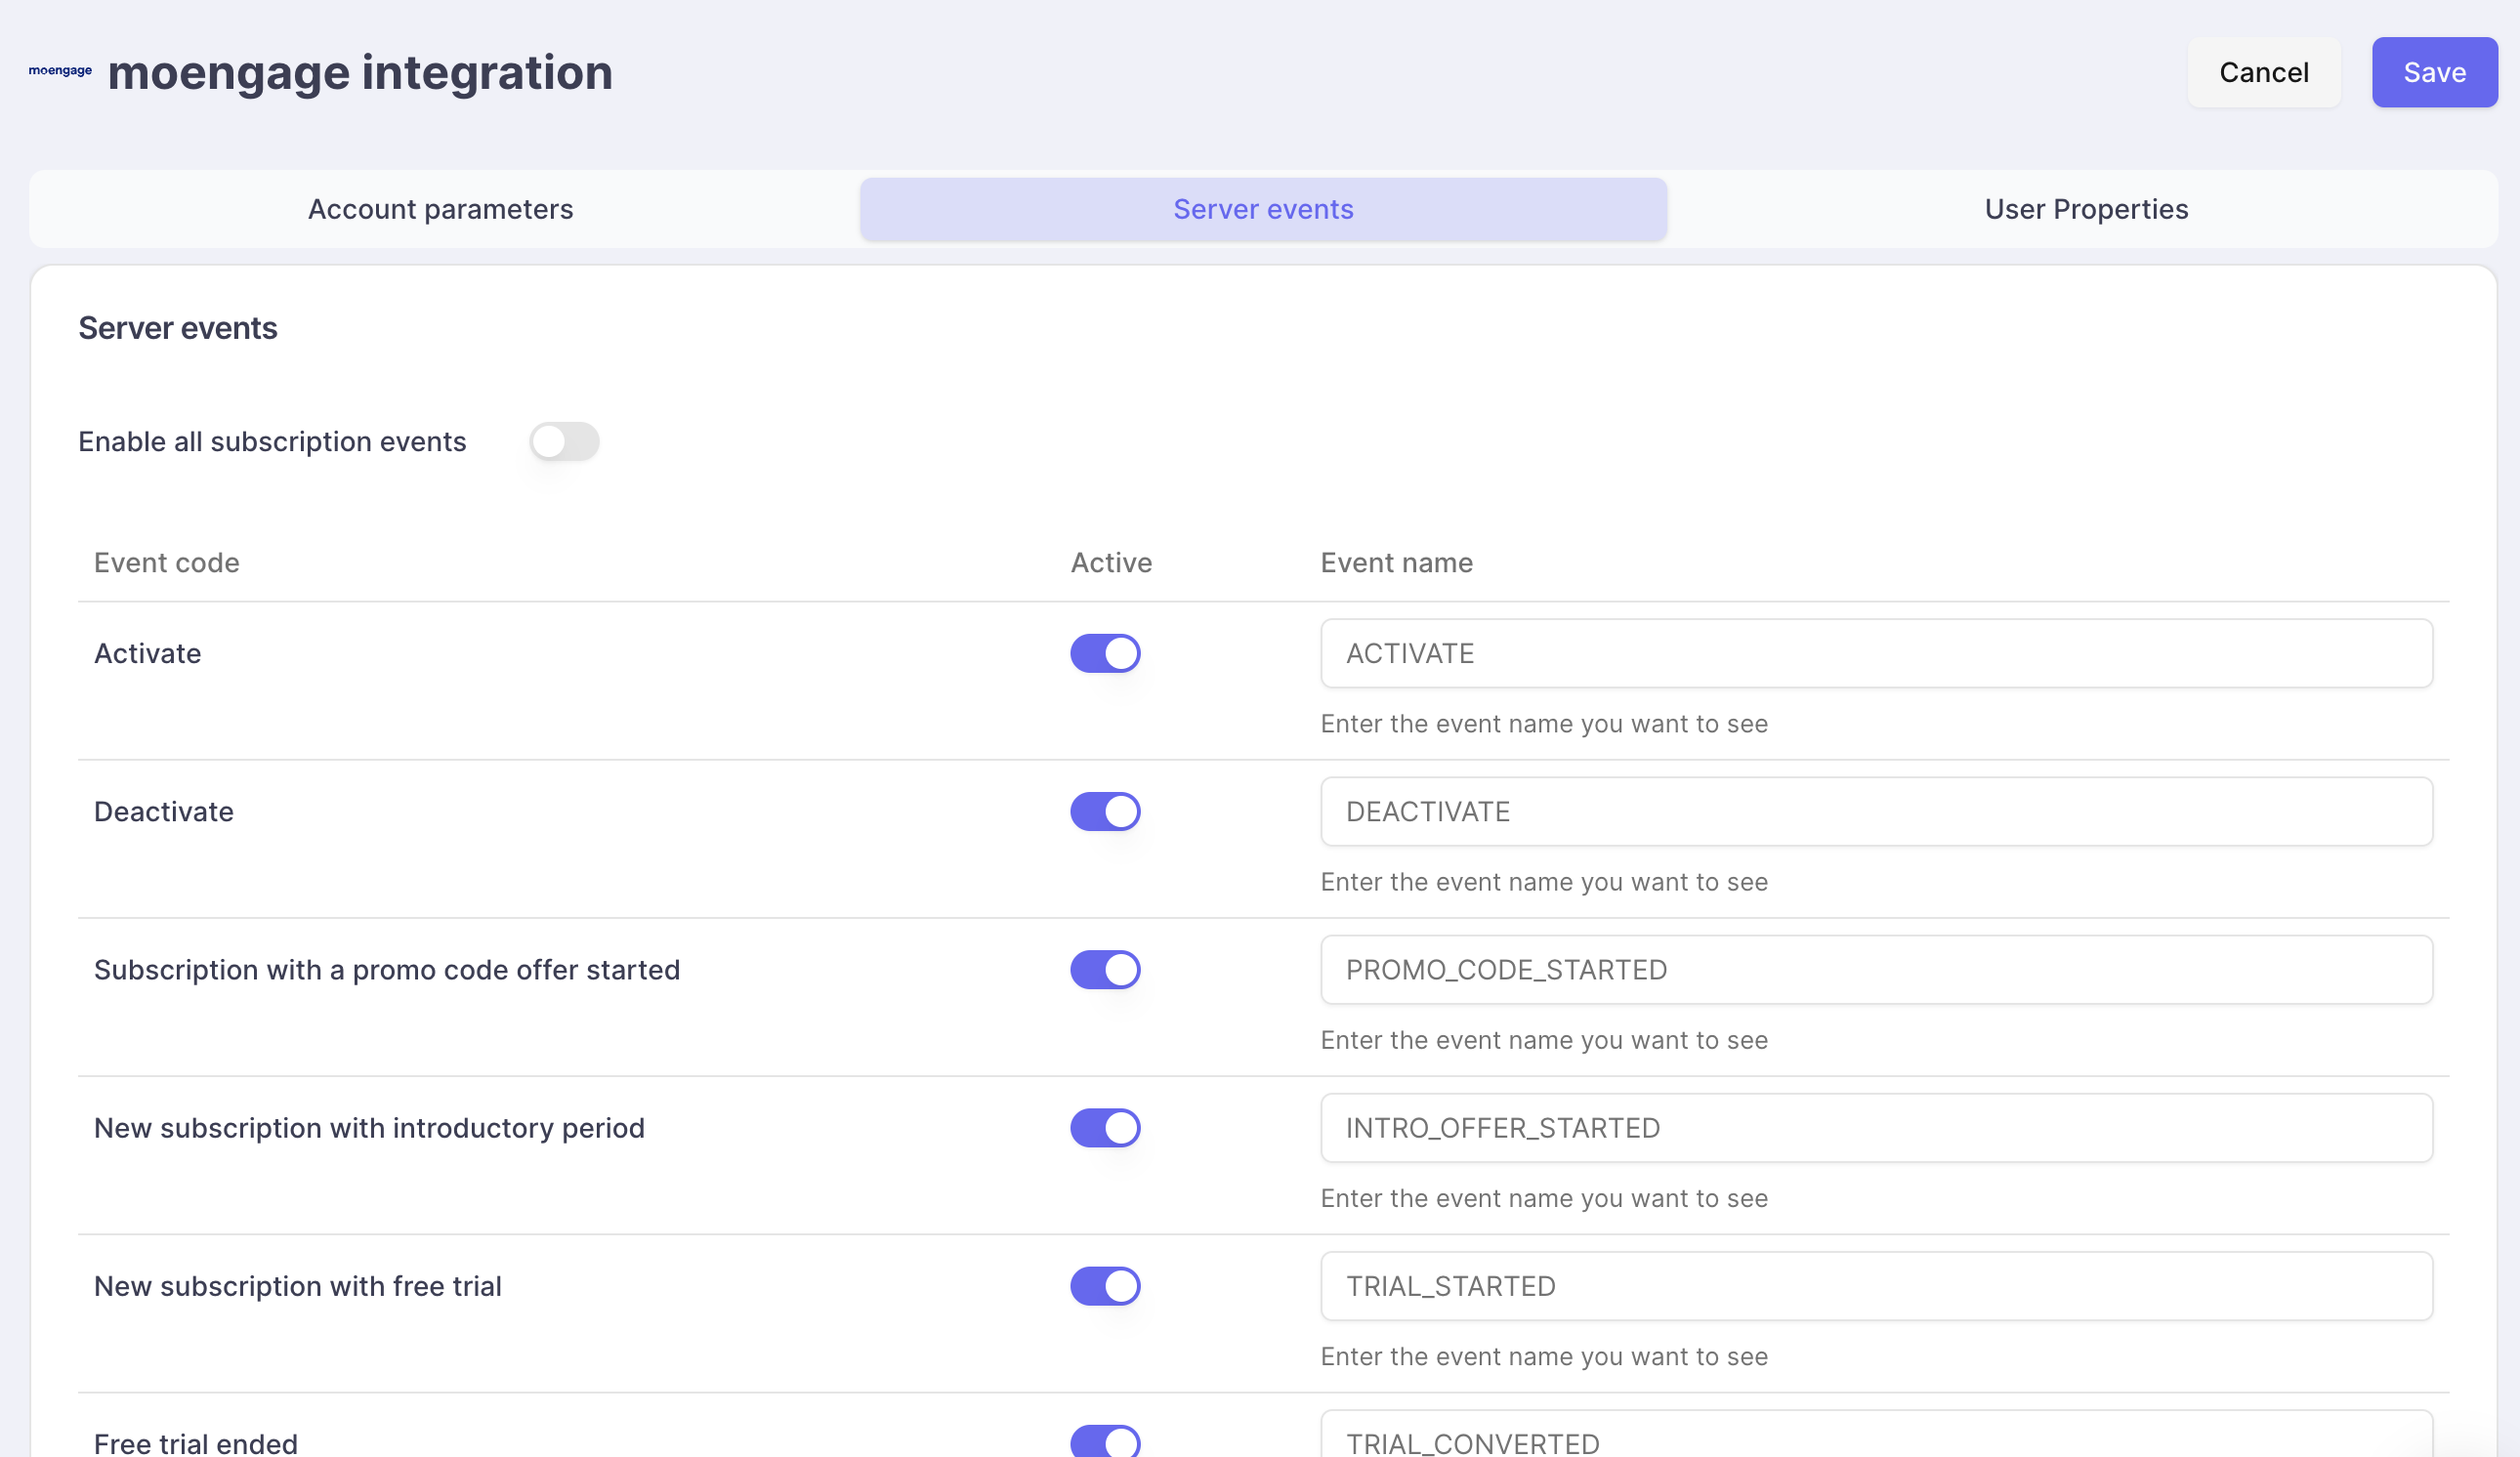
(Optional) Events names can be overridden to match with your tacking plan.
4 - Enable the update of User Properties in the Purchasely Console

- Enable the user properties you want to be sent to MoEngage
- (Optional) Override the names of the user properties that will be sent to MoEngage
- Save
Testing your integration
To test your integration, you can perform a set of in-app purchases in a Sandbox environment (eg: TestFlight for the App Store) and verify your events are received in the MoEngage dashboard https://www.moengage.com.