

Localization
This page describes details on localization options provided by Purchasely
The Purchasely Console lets you personalize your application and screens in every language you want.
In this article, we will explore different localization settings available in Purchasely.
App Localization:
When you create a new application in the Purchasely Console, you must choose a default language. Once selected, this language cannot be changed. It will automatically be applied to your paywall, including the wording of the footer, which will align with the localization settings..

Paywalls Localization
Paywalls can be localized in any number of languages. In order to add these languages to the paywall, you have to navigate to the desired paywall-> click on the language tab eg, English(default) as shown in the following video -> Add languages -> From the list, choose and add as many languages as you support in your application.
Once you have added these different languages, you have to fill in the correct translations of all your copies in every language you have added.
By default, the images form the default language is transferred to all the languages.
Smart Localization
Purchasely Screen Composer provides a smart way to localize the paywall when you have multiple languages to manage. This smart localization feature is a time saver.
This feature consists of leveraging a CSV file containing a set of keys used in your different Screens across the entire application (in rows) and associating each key with a set of translations in all the languages managed by the application (in columns)
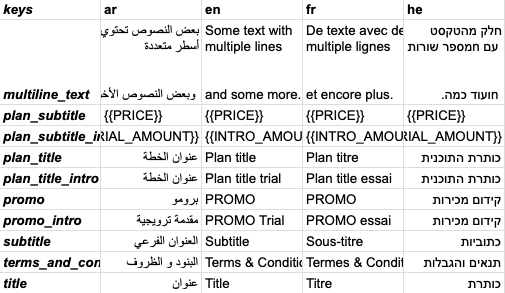
Sample CSV file for Smart Localization
Available languages
| Code ISO | Language (English) | Language (Local name) |
|---|---|---|
| ar | Arabic | العربية (Al-ʿarabiyyah) |
| bg | Bulgarian | български (bǎlgarski) |
| bn | Bengali | বাংলা (Bangla) |
| bs | Bosnian | bosanski |
| ca | Catalan | Català |
| cs | Czech | Čeština |
| da | Danish | Dansk |
| de | German | Deutsch |
| el | Greek | Ελληνικά (Elliniká) |
| en | English | English |
| en-gb | English (United Kingdom) | English (United Kingdom) |
| es | Spanish | Español |
| es-ar | Spanish (Argentina) | Español (Argentina) |
| et | Estonian | Eesti |
| fa | Persian | فارسی (Fârsi) |
| fi | Finnish | Suomi |
| fr | French | Français |
| hi | Hindi | हिन्दी (Hindī) |
| he | Hebrew | עברית (Ivrit) |
| hr | Croatian | Hrvatski |
| hu | Hungarian | Magyar |
| id | Indonesian | Bahasa Indonesia |
| it | Italian | Italiano |
| lv | Latvian | Latviešu |
| ms | Malay | Bahasa Melayu |
| no | Norwegian | Norsk |
| ja | Japanese | 日本語 (Nihongo) |
| ko | Korean | 한국어 (Hangugeo) |
| nl | Dutch | Nederlands |
| pl | Polish | Polski |
| pt | Portuguese | Português |
| pt-br | Portuguese (Brazil) | Português (Brasil) |
| ro | Romanian | Română |
| ru | Russian | Русский (Russkiy) |
| sk | Slovak | Slovenčina |
| sq | Albanian | Shqip |
| sr | Serbian | Српски (Srpski) |
| sv | Swedish | Svenska |
| sw | Swahili | Kiswahili |
| th | Thai | ไทย (Thai) |
| tr | Turkish | Türkçe |
| tl | Tagalog | Tagalog |
| uk | Ukrainian | Українська (Ukraïns'ka) |
| ur | Urdu | اُردُو (Urdu) |
| vi | Vietnamese | Tiếng Việt |
| zh | Chinese | 中文 (Zhōngwén) |
| zh-tw | Chinese (Taiwan) | 繁體中文 (Fántǐ Zhōngwén) |
| zh-cn | Chinese (Mainland China) | 简体中文 (Jiǎntǐ Zhōngwén) |
Integrating styles in the CSV upload:
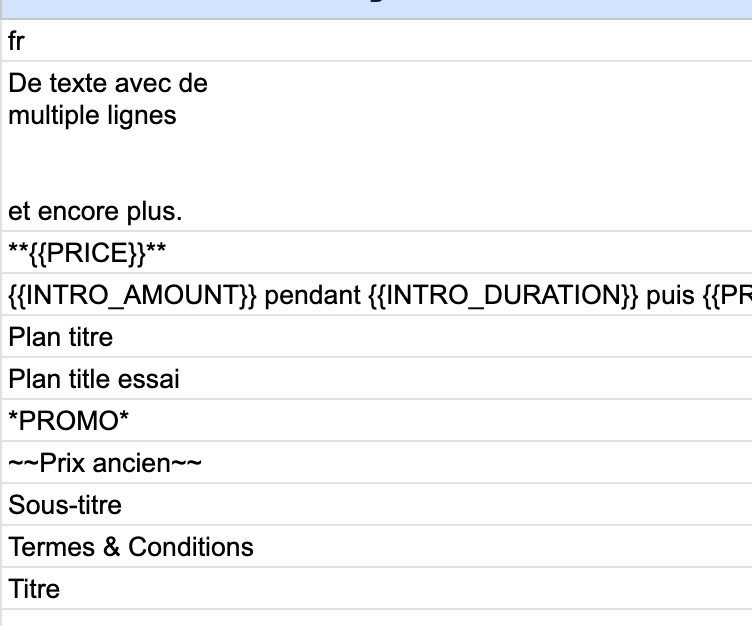
With our Screen composer, you can easily style texts in a phrase to make them stand out. Whether you want to make them bold, italicized, or add a hyperlink, our composer has got you covered. We will walk you through the steps to style texts in Screen composer while using Smart localization.
One of the simplest ways to integrate different styles within the same text is by leveraging markdown language.
Styling Texts in Screen Composer
To style texts in Screen composer, you will need to use specific symbols before and after the text you want to style.
- Bold Text
To make a text bold, you will need to use two asterisks before and after the text. For example, your text
- Italicized Text
To make a text italicized, you will need to use an underscore before and after the text. For example, your text
- Strike Through Text
If you want to strike through a text, you will need to use two tildes(~~ ) before and after the text. For example, your text
- Hyperlinks
To add a hyperlink to a text, you will need to use the following format: [your text] (HTTPS URL). For example, [purchasely] (https://www.purchasely.com/) will appear as purchasely in the final output. Make sure to include the HTTPS URL within parentheses and remove any spaces between the text and the URL.
How to use Smart Localization?
Process for uploading your translations
The process is the following:
-
The template CSV file can be downloaded from the App settings > Screen section in the Purchasely Console.
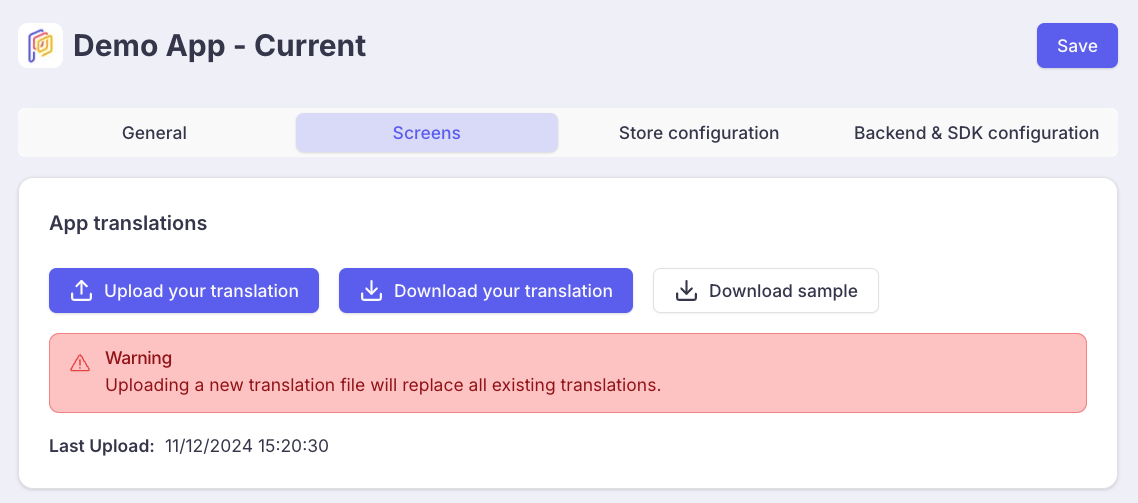
If you have previously uploaded a translation file, the Download your translation button will allow you to fetch the last version uploaded.
-
Modify the CSV file:
- add keys (= lines) languages (= columns)
and - create the translations for each key in the different languages
- add keys (= lines) languages (= columns)
-
Upload the new version of the CSV file
-
Enable localization mode for your paywalls
-
Map each text with the corresponding key
Using tags with Smart localizationIf you need to integrate Tags into your Texts, they need to be inserted between 2 pairs of curly brackets. Example:
{{PRICE}}=> Price of a default Plan or Plan associated with the parent element of the Text
(e.g.: $9.99 / month){{PRICE(yearly)}}=> Price of the annually Plan, whereyearlyis the reference associated with the Plan (e.g.: $99.99 / year)
Enabling smart localization mode for your Screens
Enable localization for your Screen from Localization -> + -> Localization
⚠️The pop-up box displays an important message about the feature: if you proceed with the localization mode, the existing text on the Screen will be lost. Click Confirm to continue
ℹ️ If you decide to change your mind, you can use the rollback feature to revert to the latest published version of your Screen 😊
⚠️ As soon as you confirm the above pop-up, your Screen's Texts will be wiped off.
You can then go over each Text element of your Screen and map it with the desired key from the translation file.
Save and publish 👍
⚠️ Please make sure to be transparent about the price of the plan in the CTA buttons.
How to add a new language?
If you wish to add a new language, you'll need to upload a translation file.
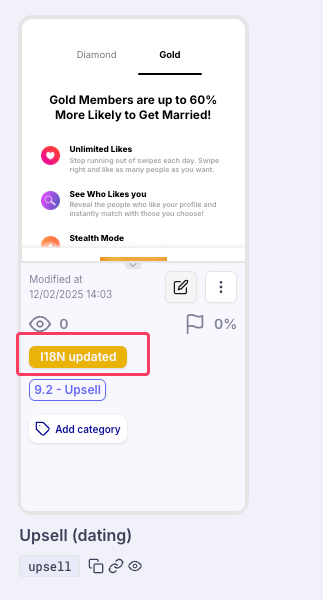
Once you have added the file, you will notice the paywalls that support localization are marked with "localization updated".
Step 3
You will see the newly added language, and you'll need to provide the corresponding visuals.
How to edit my existing translation?
If you want to make changes to an existing translation, you'll need to upload a file containing the updated text.
As soon as you uploaded a new file, you will see the paywalls that are localization enabled will be marked for localization updated.
Step 4: you can choose which text to update by selecting it from the new file.
Updated 9 months ago