

Apple App Store configuration
This section describes how to connect the App Store with the Purchasely Console
In order to connect your Apple App Store account with Purchasely, you have to provide the following parameters from your App Store Connect application's console:
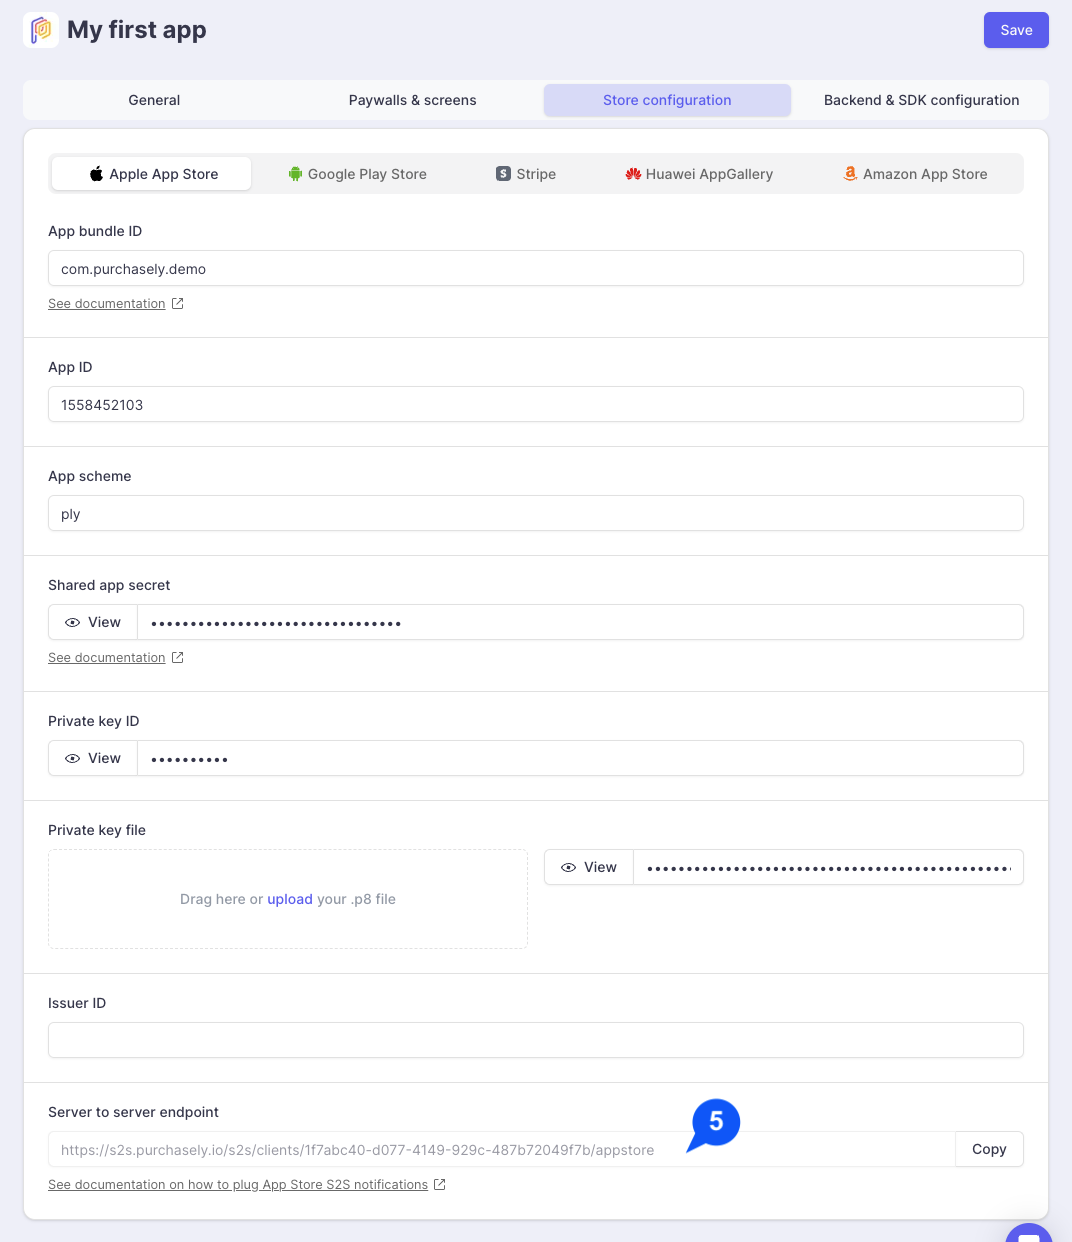
- App bundle ID
- App ID
- App scheme
- Shared App Secret - only for subscription apps
- StoreKit 2 - Private key ID - only for subscription apps
- StoreKit 2 - Private key file - only for subscription apps
- StoreKit 2 - Issuer ID - only for subscription apps
- The Server to Server End point - only for subscription apps
- App Store Connect API - Key ID - optional
- App Store Connect API - Private key file - optional
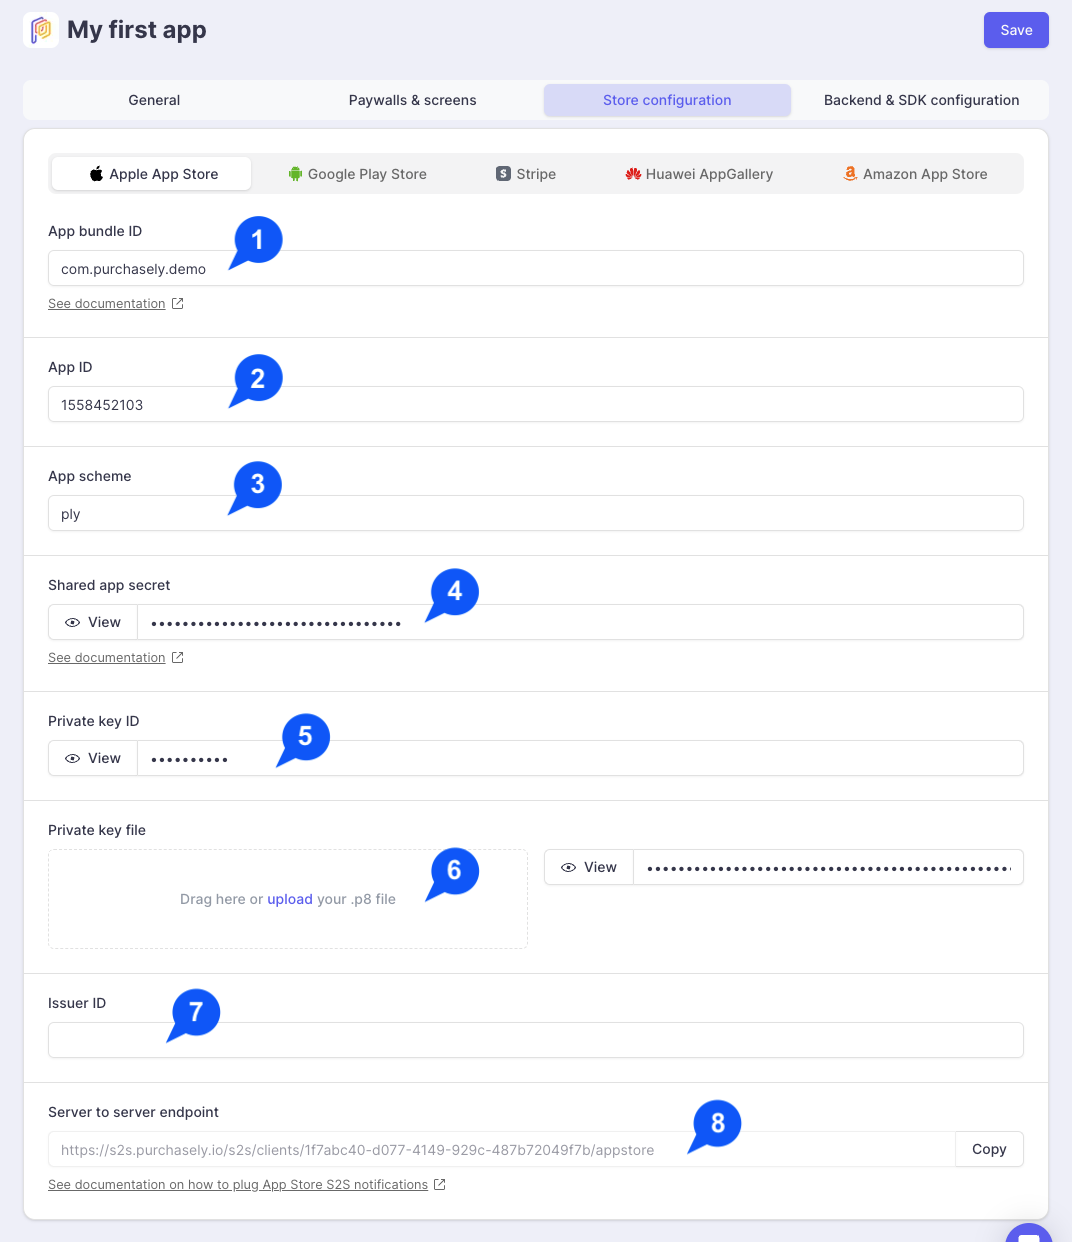
1. App Bundle ID
The Bundle ID is used by the Purchasely Platform to validate that receipts are indeed coming from your app.
- Open App Store Connect, go to My Apps and select the desired app
- Navigate to the section General > App information
- Copy the value displayed in the field Bundle ID
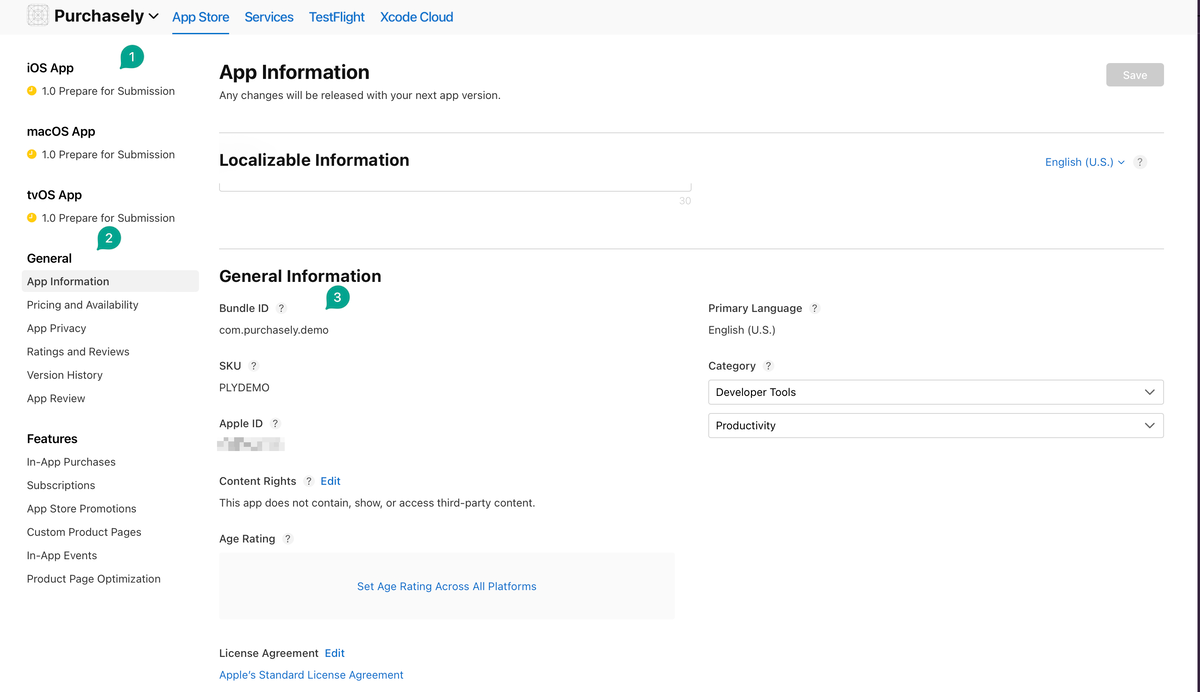
2. App ID
It is required to set up promo code deeplinks in paywalls.
- Open App Store Connect, go to My Apps and select the desired app
- Navigate to the section General > App information
- Copy the value of the field Apple ID
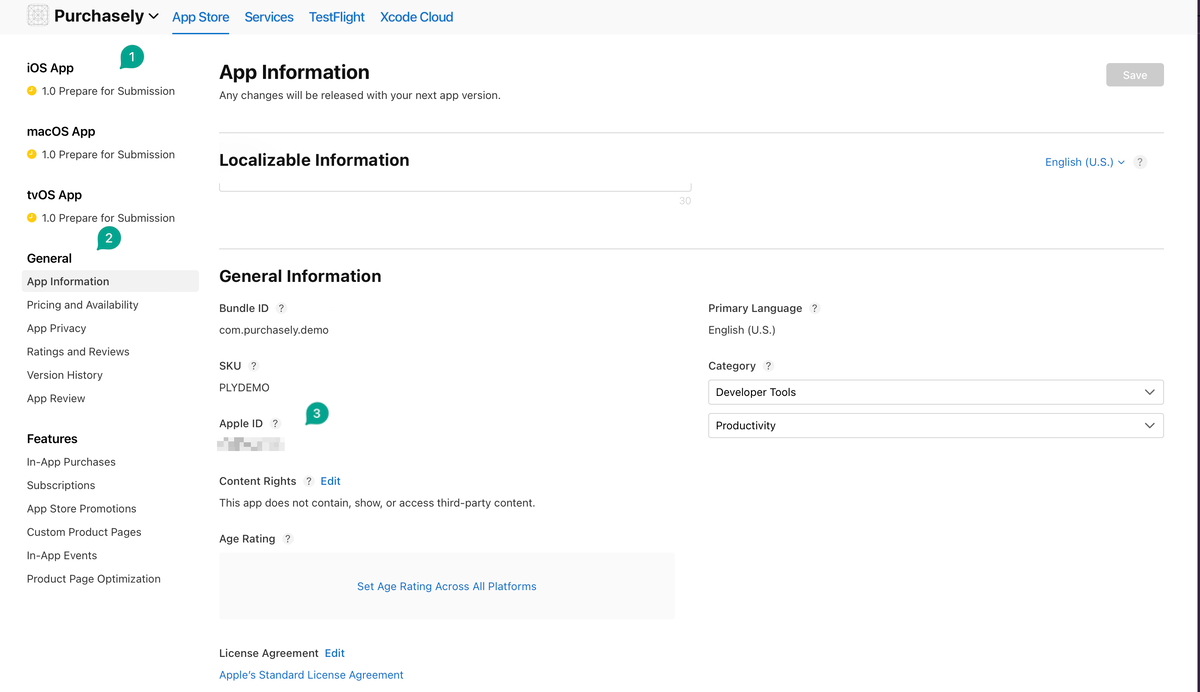
3. App scheme (optional)
The App scheme is required to make the paywalls preview work and enable deeplink automations.
Enter your App scheme (without the ://) in the Purchasely Console in the field App Scheme . A universal link can also be used.
- More details on how to configure it for your iOS app
- More details on how to manage deeplinks with the Purchasely SDK
4. Shared App Secret - only for subscription apps
The Shared App Secret is used by Purchasely Platform and required to decode and validate receipts for this specific app
-
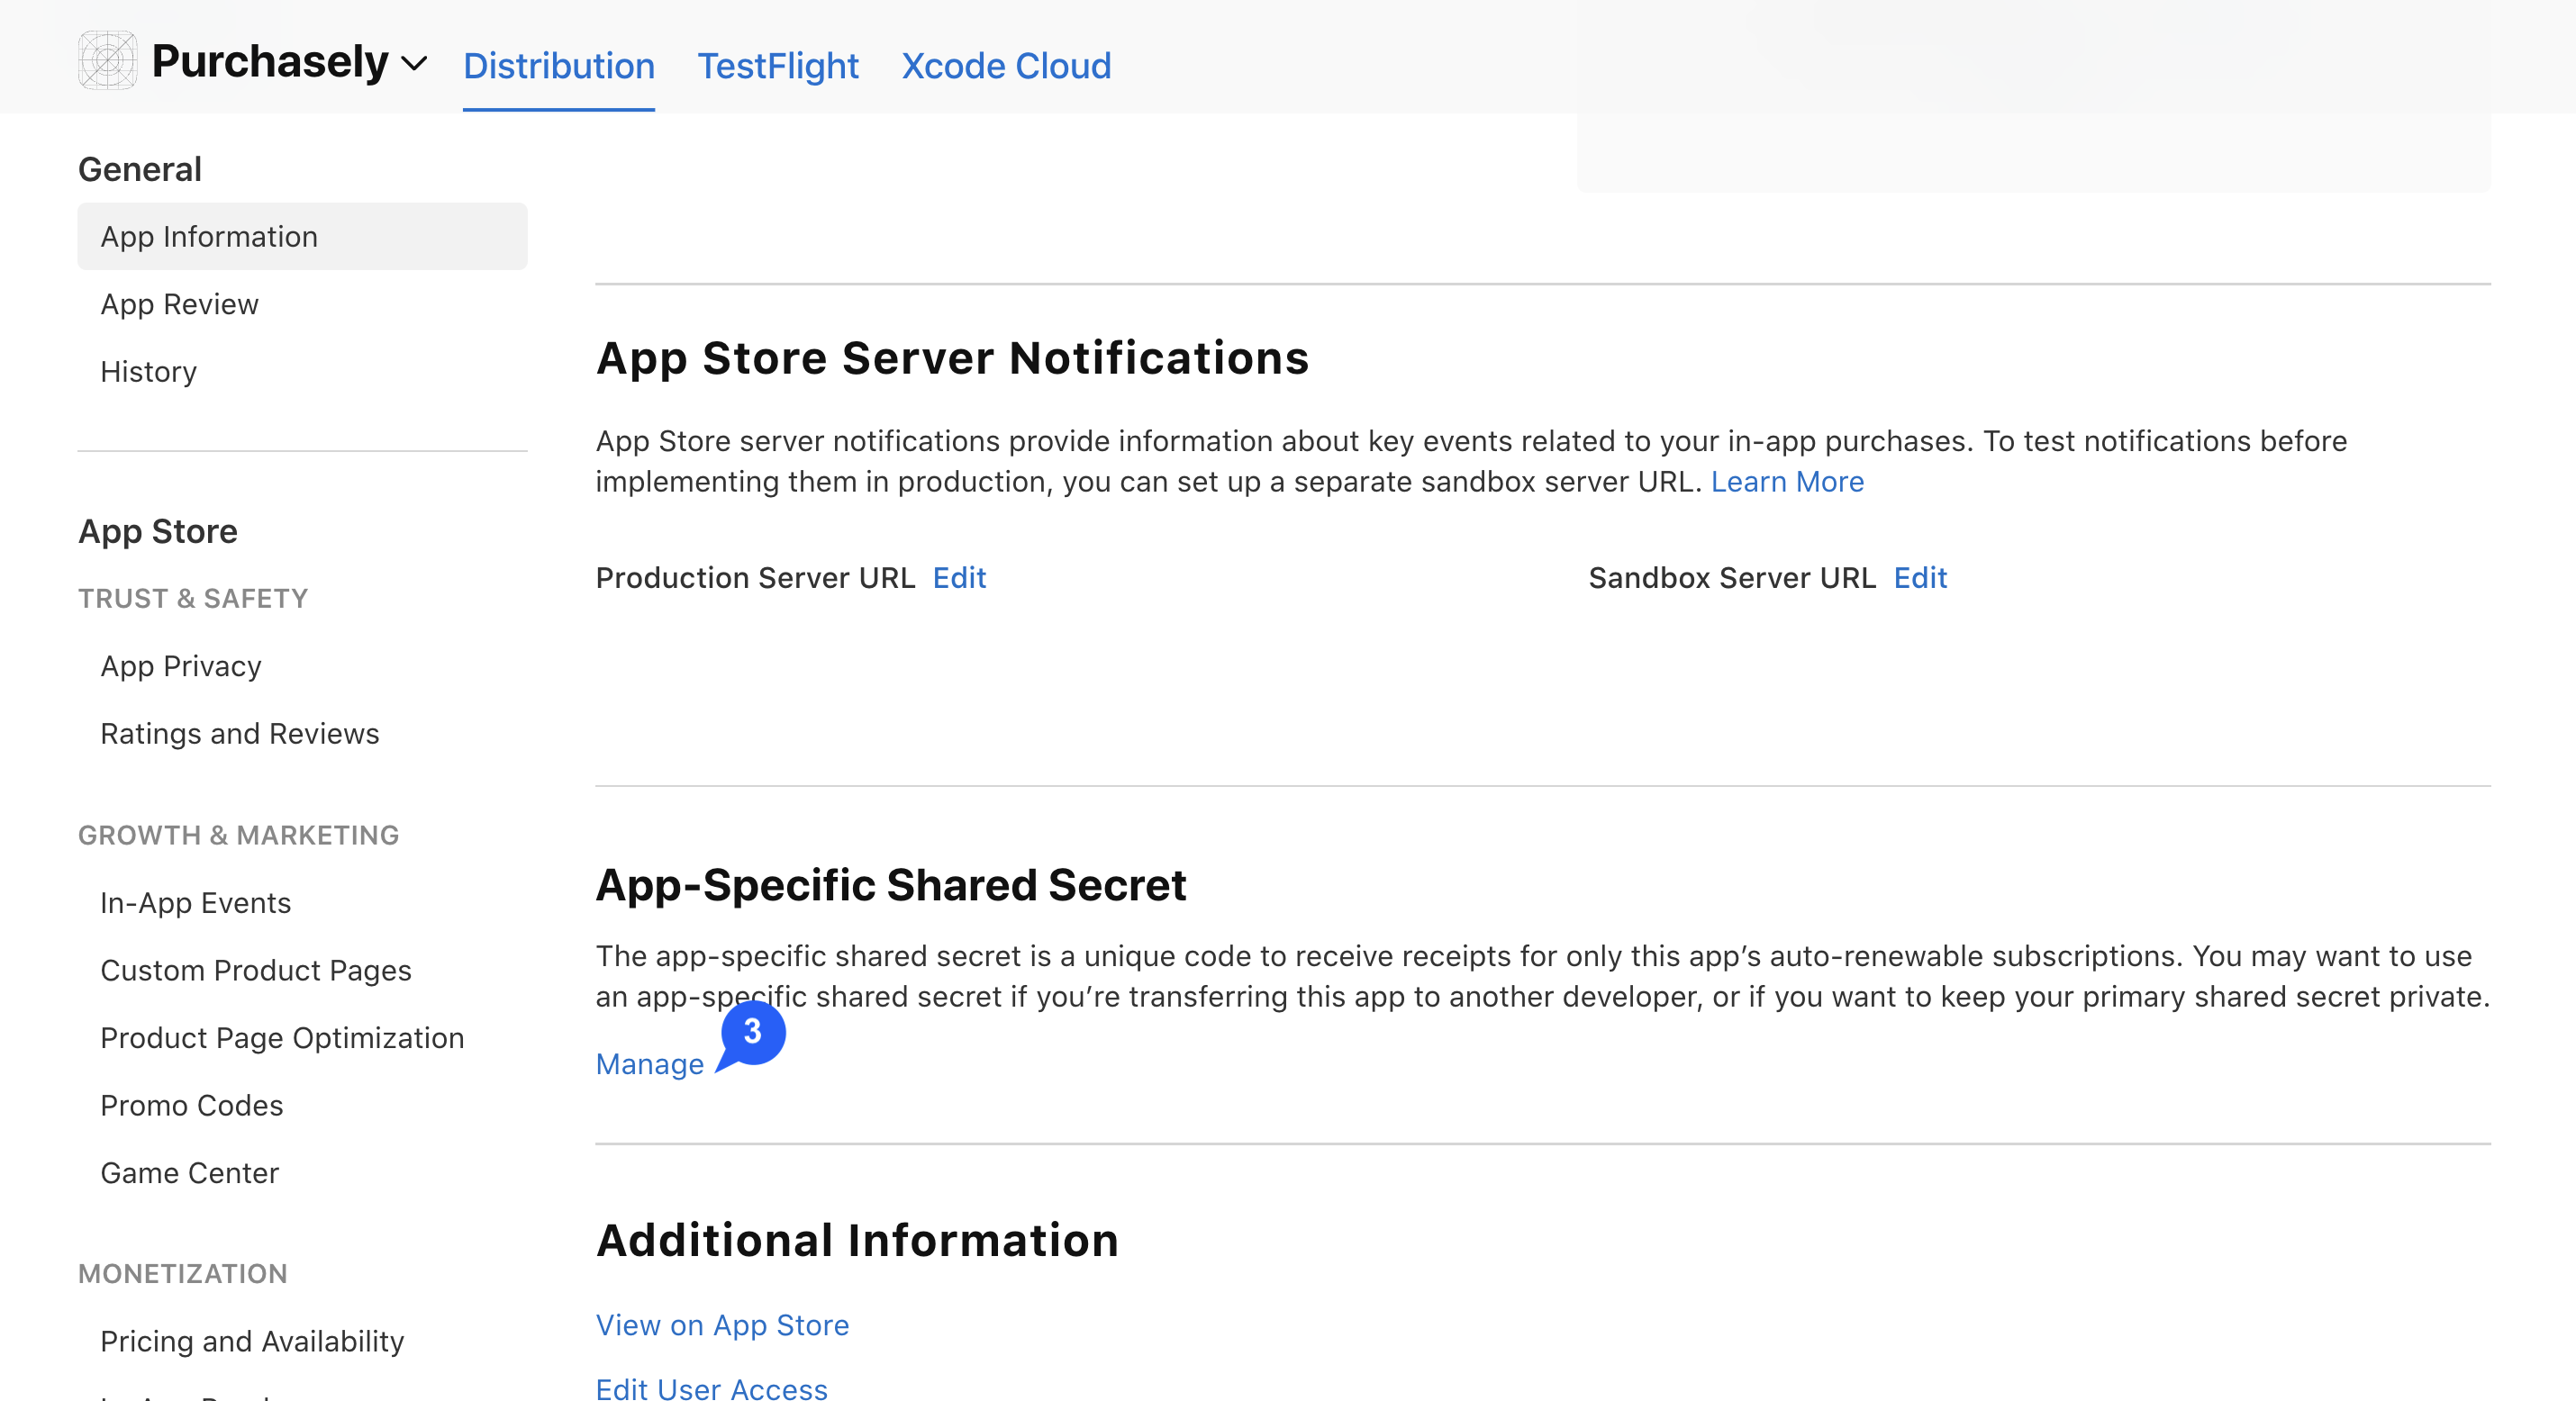
Open App Store Connect, go to My Apps and select the desired app
-
Navigate to the section General > App information and browse down the screen
-
Click on the link Manage in the section App-Specific Shared Secret
-
Copy the value displayed on the following screen
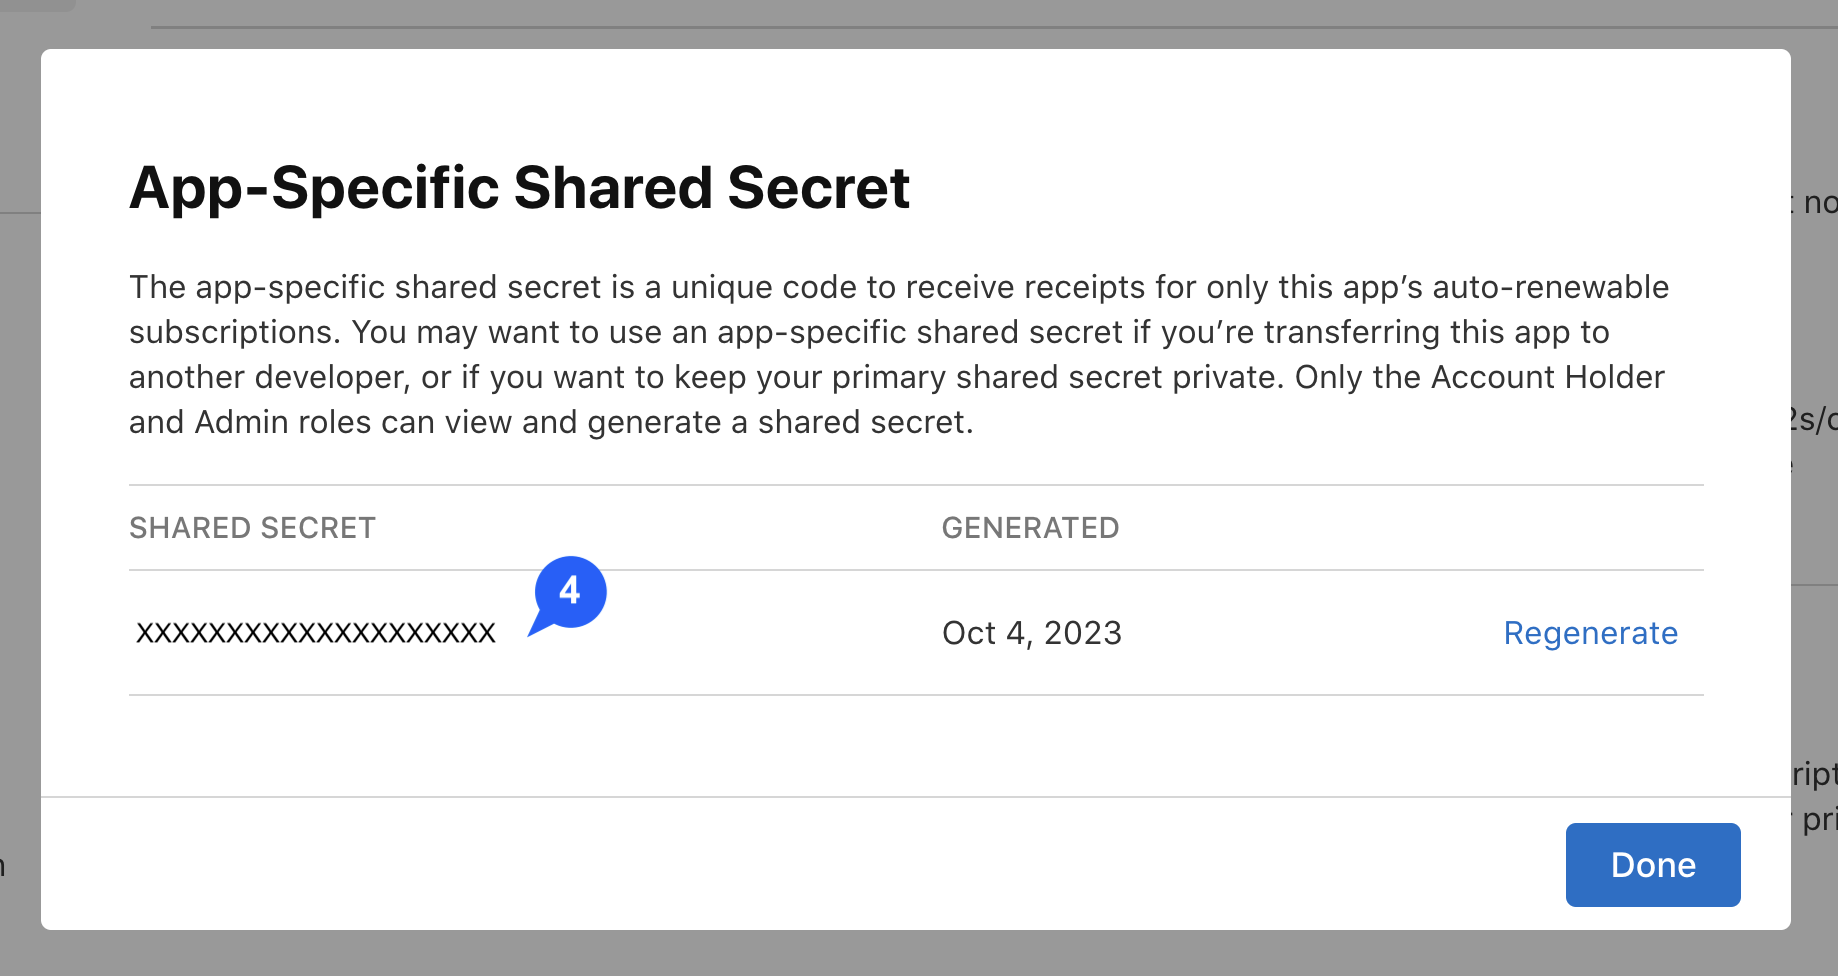
Don't forget to update the value in the Purchasely Console each time you regenerate a new App-Specific Shared Secret.
5, 6, 7. StoreKit 2 configuration - only for subscription apps
StoreKit 1 is deprecatedSince StoreKit1 is deprecated, please configure StoreKit2 and use it in your app.
To make StoreKit 2 work, you need to grant the Purchasely Platform with a specific access.
The Private key Id, Private key file and the Issuer Id are required by Apple APIs. We use them for :
- StoreKit 2 APIs: to allow our server to verify your purchases
- Promotional offers: to generate the signature allowing the purchase
The configuration of StoreKit 2 requires to follow a few steps:
- Open App Store Connect
- Go to the section Users and Access > Integrations > In-App Purchase
- Click on the + button to generate a new API key
- Choose a name for the key and click "Generate"
- Download the API key file (.p8), and note the Key ID and Issuer ID.
Keep the file secure, as you won't be able to download it again
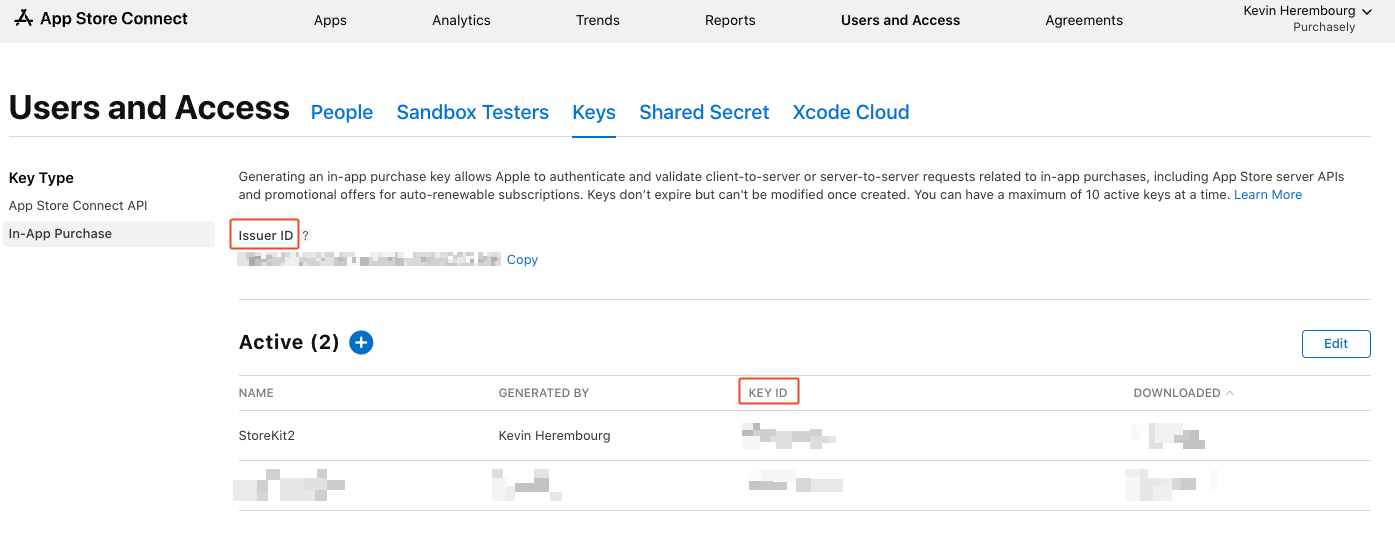
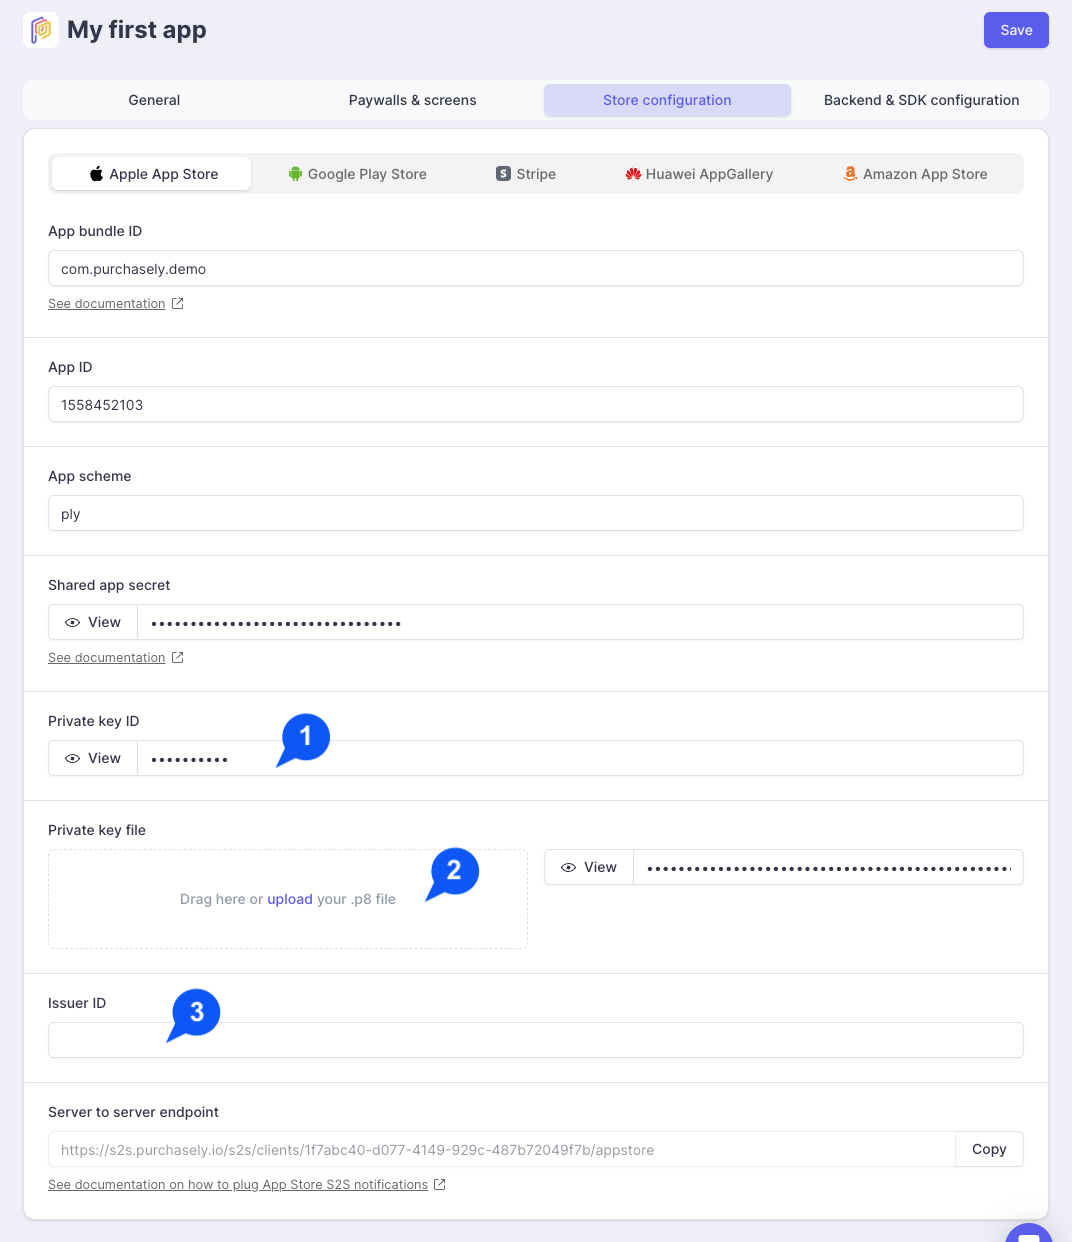
Then, in the Purchasely Console:
- Paste the value of the Key ID generated in the field
Private Key ID - Upload the API Key file (
.p8) previously downloaded in the fieldPrivate Key File - Paste the value of the
Issuer IDin the fieldIssuer ID
8. The Server to Server End Point - only for subscription apps
This step is only available in the App Store Connect Console once you've created your first In-App Subscription.
To plug App Store Server Notifications with the Purchasely platform, follow these steps:
-
Open App Store Connect,
-
Go to My Apps and select the desired app
-
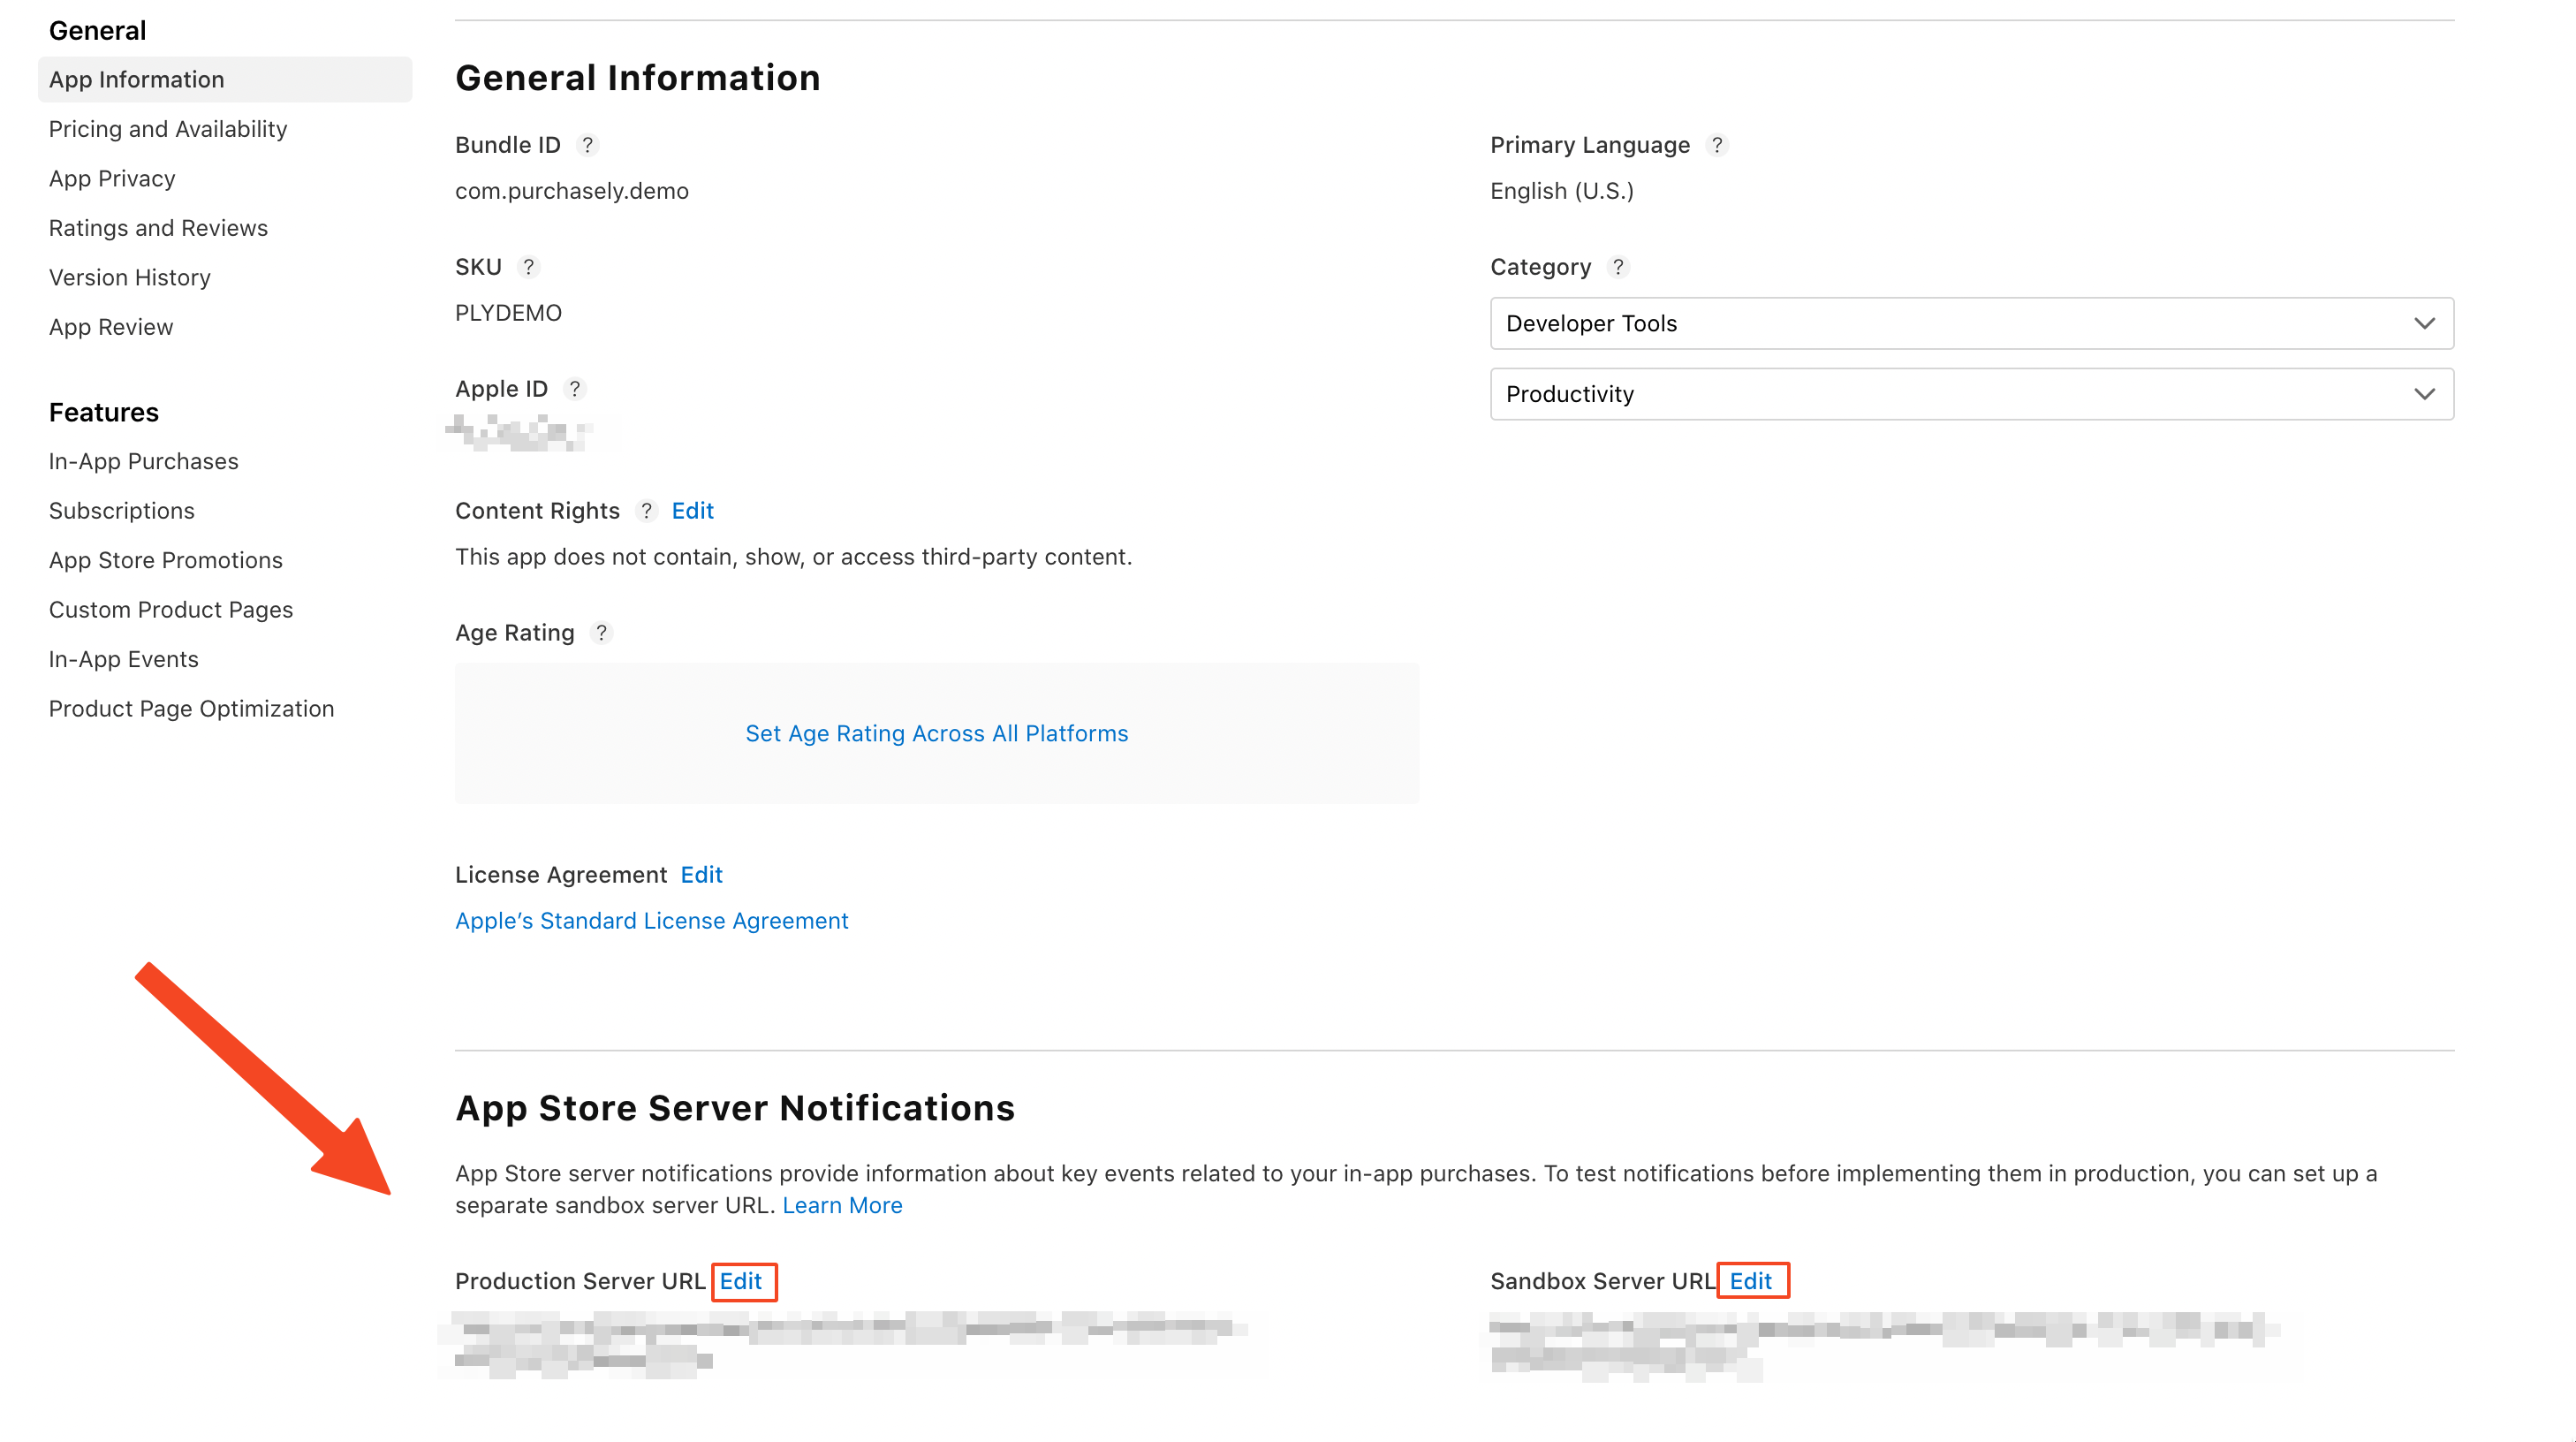
Navigate to the section General > App information
-
In the sub-section App Store Server Notifications, edit the Product Server URL
-
Paste the value from the field Server to server endpoint in the Purchasely Console
What are App Store Server Notifications used for?
App Store Server Notifications are used to receive real-time notifications about the lifecycle of your client's purchases.
They consist in messages, sent by the App Store, every time an event occurs on a subscription. For instance, a message is sent when a subscription :
- is purchased
- is renewed
- won't renew because the user as canceled the auto-renewal
- is refund
- gets expired
- encounters a billing issue
…
The server-to-server notifications are not mandatory for making subscriptions work, but they are very valuable in the sense that they bring a real-time and comprehensive vision for the app editor
What happens if I do not activate the S2S?Until the expected renewal date of the original subscription, Purchasely won't be able to detect:
- a refund (which means users may have a 1-year free subscription if they immediately ask for a refund on a yearly subscription)
- a plan change (when they are bought outside the application)
- a cancellation of the renewal (we won't know the user will churn at the next renewal)
What if you are already using the App Store Server Notifications for your subscription infrastructure?
App Store Connect only allows setting one endpoint url for S2S in production and sandbox mode. To circumvent this limitation, you can enable our S2S Forwardings integration in Purchasely Console.
If you are already using S2S notification with your existing Subscription Infrastructure, you can activate Server to server notifications forwarding in the Purchasely Console.
More details on activating Server to server notifications forwarding
9, 10. App Store Connect API key (optional)
This key gives Purchasely read access to Apple data that the StoreKit 2 key cannot reach:
- Apple catalog through MCP: list your app's in-app purchases, subscription groups and subscriptions, then associate them with Purchasely products, plans and App Store distributions. Catalog discovery is read-only: it does not import products or start an automatic synchronization.
- Apple's Retention Messaging report: Apple's App Store Retention Messaging analytics report, used by Apple Retention Messaging.
Separate from StoreKit 2This key is not required to process purchases or validate subscriptions. Keep the StoreKit 2 configuration above. Although both keys use the
.p8file extension, this key must come from App Store Connect API, not In-App Purchase.
Create and download the key in Apple
- Sign in to App Store Connect as an Account Holder or Admin to create a team key.
- Open Users and Access → Integrations → App Store Connect API → Team Keys. If API access has not been enabled, the Account Holder must first use Request Access.
- Click Generate API Key (or +) and name it, for example,
Purchasely. - Under Access, select Admin. Apple accepts the analytics report request behind the Retention Messaging report only from an Admin key. For catalog access alone, a role that can read the app's in-app purchases and subscriptions is enough.
- Generate the key, download its
.p8private key file, and copy the Key ID and Issuer ID. Apple allows only one download of the private key, so store it securely.
Use a team key for this integration. Apple team keys cover all apps in the account; Purchasely only reads the app configured in Purchasely.
Apple's guide to creating and managing App Store Connect API keys
Configure the key in Purchasely
In the Purchasely Console, select your application and open Setup → Platforms → Apple App Store:
- Check that App ID contains the numeric Apple ID from App Store Connect and that Issuer ID matches the team that issued the key. These fields are shared with the configuration above.
- In App Store Connect API, enter the new Key ID in App Store Connect Key ID.
- Upload the
.p8file in App Store Connect private key (.p8), or paste its complete contents, preserving the header, footer, and line breaks. - Save your changes.
Your Purchasely administrator needs Setup → Platforms → View to see the credentials and Edit to change them. To read the Apple catalog through MCP, grant Setup → Apple catalog → View (MCP only) when inviting or configuring the administrator, and include it in the MCP connection's consent. Renew the connection's consent if it was authorized before this permission was granted.
Updated 3 days ago
What’s Next
You can now proceed with the Google Play Store configuration