Google Play Store configuration
This section describes how to connect the Google Play Store with the Purchasely Console
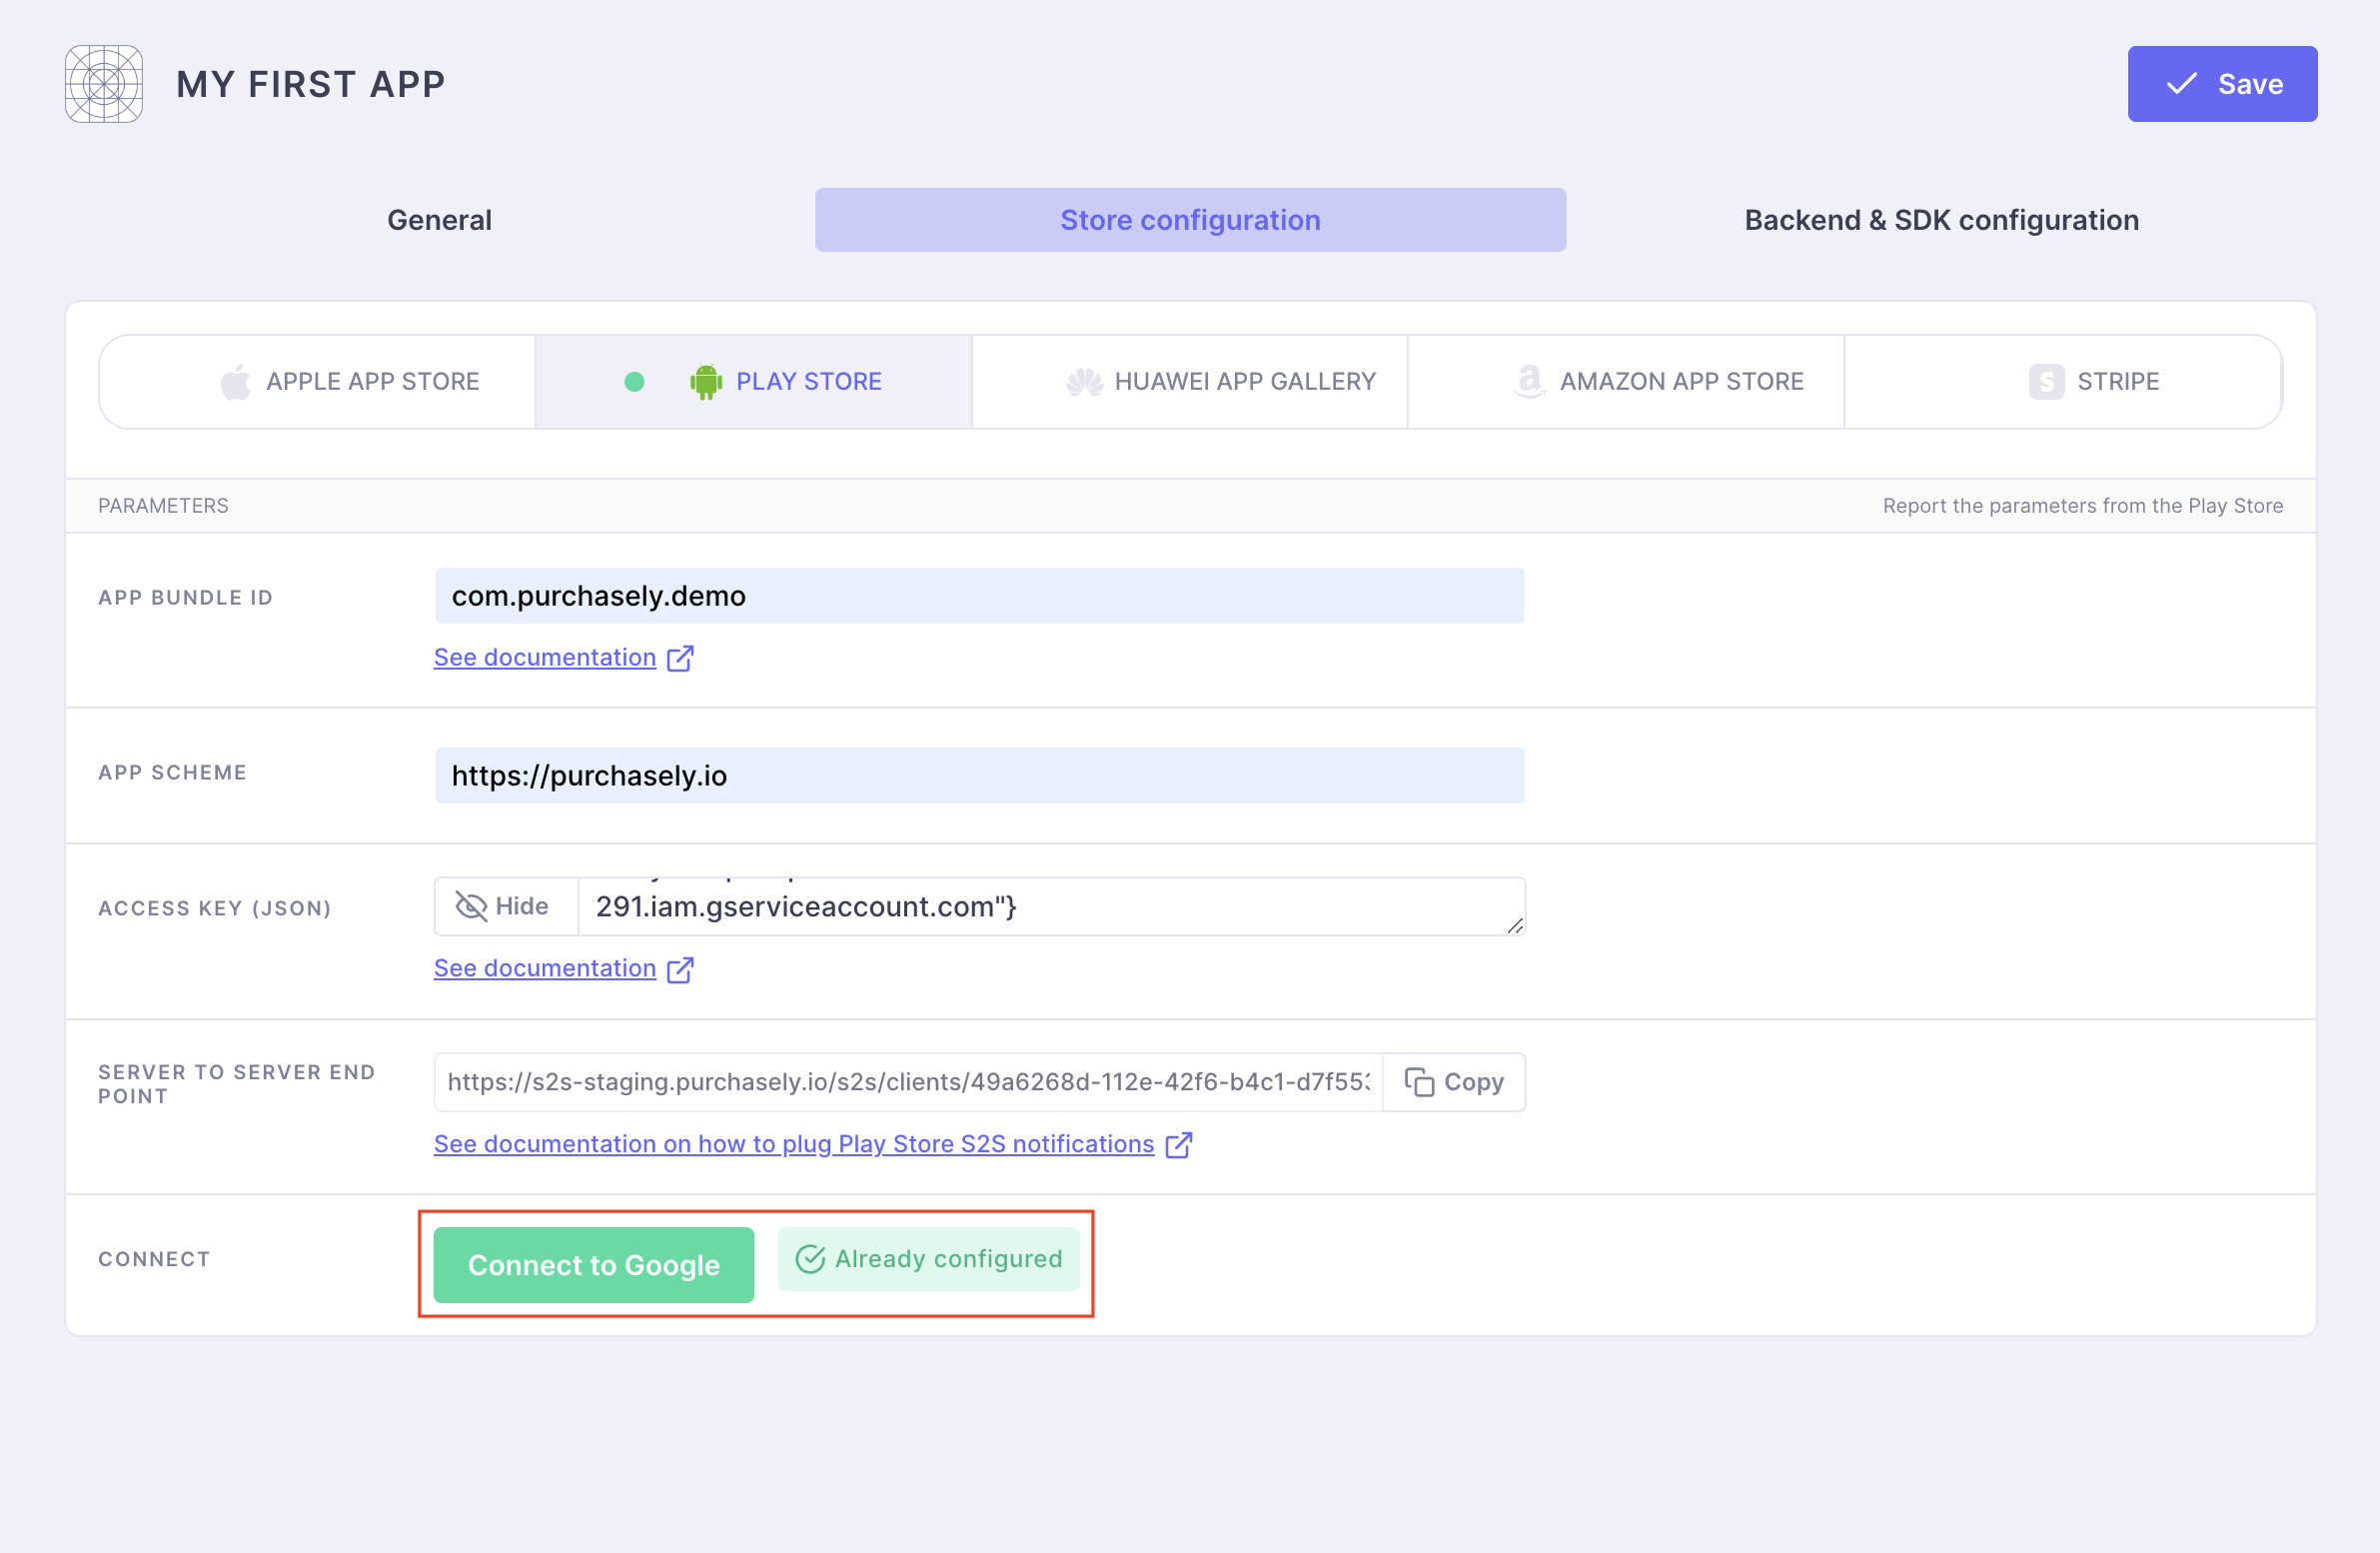
To connect your Google Play Store account with Purchasely, you need to provide the following parameters from the Play Store Console:
- Android App Bundle ID
- App Scheme
- Access Key (JSON) - only for subscription apps
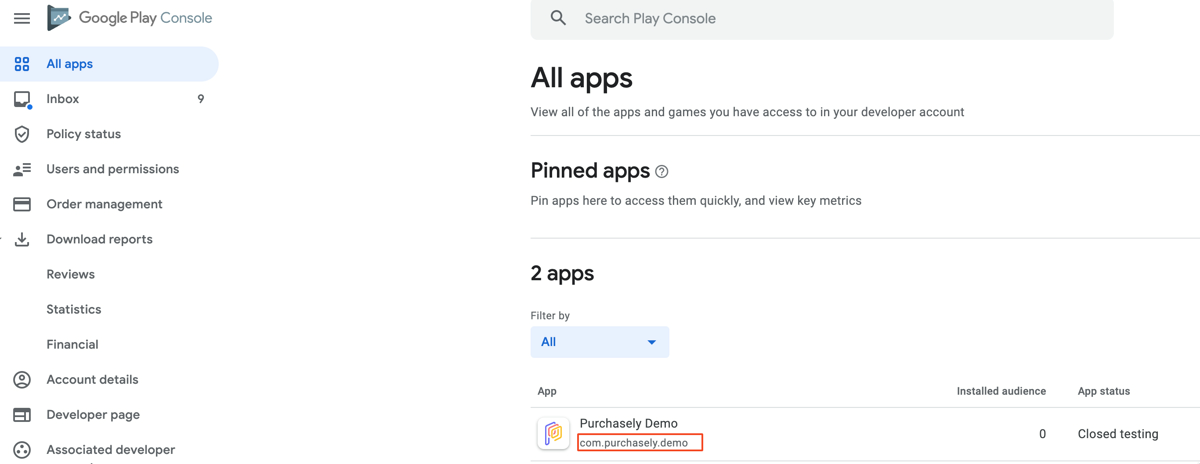
1. Android App Bundle ID
- Open Google Play Console, go to All Apps
- Copy the value displayed below your application name
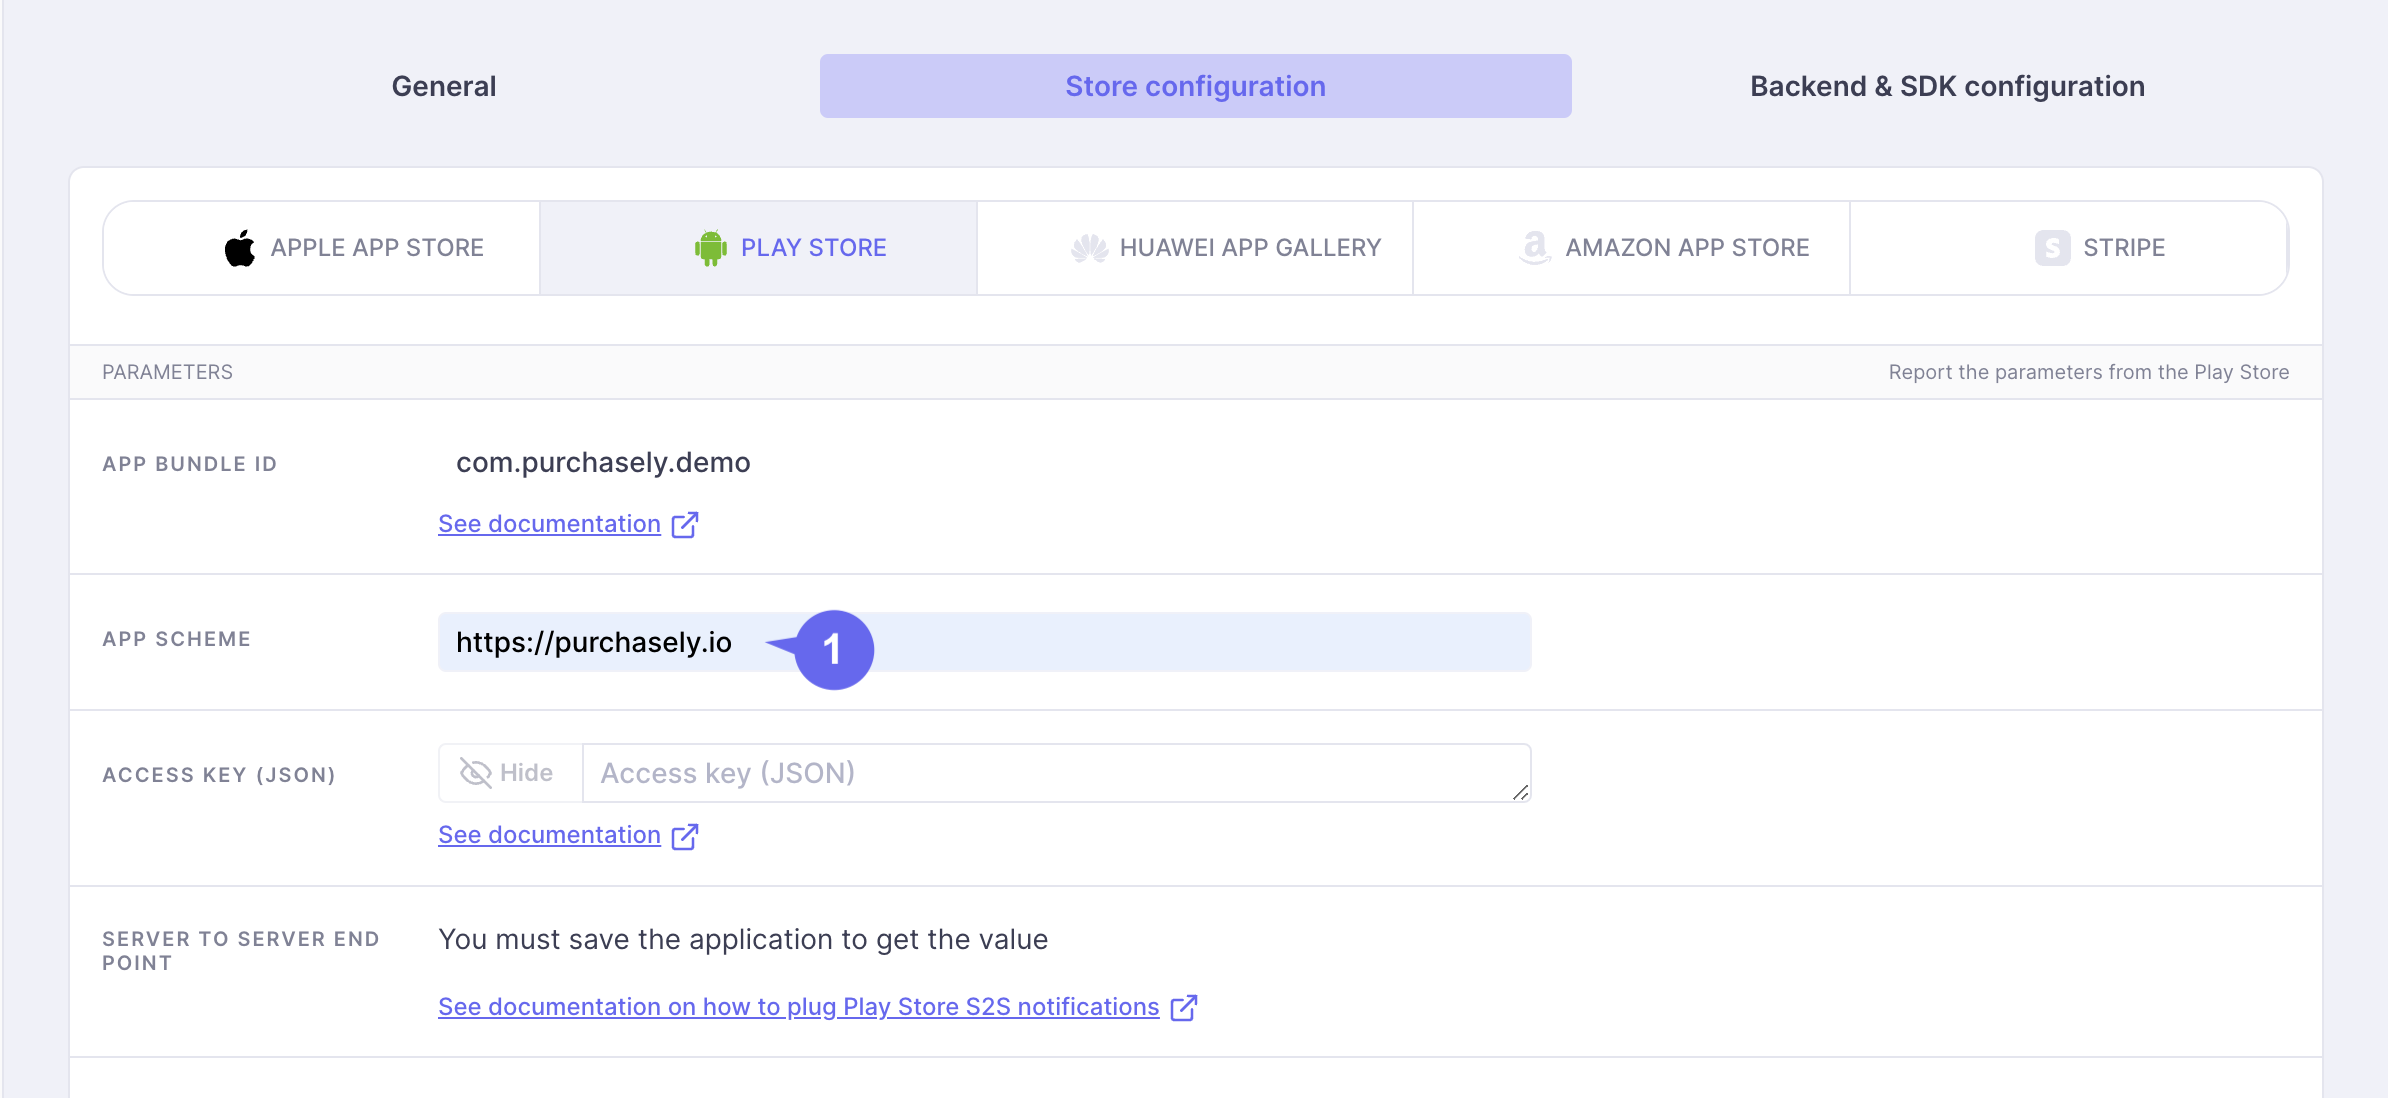
2. App Scheme
The App Scheme is required to make the paywall preview work.
You need to handle deeplinks as well for your application to give it the SDK to open the paywall preview.
We support scheme such as myapp:// but also universal link like https://myapp.io
You can configure it for your Android app by referring to the following document
- Paste your
App schemein the Purchasely Console in the fieldApp Scheme
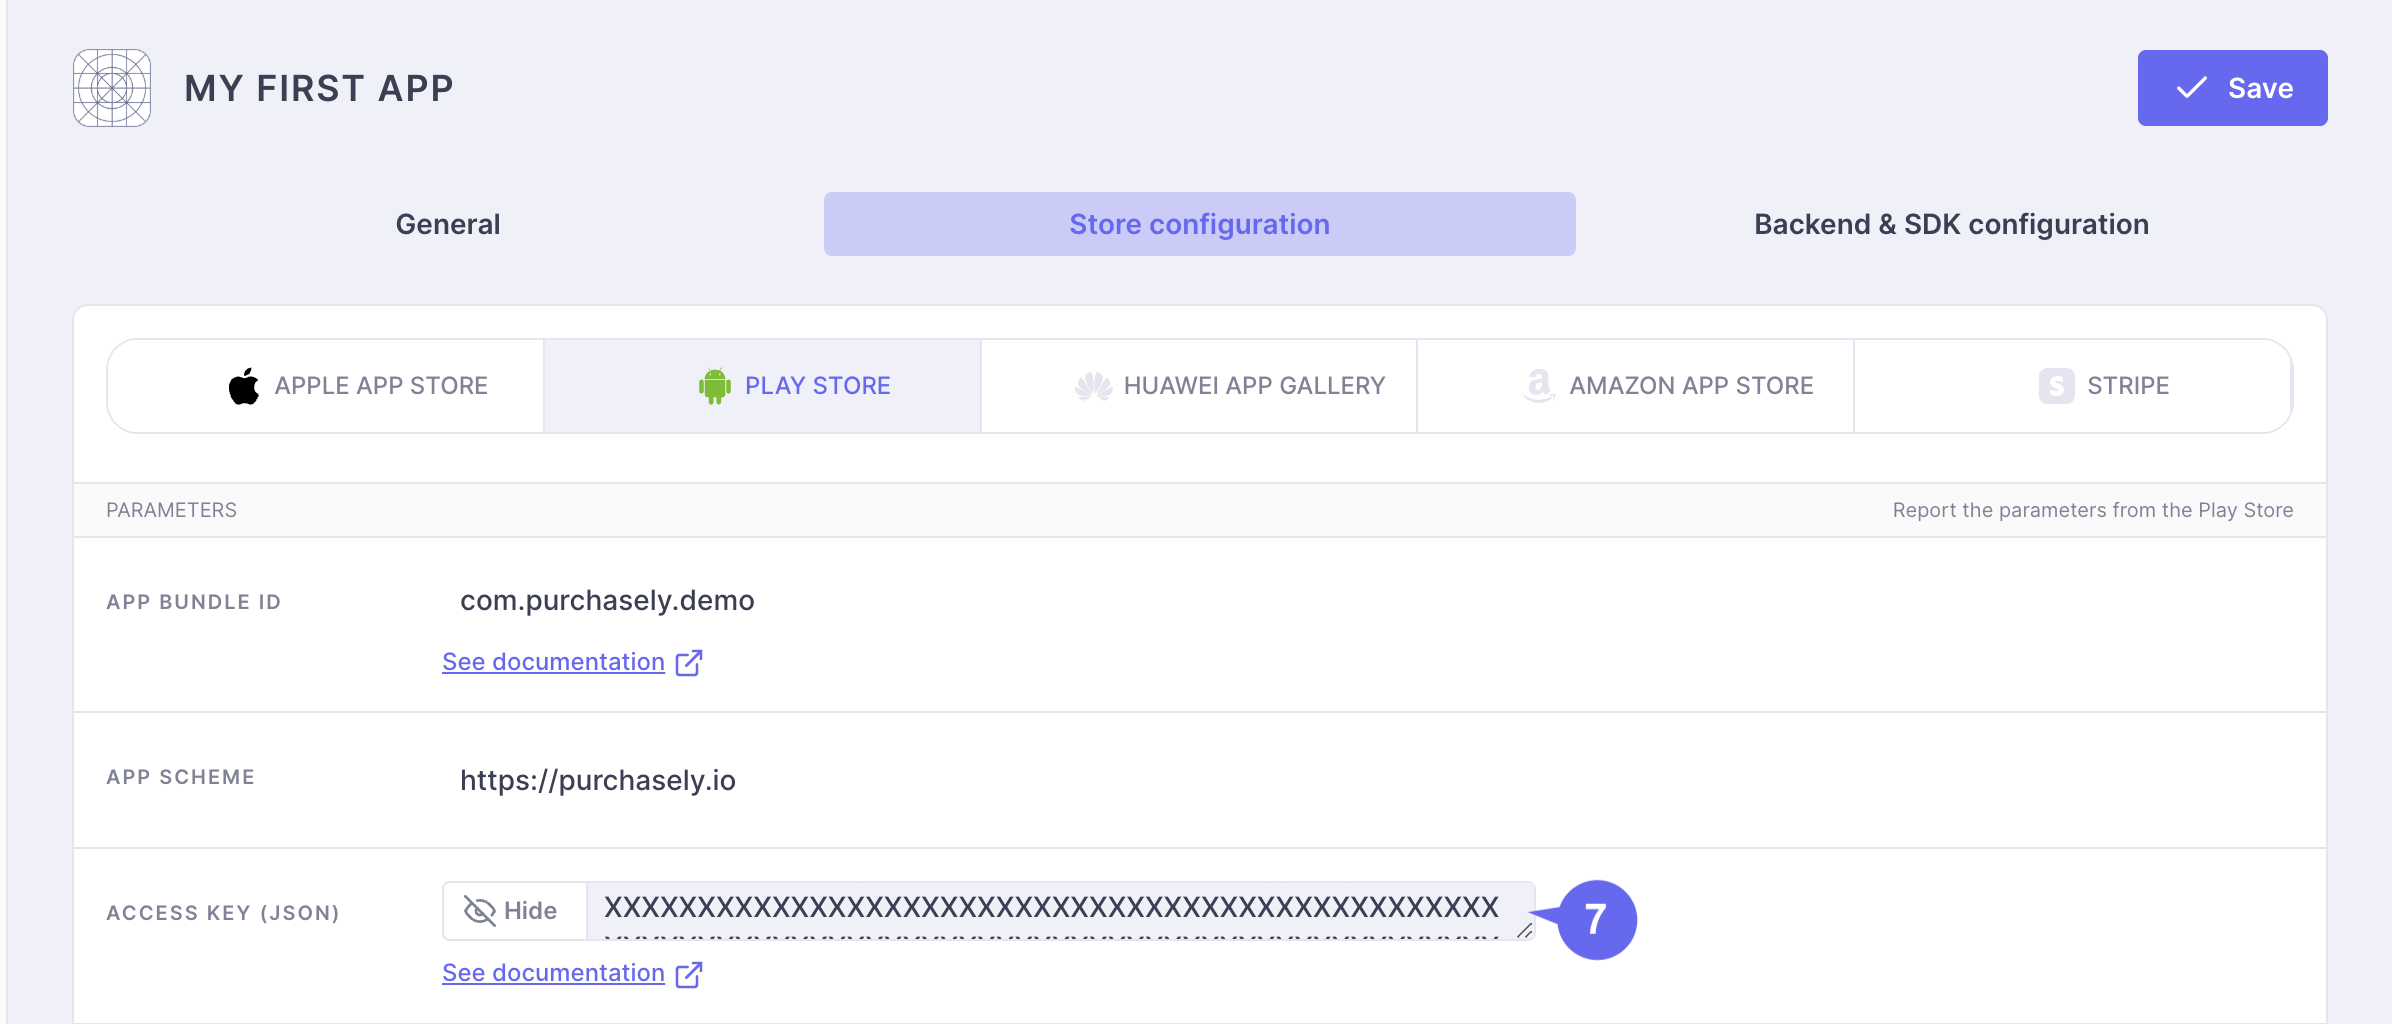
3. Access Key (JSON) - only for subscription apps
The access key is provided by Google and is linked to a service account. This access key is mandatory for Purchasely to make requests to Google API and validate purchase receipts.
To retrieve follow the steps below:
- Enable API on Google Cloud
- Create a new Service Account
- Grant access to Service Account
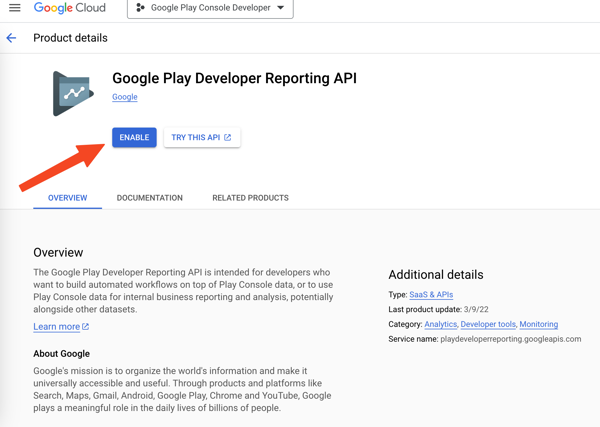
Enabling the API on Google Cloud
You will need to enable 2 APIs on Google Cloud Console
- Create or select your existing project
- Enable Android Developer API
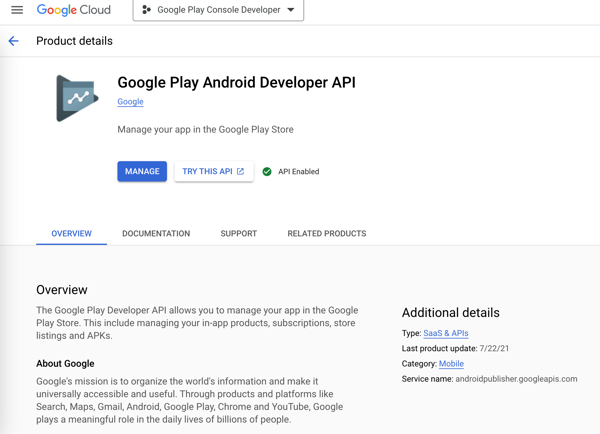
- Enable Developer Reporting API
Creating a New Service Account
Create a dedicated Service Account under the Google Cloud Platform Console
Google Cloud Platform > IAM & admin > Service Account > Create a new Service Account
Check the selected projectBefore creating the service account, make sure that the relevant Project is selected. The drop-down menu in the upper left corner of the screen shall match the Organisation you have set in the previous step
-
Name your account
Purchaselyto be able to easily identify it later -
Give it the ID
purchasely -
On the following screen, set the role to "Owner"
- You can also set "Pub/Sub Admin" and "Monitoring Viewer" as roles instead of "Owner"
-
On the following screen, note the email generated by Google for your Service Account
- It should look like [email protected]
-
Create a key by clicking on the + Create a key button
-
Choose JSON format to download the file
- In the Purchasely Console, fill in the
Access key (JSON)field with this JSON file.
Granting Access to the New Service Account
Up to 72 hours delay
Once you grant access to the Service Account for your application, it may take up to 72 hours for the changes to take effect on Google’s side. During this time, the Service Account will be updated with the proper access rights to the selected applications.
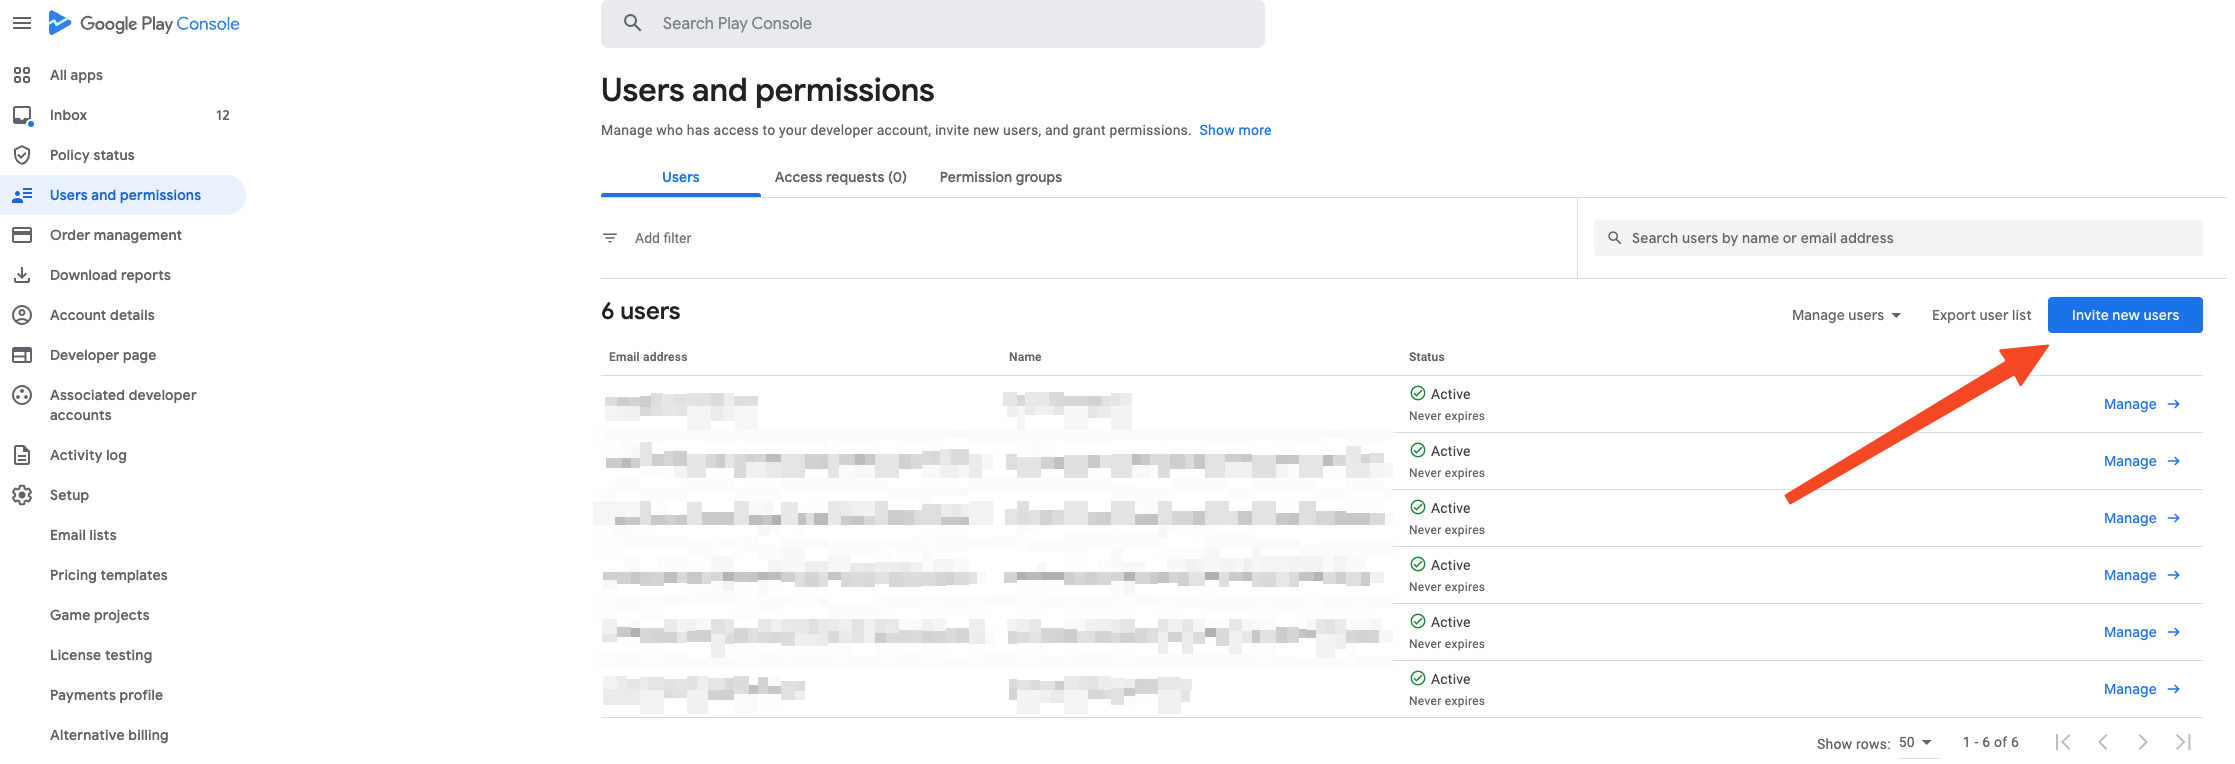
Grant access to the Service Account under the Google Play Console
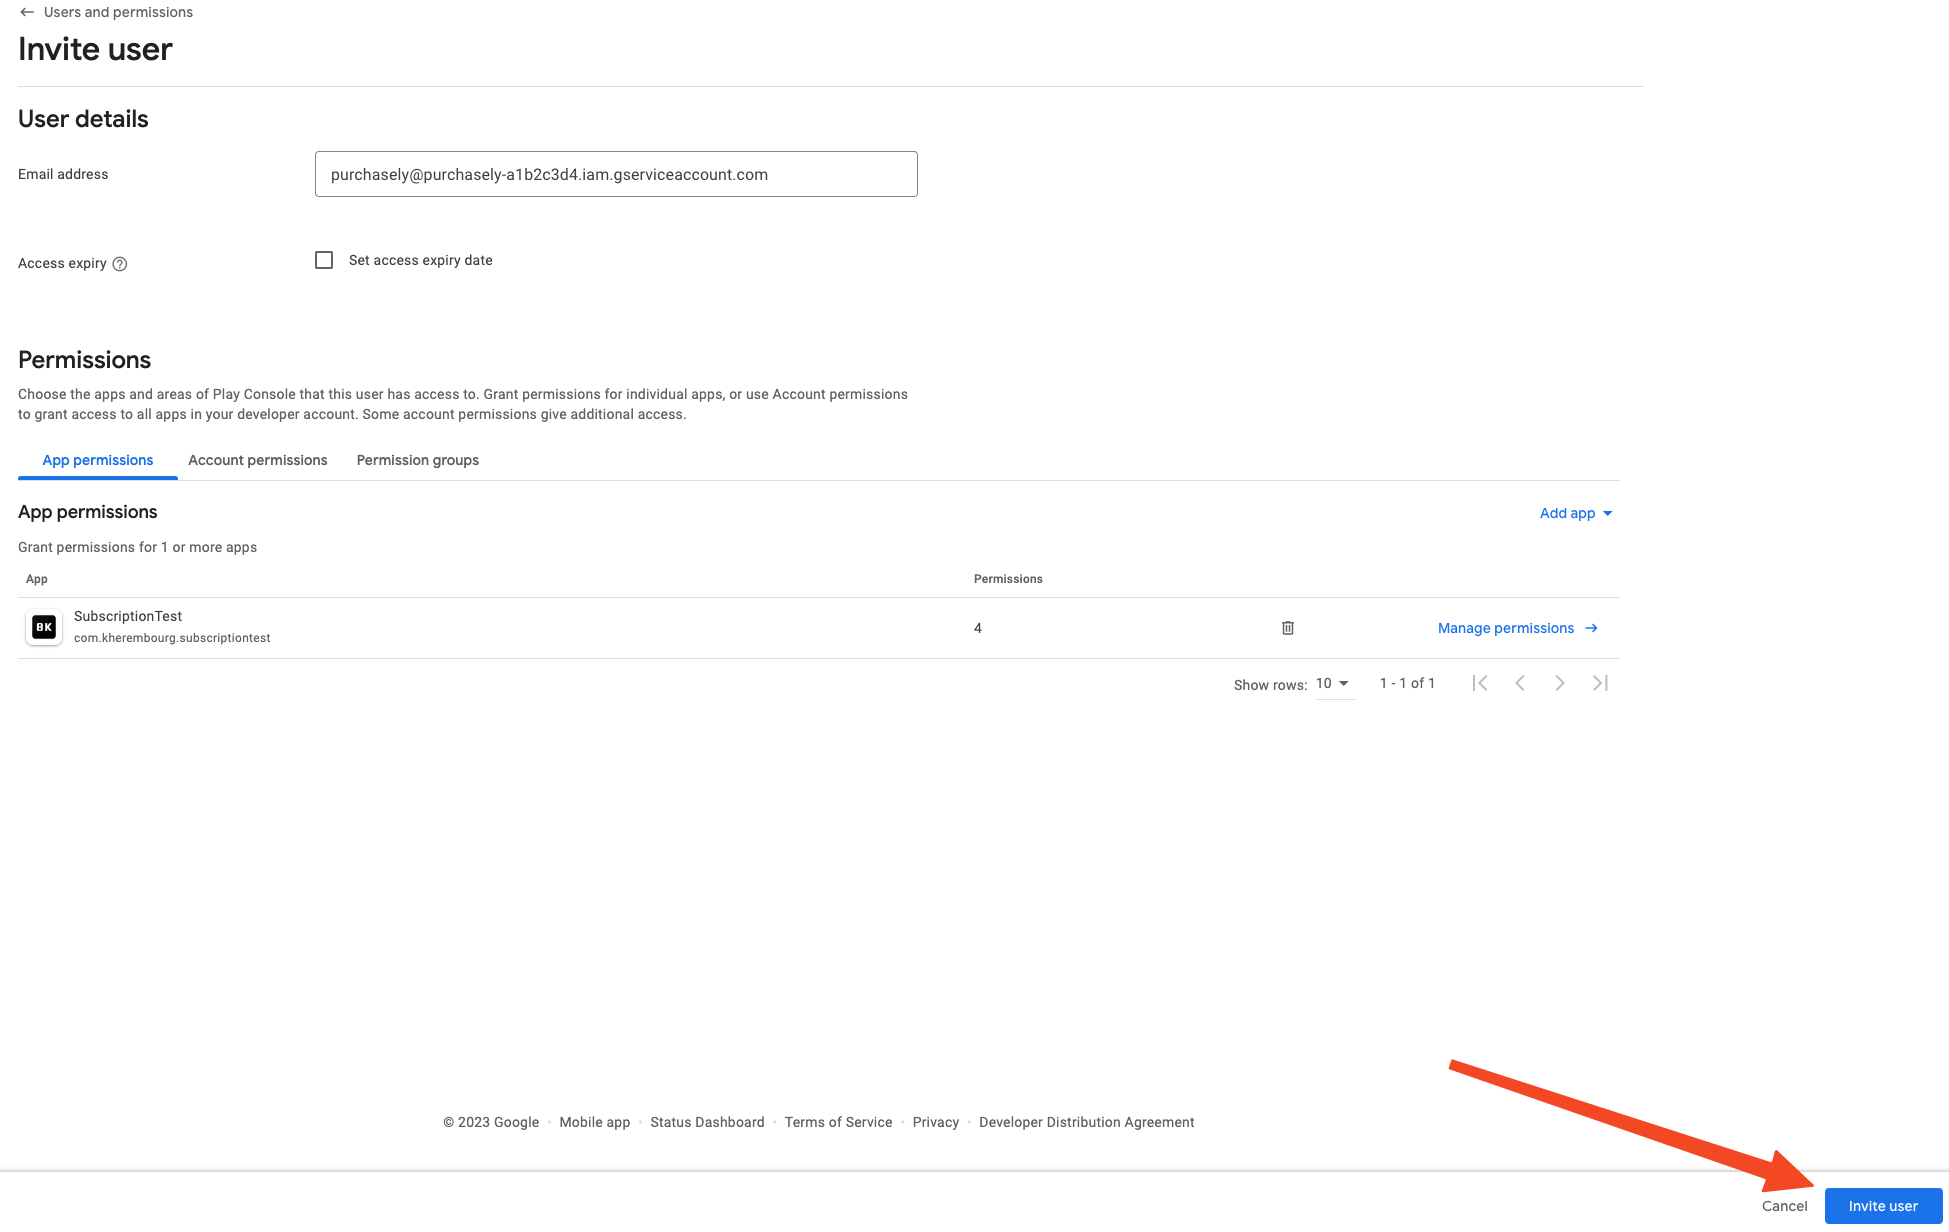
Google Play Console> Users & Permissions > Invite new users
Then complete the 3 following steps
- Set the email of your service account
- Set "no expiration date" by leaving the "Set access expiry date" unchecked
- Add your application
- Select it
- Apply
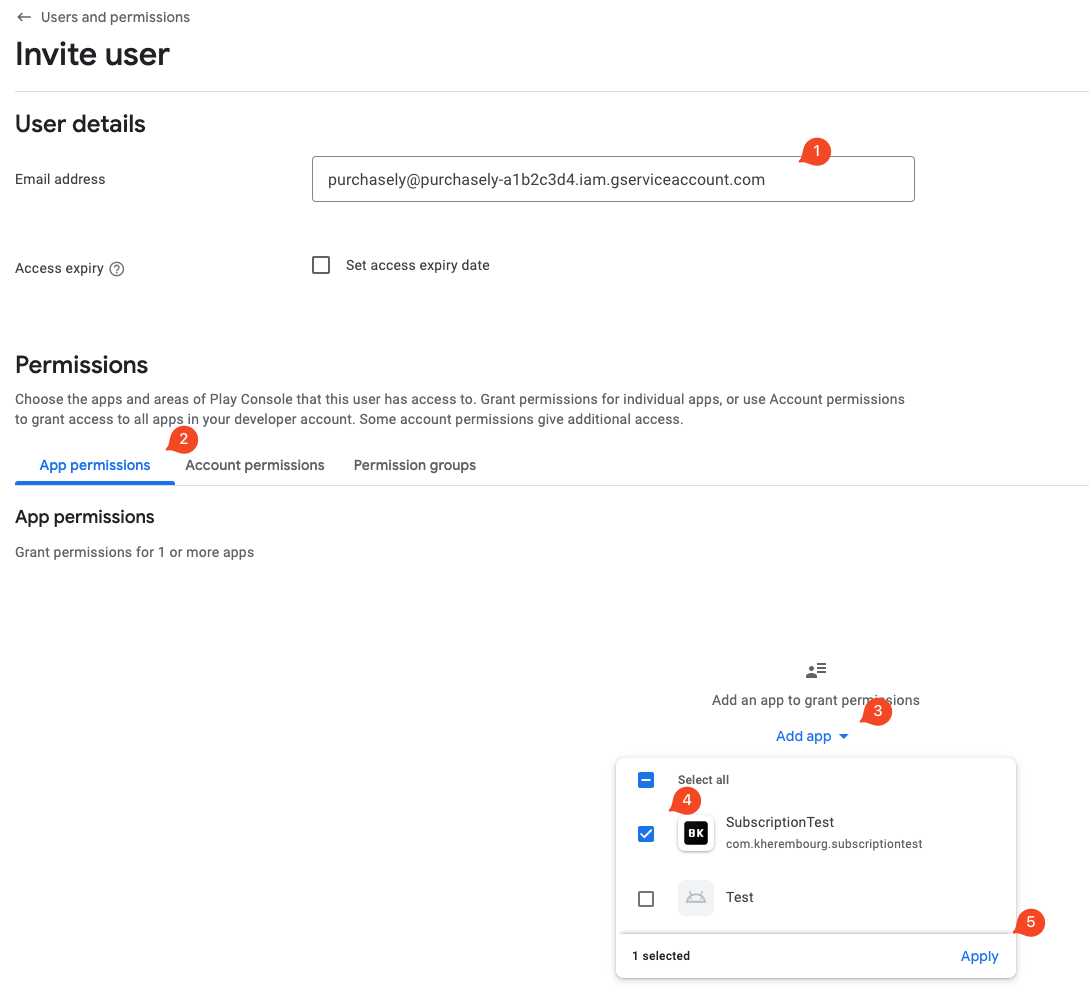
Under the tab App permissions select the application corresponding to the desired App Bundle ID
Once you've clicked on Apply, make sure the following permissions are selected:
- View app information and download bulk reports
- View financial data, orders, and cancellation survey responses
- Manage orders and subscriptions
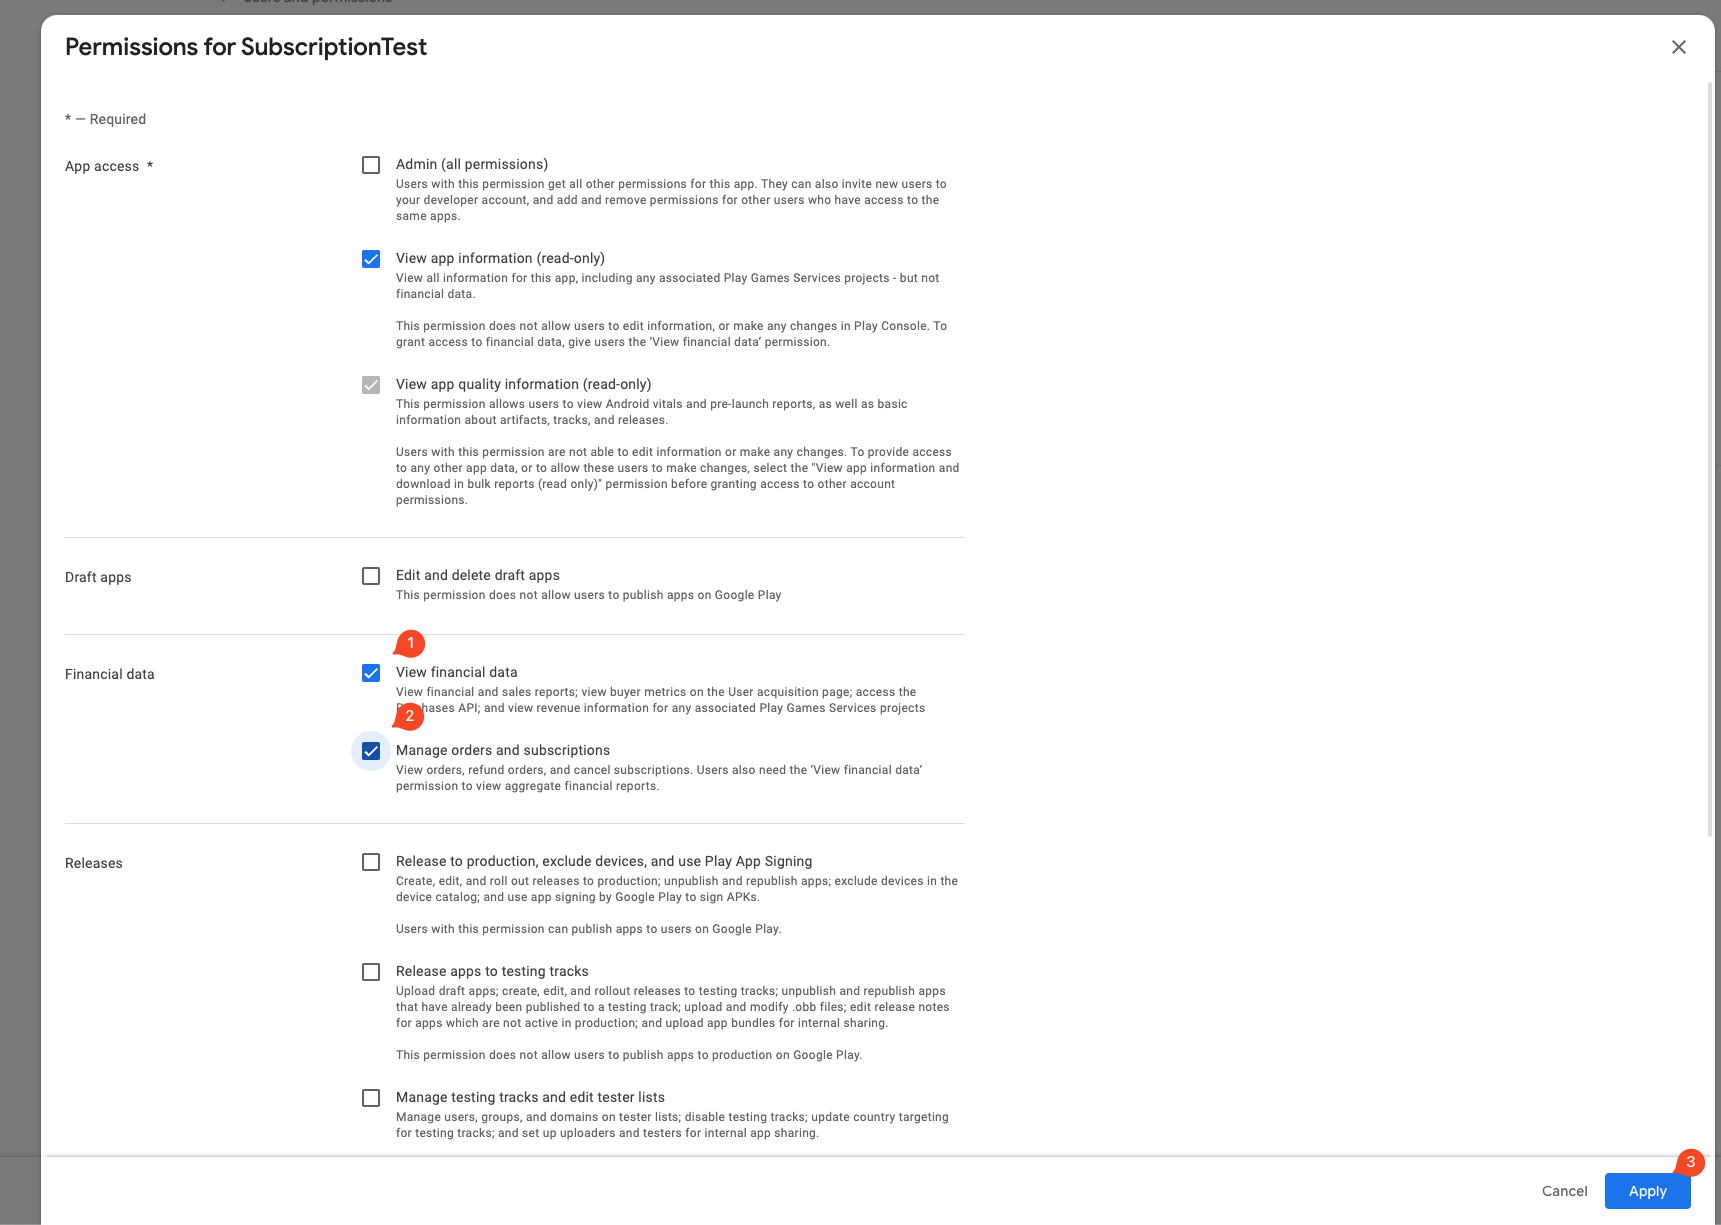
Select the appropriate permissions then click on Apply
Finally, click on Invite user to grant access to your service account
Server-to-Server Notifications
We connect to Google Cloud Pub/Sub automatically for you by using your service account access.
Finalize the S2S connection by clicking on Connect to Google in the Purchasely Console and let it guide you.
If you already have it configured with your own server or another provider, after clicking on the button select the topic that you have configured. Purchasely will add a subscription to the same topic to also receives notifications without other steps required on your side.
Manual configurationIf the button is red, it means that we do no have the right to configure Pub/Sub notifications from Google cloud with the Access Key you have provided. In that case, you need to configure Server to Server notifications manually