Localization
This page describes details on localization options provided by Purchasely
The Purchasely Console lets you personalize your app in any language you want.
Let us look at different localization options.
App Localization:
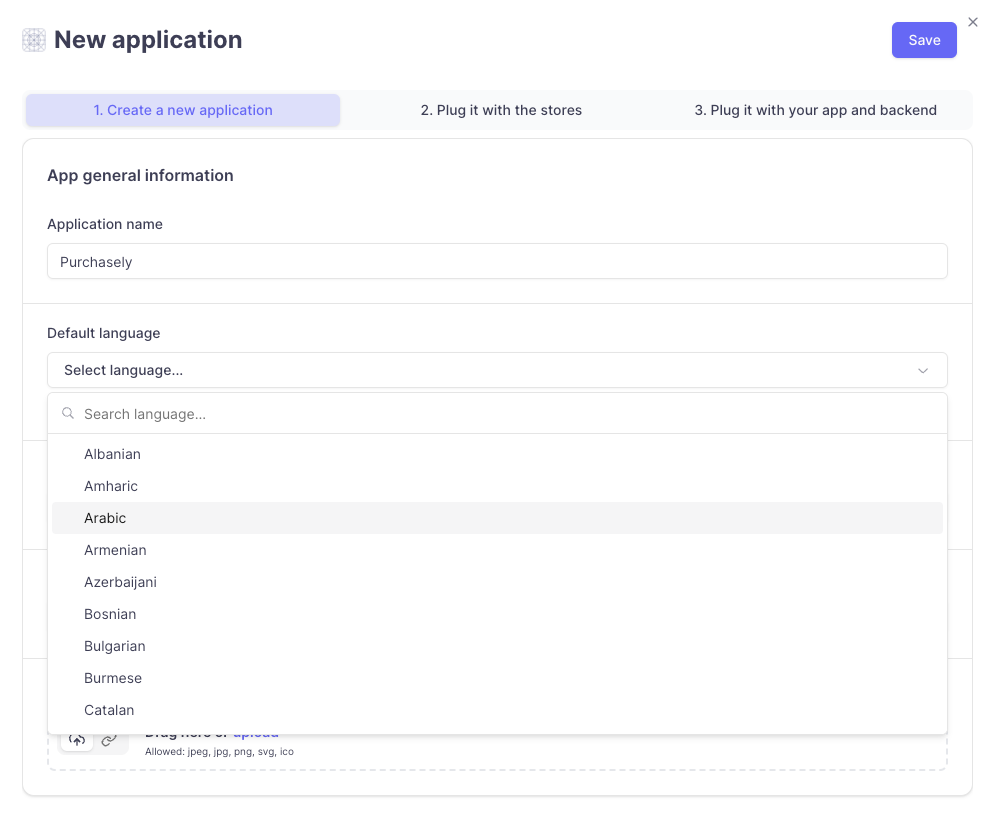
When a new application is created in the Purchasely Console, you will be asked to choose the default language. Once you have chosen this language, you can't change it. This default language is automatically added to your paywall. The wording of the footer in the paywall will align with the language chosen under localization.
Paywalls Localization:
Paywalls can be localized in any number of languages. In order to add these languages to the paywall, you have to navigate to the
desired paywall-> Localization tab-> Press + -> From the list choose and add as many languages as you support in your application.
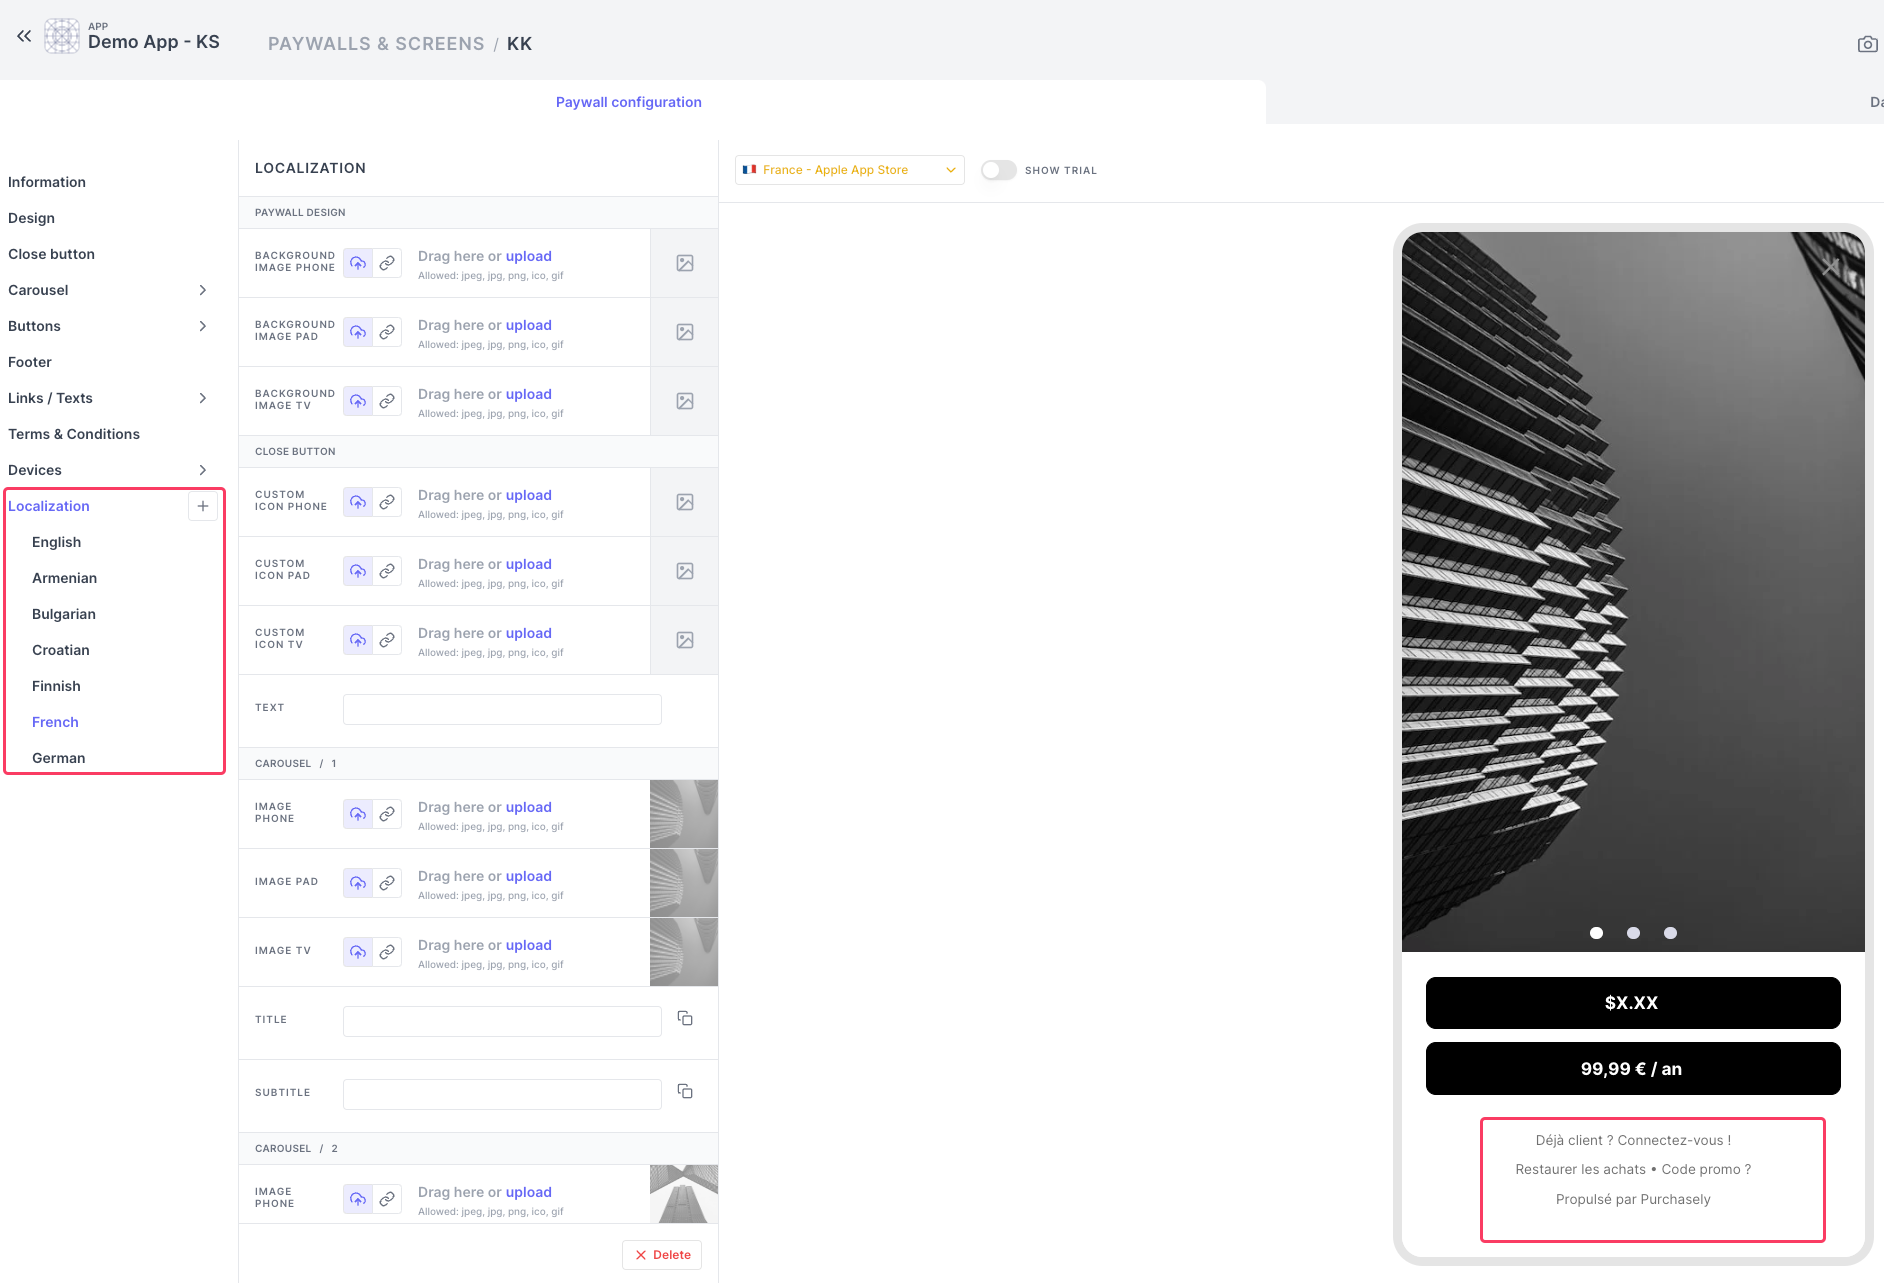
Once you have added these different languages, you have to fill the correct translations of all your copies in every language you have added.
By default, the images form the default language is transferred to the all the languages.
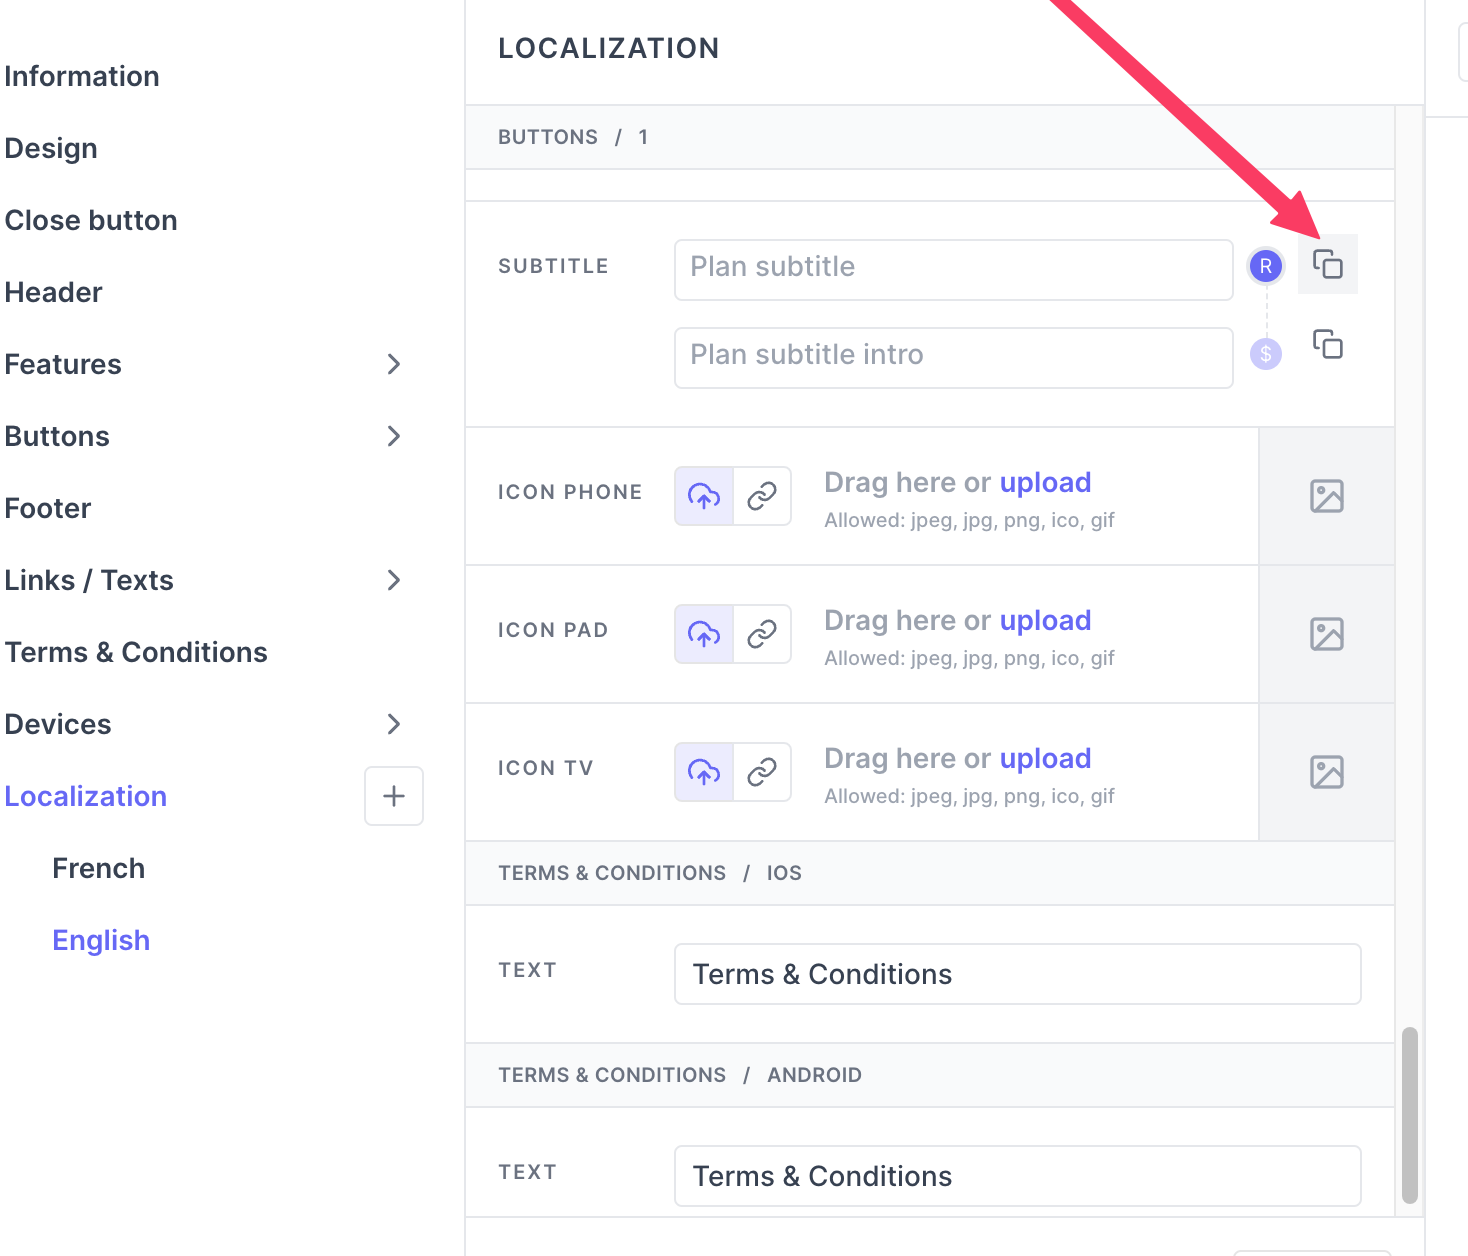
Quick tip:You can click on copy button to copy the text and default language and then replace the appropriate translation.
If your texts doesn't have any text, then you can also click copy button in the image section to use the same image as in the default language.
Smart localization
Purchasely Paywall Builder provides a smart way to localize the paywall for more than 10+ language, this smart localization feature is a time saver.
- This feature works on the principle of obtaining text from the CSV of translated texts you upload in the console. Every time you need to make a change, you have to upload a file with up to date text.
- You can only download the last uploaded file for your reference as the console will not store the historical uploads of these translation files.
How to use the localization feature?
Steps:
- Your translation file is ready and uploaded
- Enable localization mode for your paywalls
- Add a new language
- How to edit my existing translation
Step 1 Upload your translation file
-
Go to App settings -> General -> App Translate -> Upload your translation
-
If you need help building the translation file, feel free to Download a sample
-
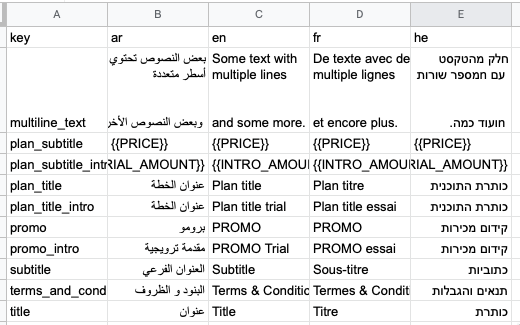
In the sample, you can find the key equivalent to the different titles, subtitles, promo titles etc
-
The language added using the language code in the column title as shown below:
-
Refer to this article before uploading your translation file- Tags article
-
You will find the latest upload date of the translation file.
Download your translation will help you know the contents of your previously uploaded translation file.
Step 2 Enable smart localization mode for your paywalls
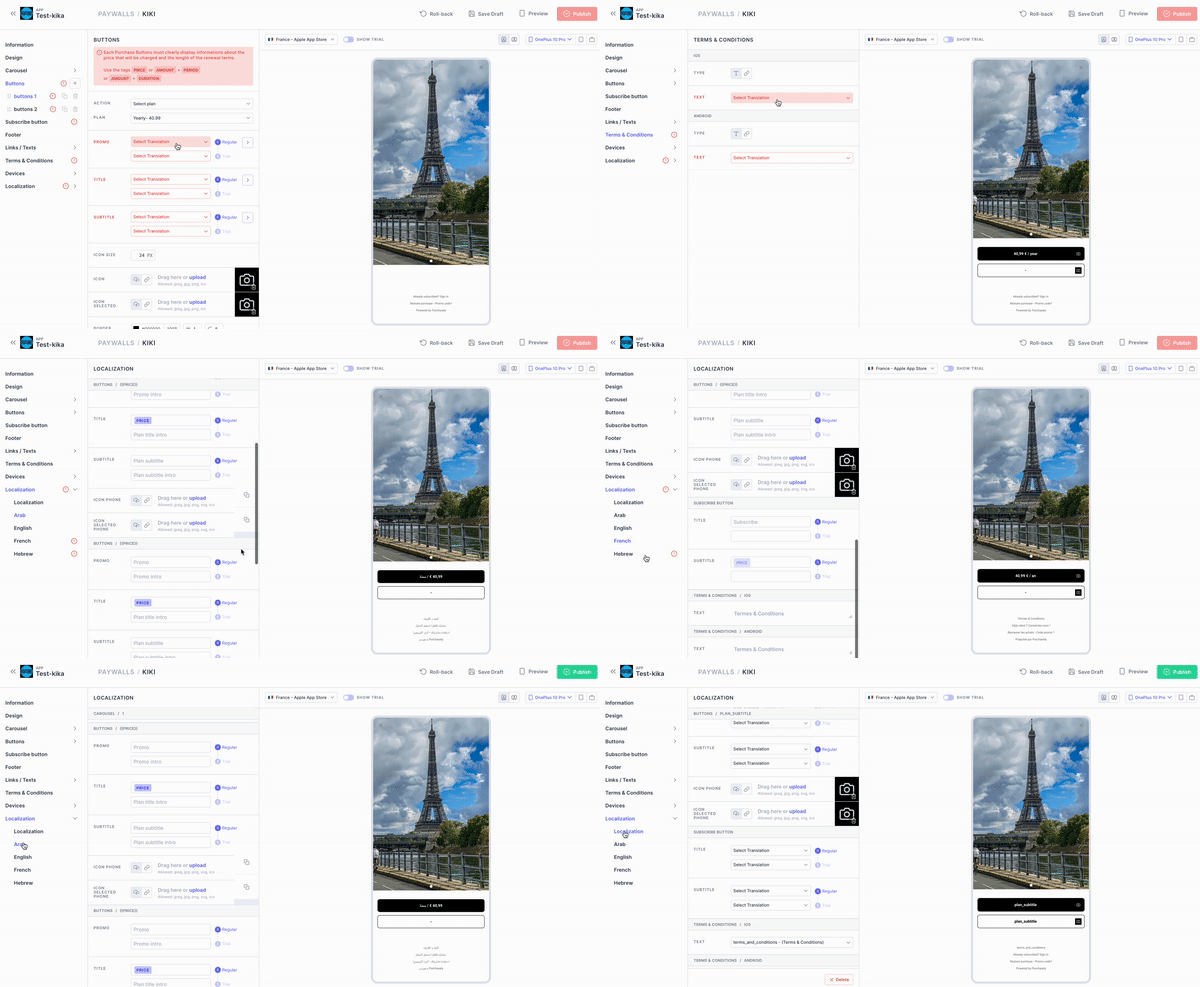
Enable localization for your paywall from Localization -> + -> Localization
⚠️The pop-up box displays an important message about the feature: if you proceed with the localization mode, the existing text on the paywall will be lost. Click Confirm to continue
ℹ️ If you decide to change your mind, you can use the rollback feature to revert to the latest published version of your paywall 😊
As soon as you confirm the above pop-up, your paywall will be wiped off.
You will find translations you have uploaded for all the languages you have added to the file.
You'll find all the translations you've uploaded for the languages included in the file.
You will be able to fill in every title and subtitle with the text you provided in the translation file.
Save and publish 👍
⚠️ Please make sure to be transparent about the price of the plan in the CTA buttons.
How to add a new language?
If you wish to add a new language, you'll need to upload a translation file.
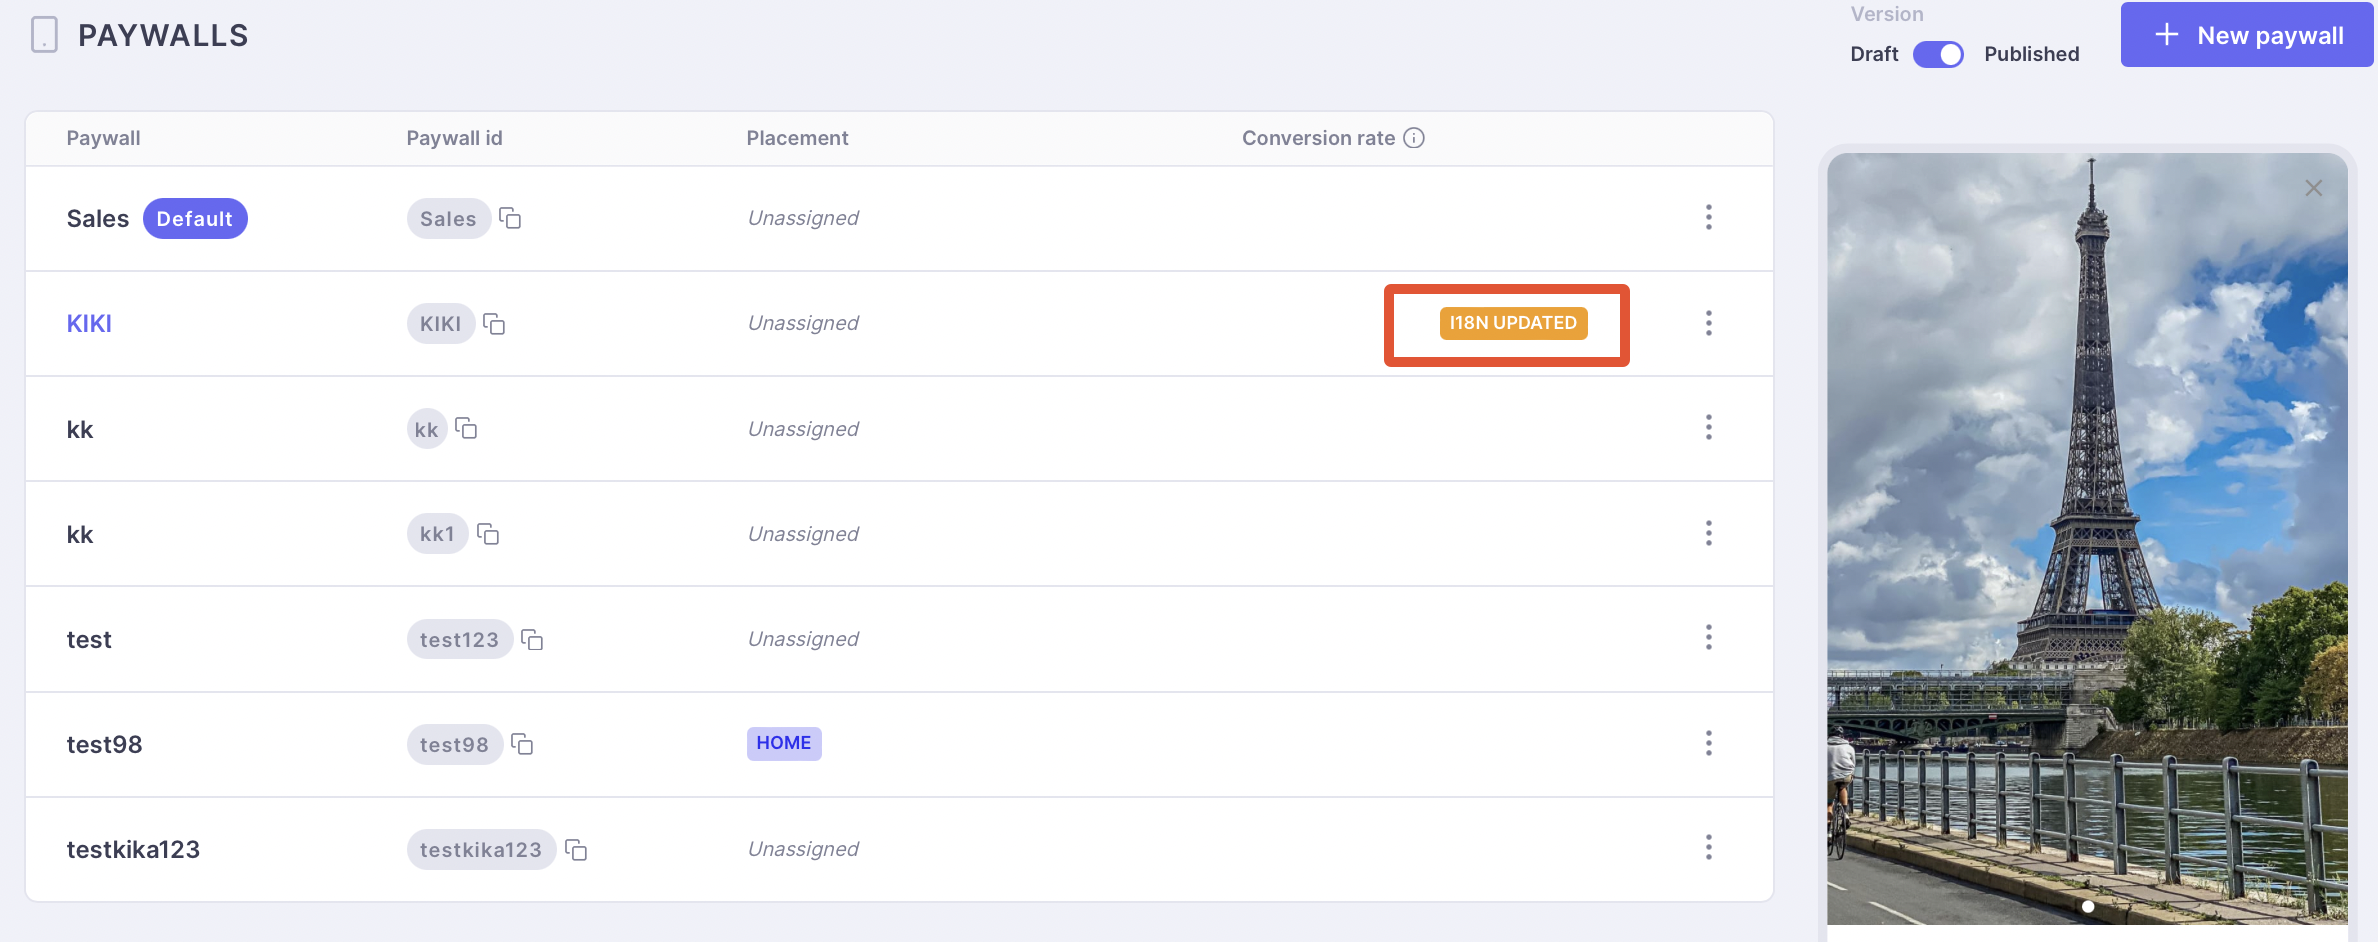
Once you have added the file, you will notice the paywalls that support localization are marked for localization updated.
Step 3
You will see the newly added language and you'll need to provide the corresponding visuals.
How to edit my existing translation?
If you want to make changes to an existing translation, you'll need to upload a file containing the updated text.
As soon as you uploaded a new file, you will see the paywalls that are localization enabled will be marked for localization updated.
Step 4 you can choose which text to update by selecting it from the new file.
Updated 3 months ago
