
Airship
This section describes how to activate the integration between Airship and Purchasely
If you have anonymous users in your app, we'll need the Airship channel to send purchase events to Airship on your behalf.
if let channelId = UAirship.channel()?.identifier {
	Purchasely.setAttribute(.airshipChannelId, value: channelId)
}
UAirship.shared().channel.id?.let {
Purchasely.setAttribute(Attribute.AIRSHIP_CHANNEL_ID, it)
}var channelId = UrbanAirship.getChannelId().then(channelId => {
Purchasely.setAttribute(Attributes.AIRSHIP_CHANNEL_ID, channelId);
}));Purchasely.setAttribute(PLYAttribute.airship_channel_id, "airship_channel_id");Purchasely.setAttribute(Purchasely.Attribute.AIRSHIP_CHANNEL_ID, "channelId");private PurchaselyRuntime.Purchasely _purchasely;
Purchasely.setAttribute(PLYAttribute.AIRSHIP_CHANNEL_ID, "channelId");Integrating Purchasely with Airship
The integration requires 5 steps:
- Activate the Airship integration in the Purchasely Console
- Enable the forwarding of Server Events in the Purchasely Console
- Enable the update of User Properties in the Purchasely Console
- Associate your users with an Airship ID
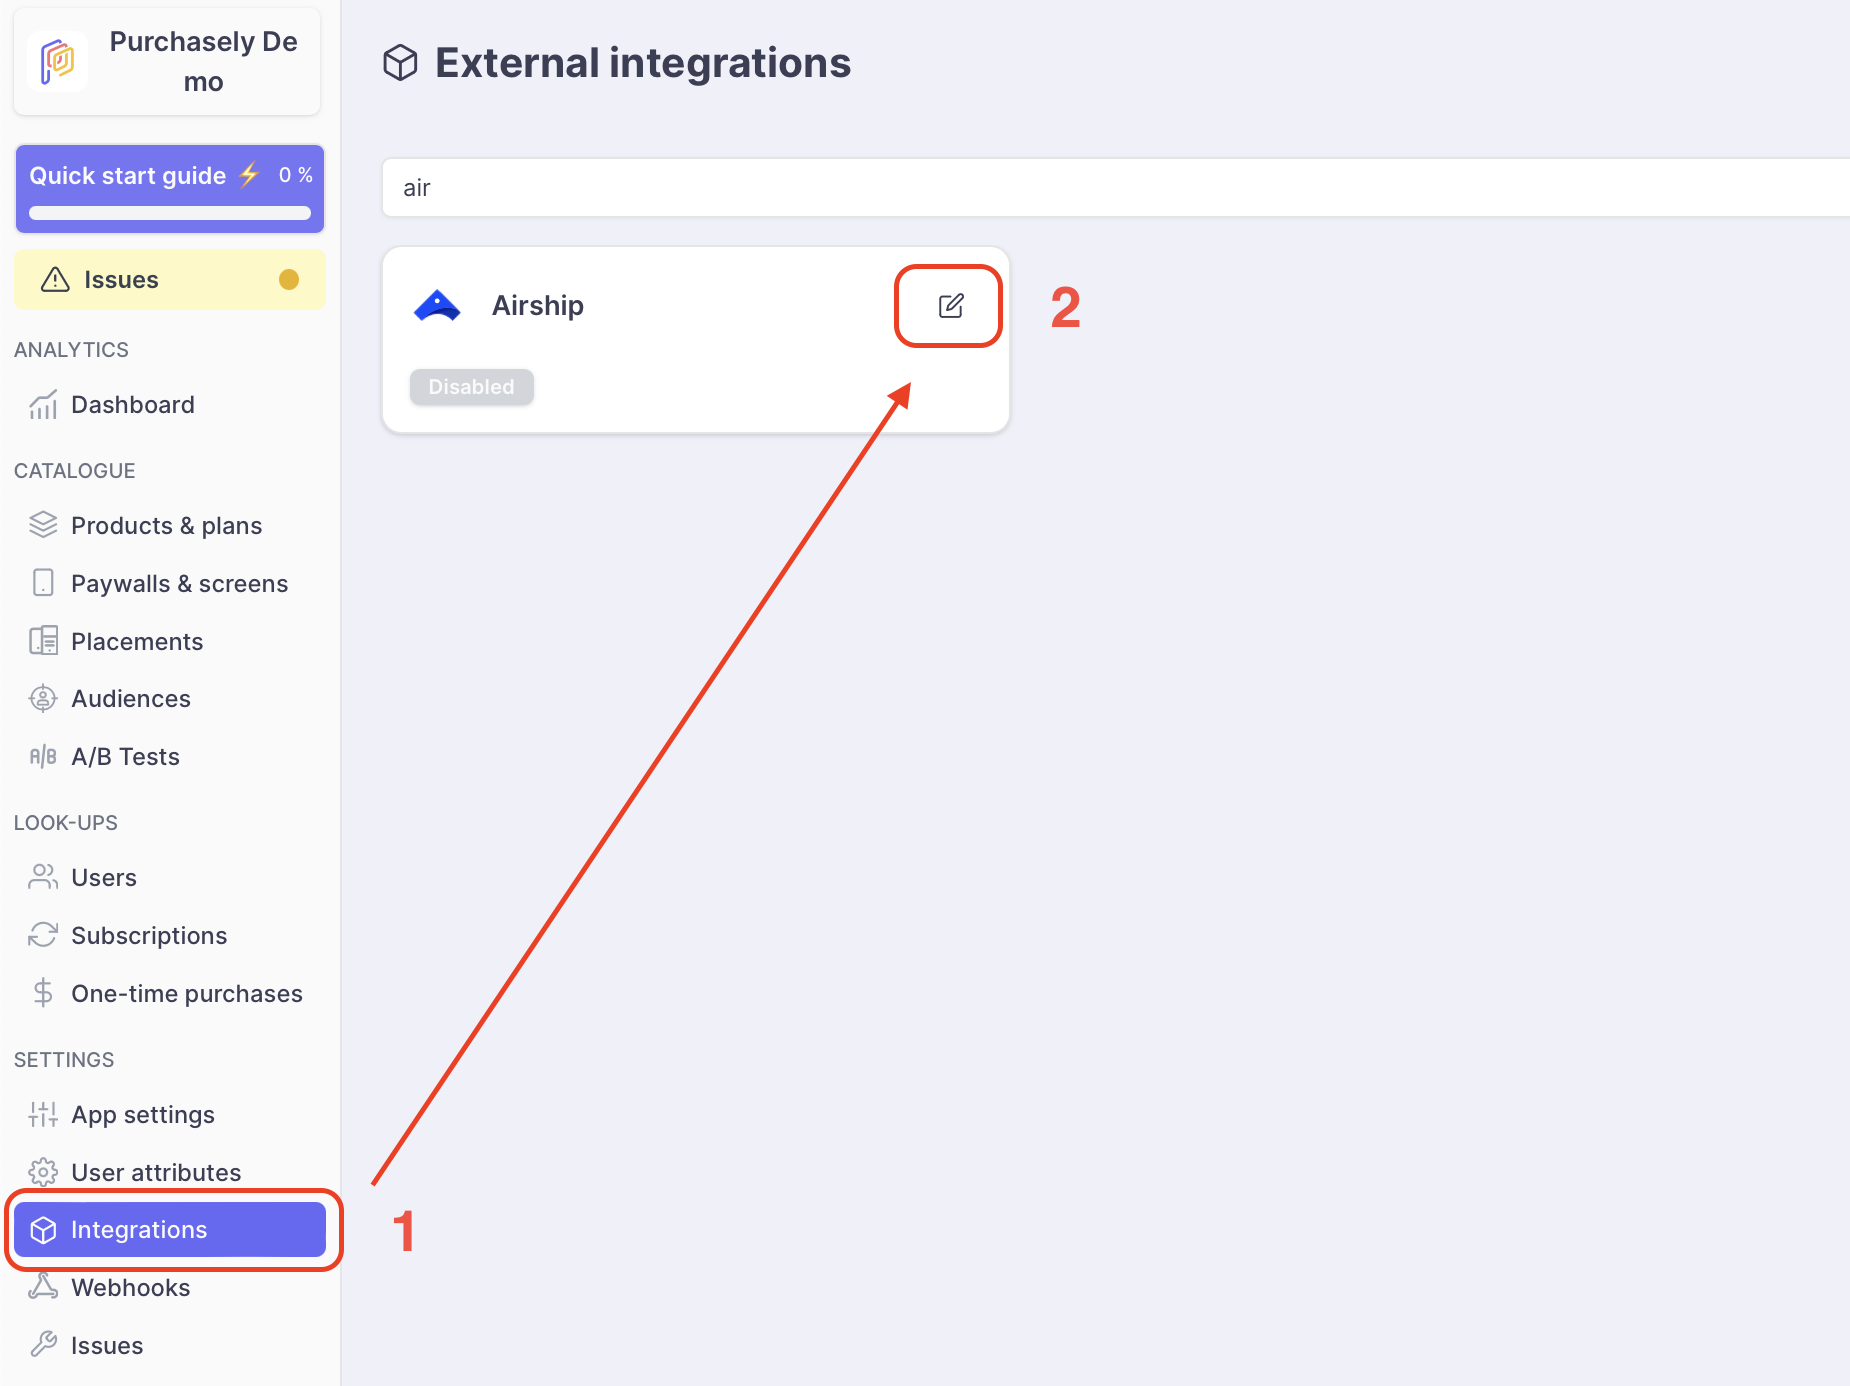
1 - Activate the Airship integration in the Purchasely Console
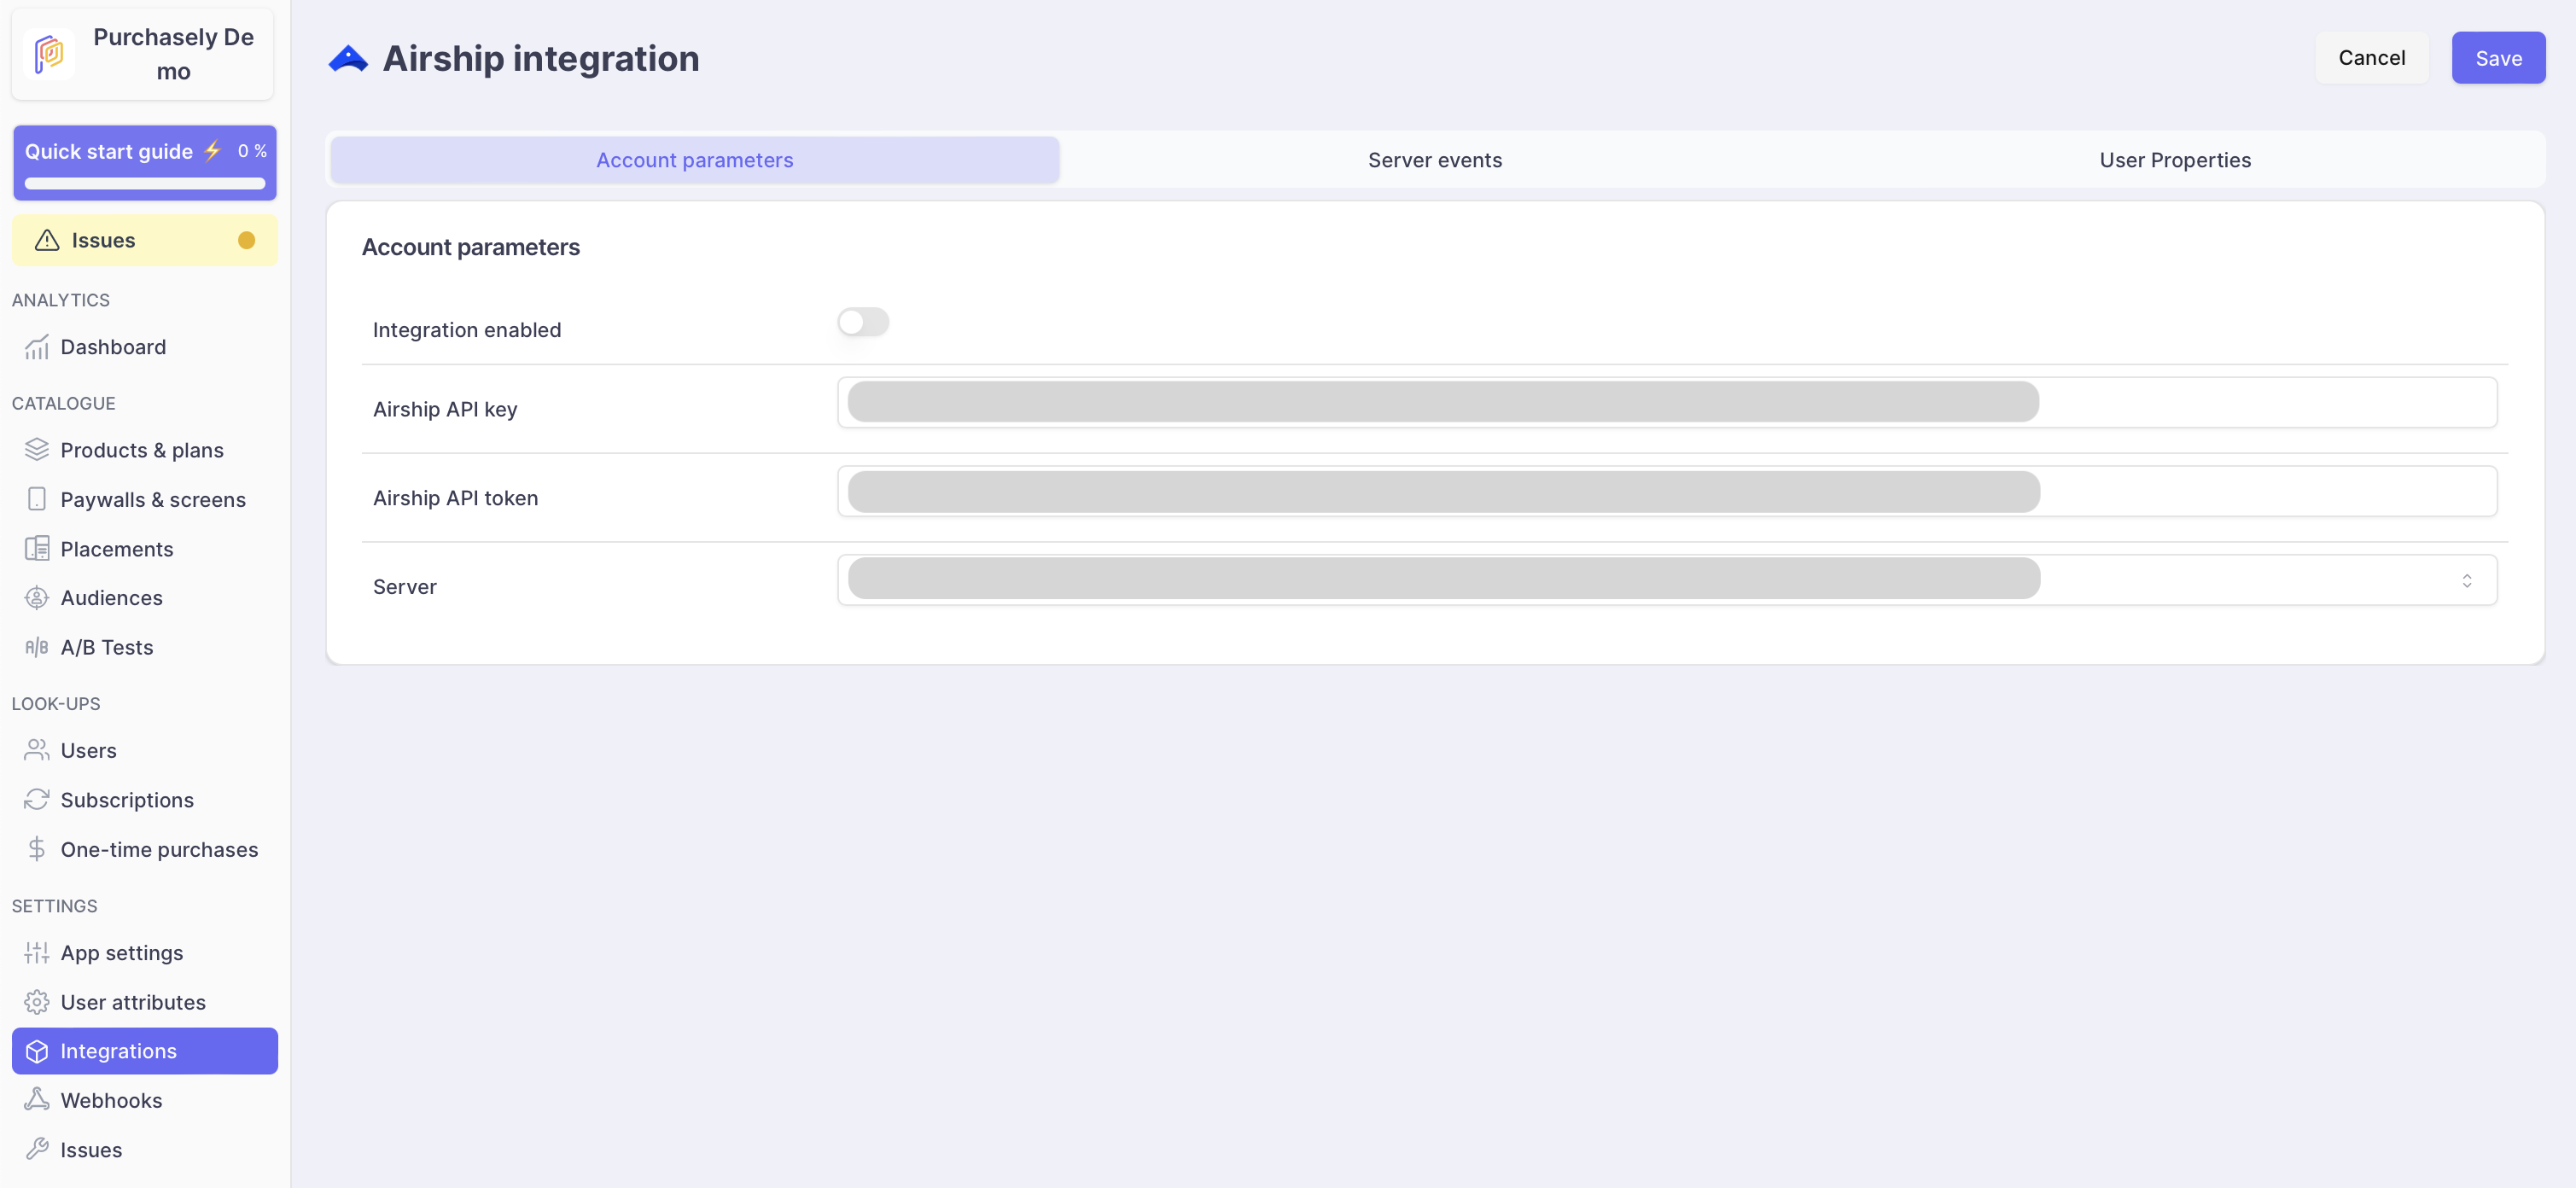
In the Purchasely Console, go to "Integration » Airship" and enable the integration.
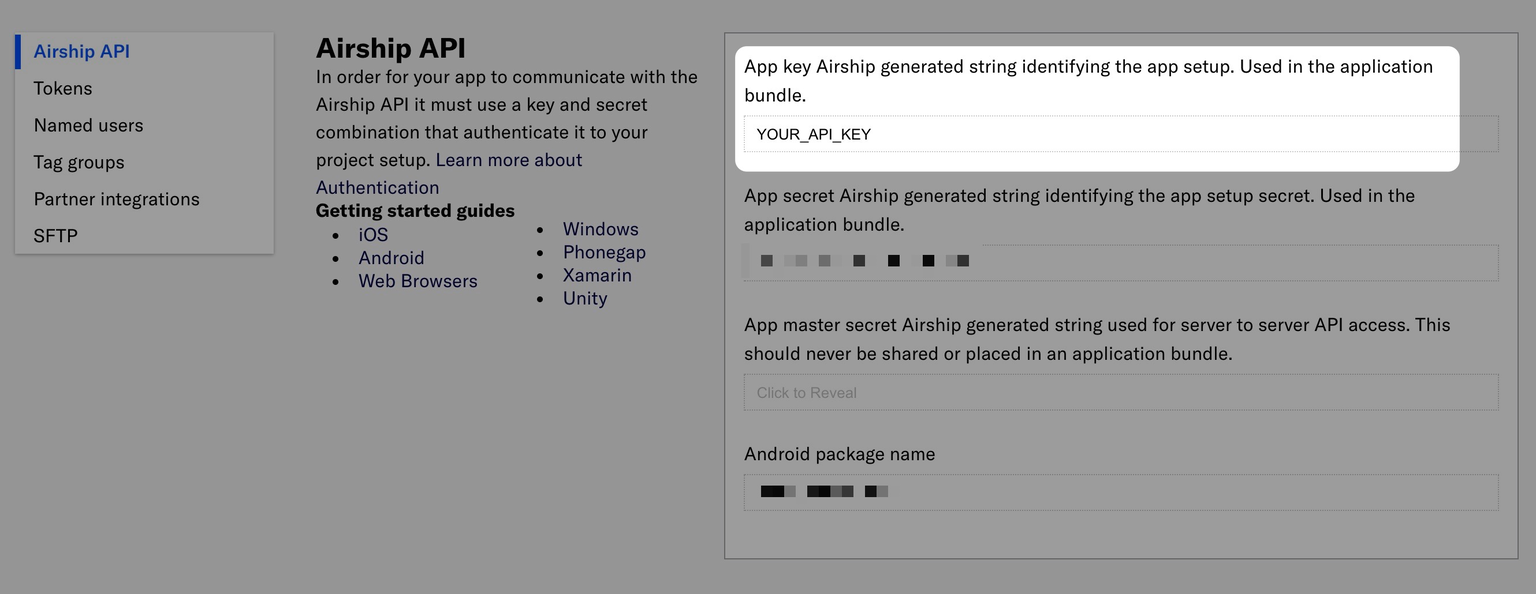
You'll find your "Airship API key" in your Airship console, section Settings » APIs & Integrations:
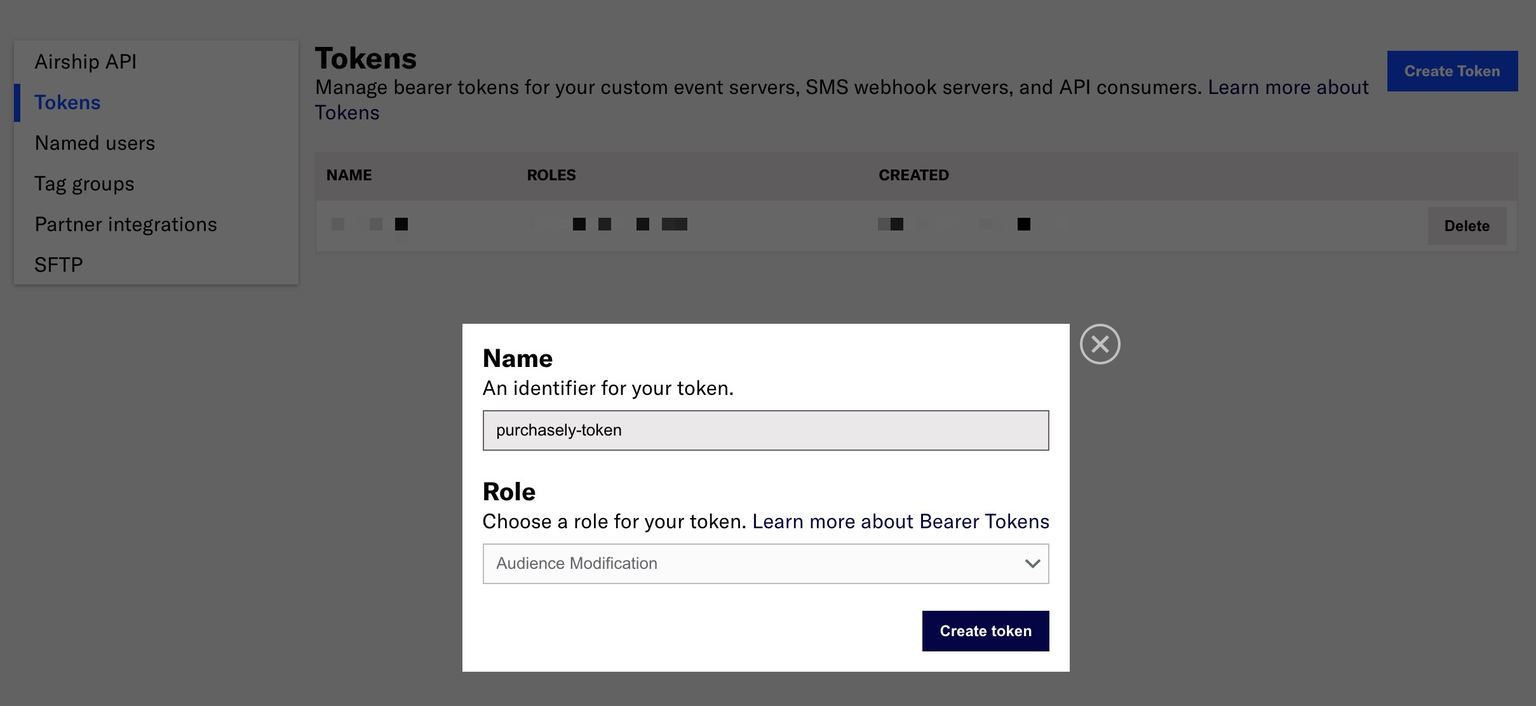
You need to generate the "Airship API token" in your Airship console, section Settings » APIs & Integrations » Tokens, with the "Audience Modification" role:
Finally, the "Server" to use depends on your app.
- If your Airship console is on the "go.airship.com" domain, then you'll need to choose the "go.urbanairship.com" server.
- If your Airship console is on the "go.airship.eu" domain, then you'll need to choose the "go.airship.eu" server.
2 - Enable the forwarding of Server Events in the Purchasely Console
In the Purchasely Console, under the tab Server Events, you can choose with Server Events must be forwarded to Airship.
If you want to, you can rename the events sent to Airship:
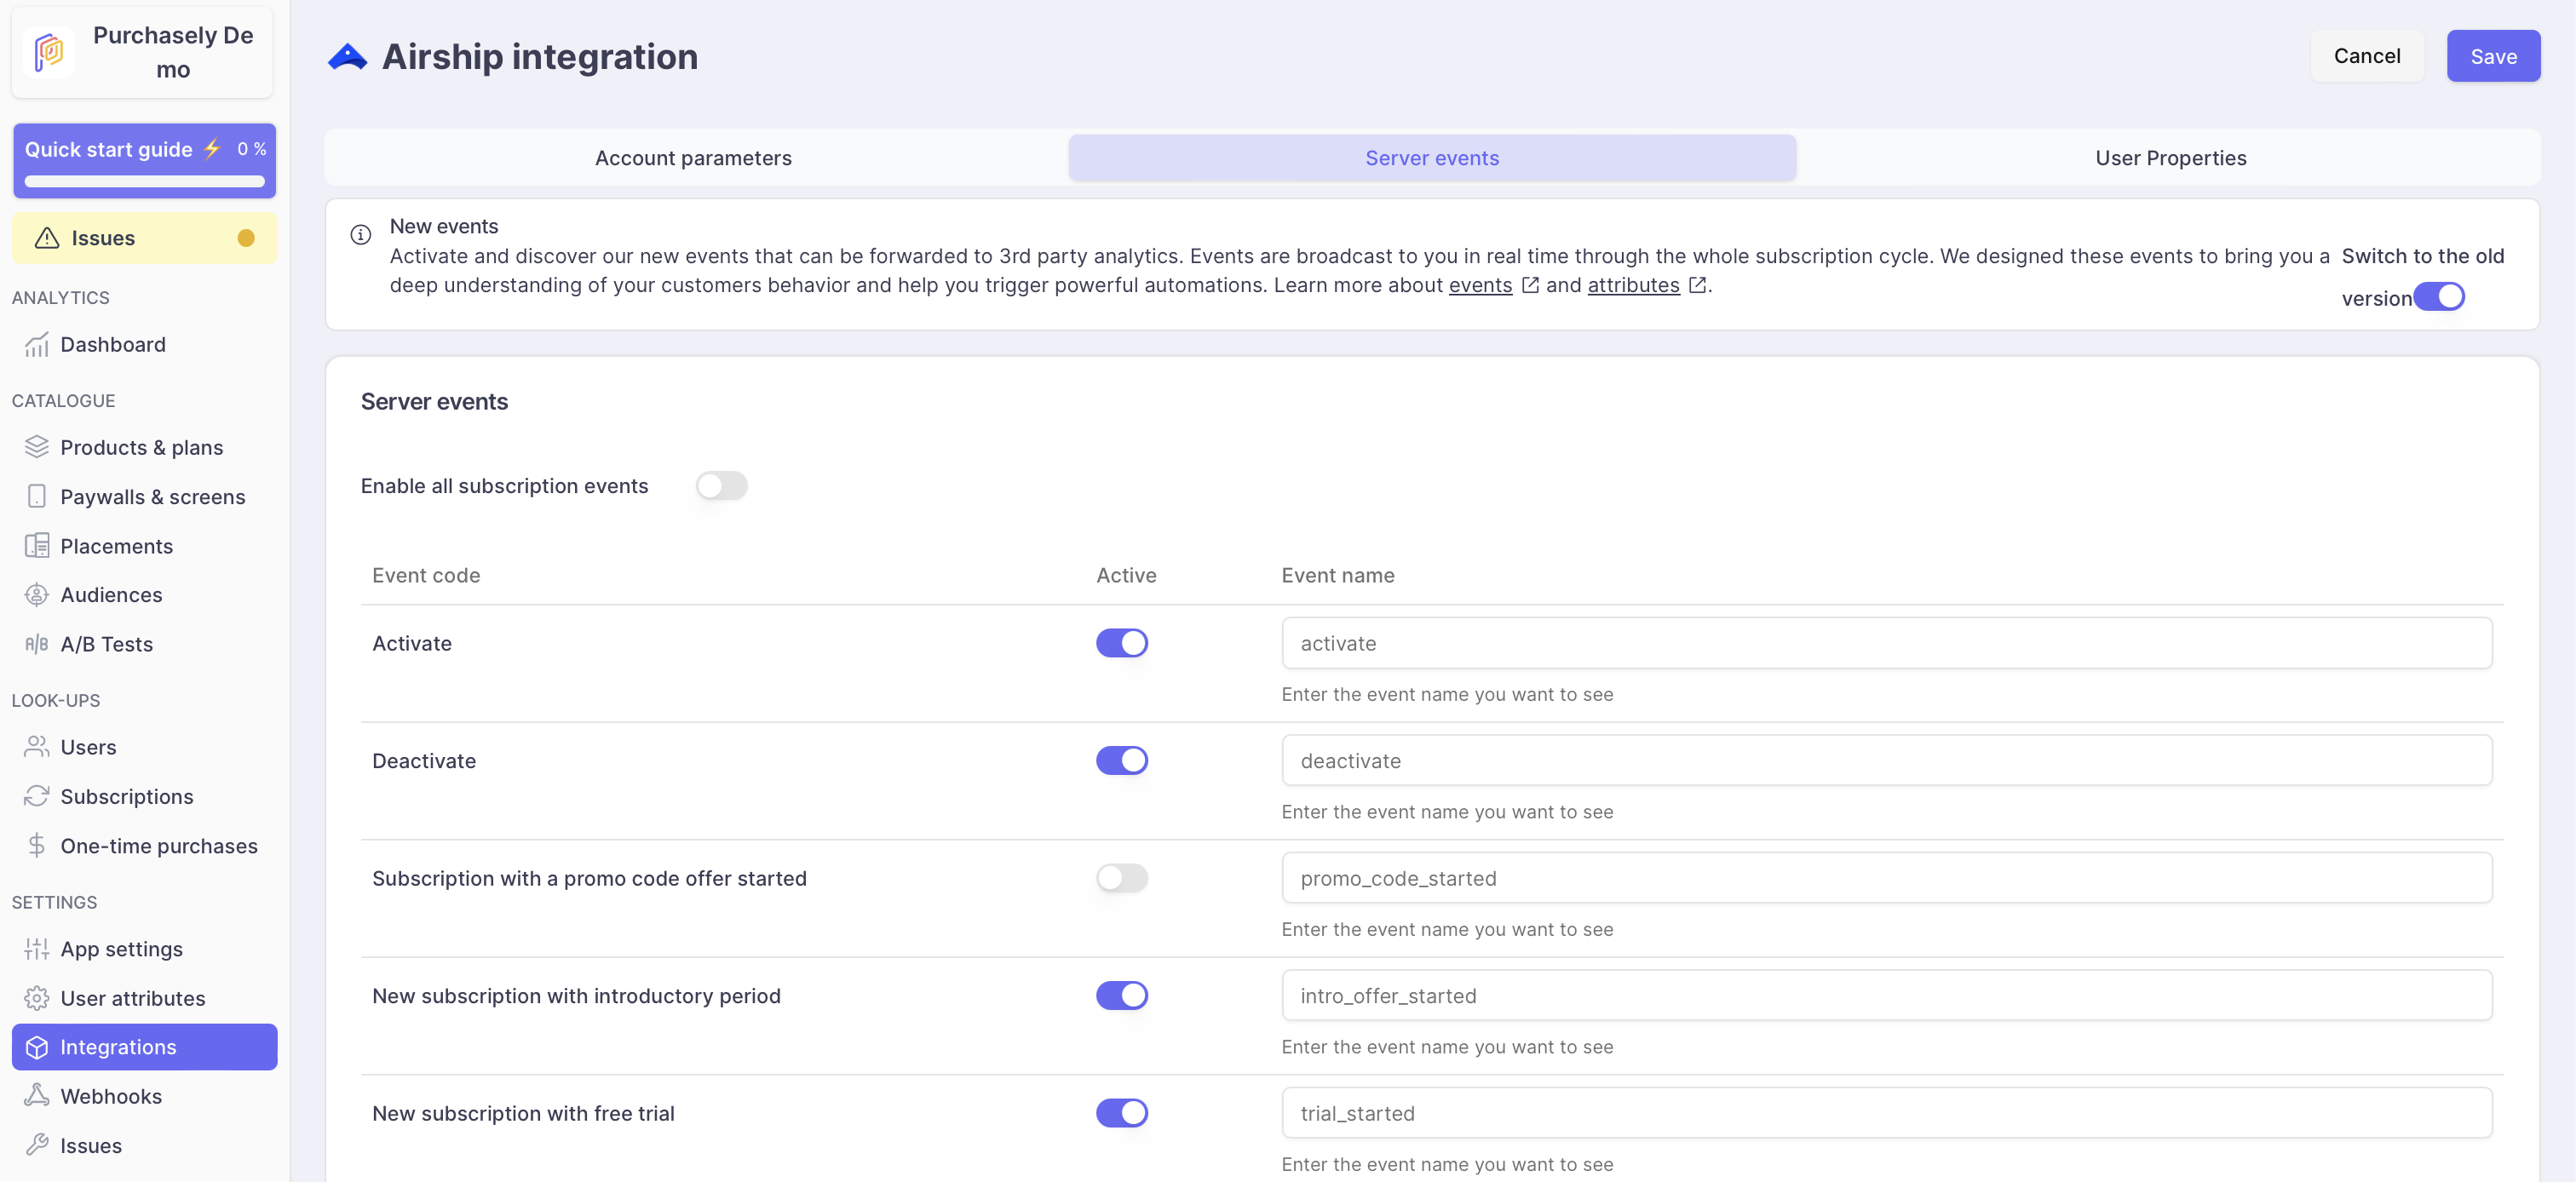
(Optional) Events names can be overridden to match with your tacking plan.
Keep in mindUI / SDK Events triggered by the Purchasely SDK cannot be forwarded to Airship directly from the Purchasely Console.
This has to be done at the app level by intercepting the SDK events and forwarding them to the Airship SDK.
Sample event sent by Purchasely to Airship:
{
  "body": {
    "name": "purchase_validated_server",
    "properties": {
      "application_name": "Purchasely",
      "application_package_id": "com.purchasely",
      "application_platform": "IOS",
      "plan_id": "PURCHASELY_PLUS_MONTHLY",
      "plan_name": "Monthly",
      "plan_store_product_id": "com.purchasely.plus.monthly",
      "plan_type": "RENEWING_SUBSCRIPTION",
      "product_id": "PURCHASELY_PLUS",
      "product_name": "Purchasely +",
      "store": "APPLE_APP_STORE"
    }
  },
  "occurred":"2021-03-24T17:15:01",
  "user":{
    "named_user_id": "jg"
  }
}
3 - Enable the update of User Properties in the Purchasely Console
In the Purchasely Console, under the tab User Properties, you can choose with User Properties should be updated in real time along the subscription lifecycle.
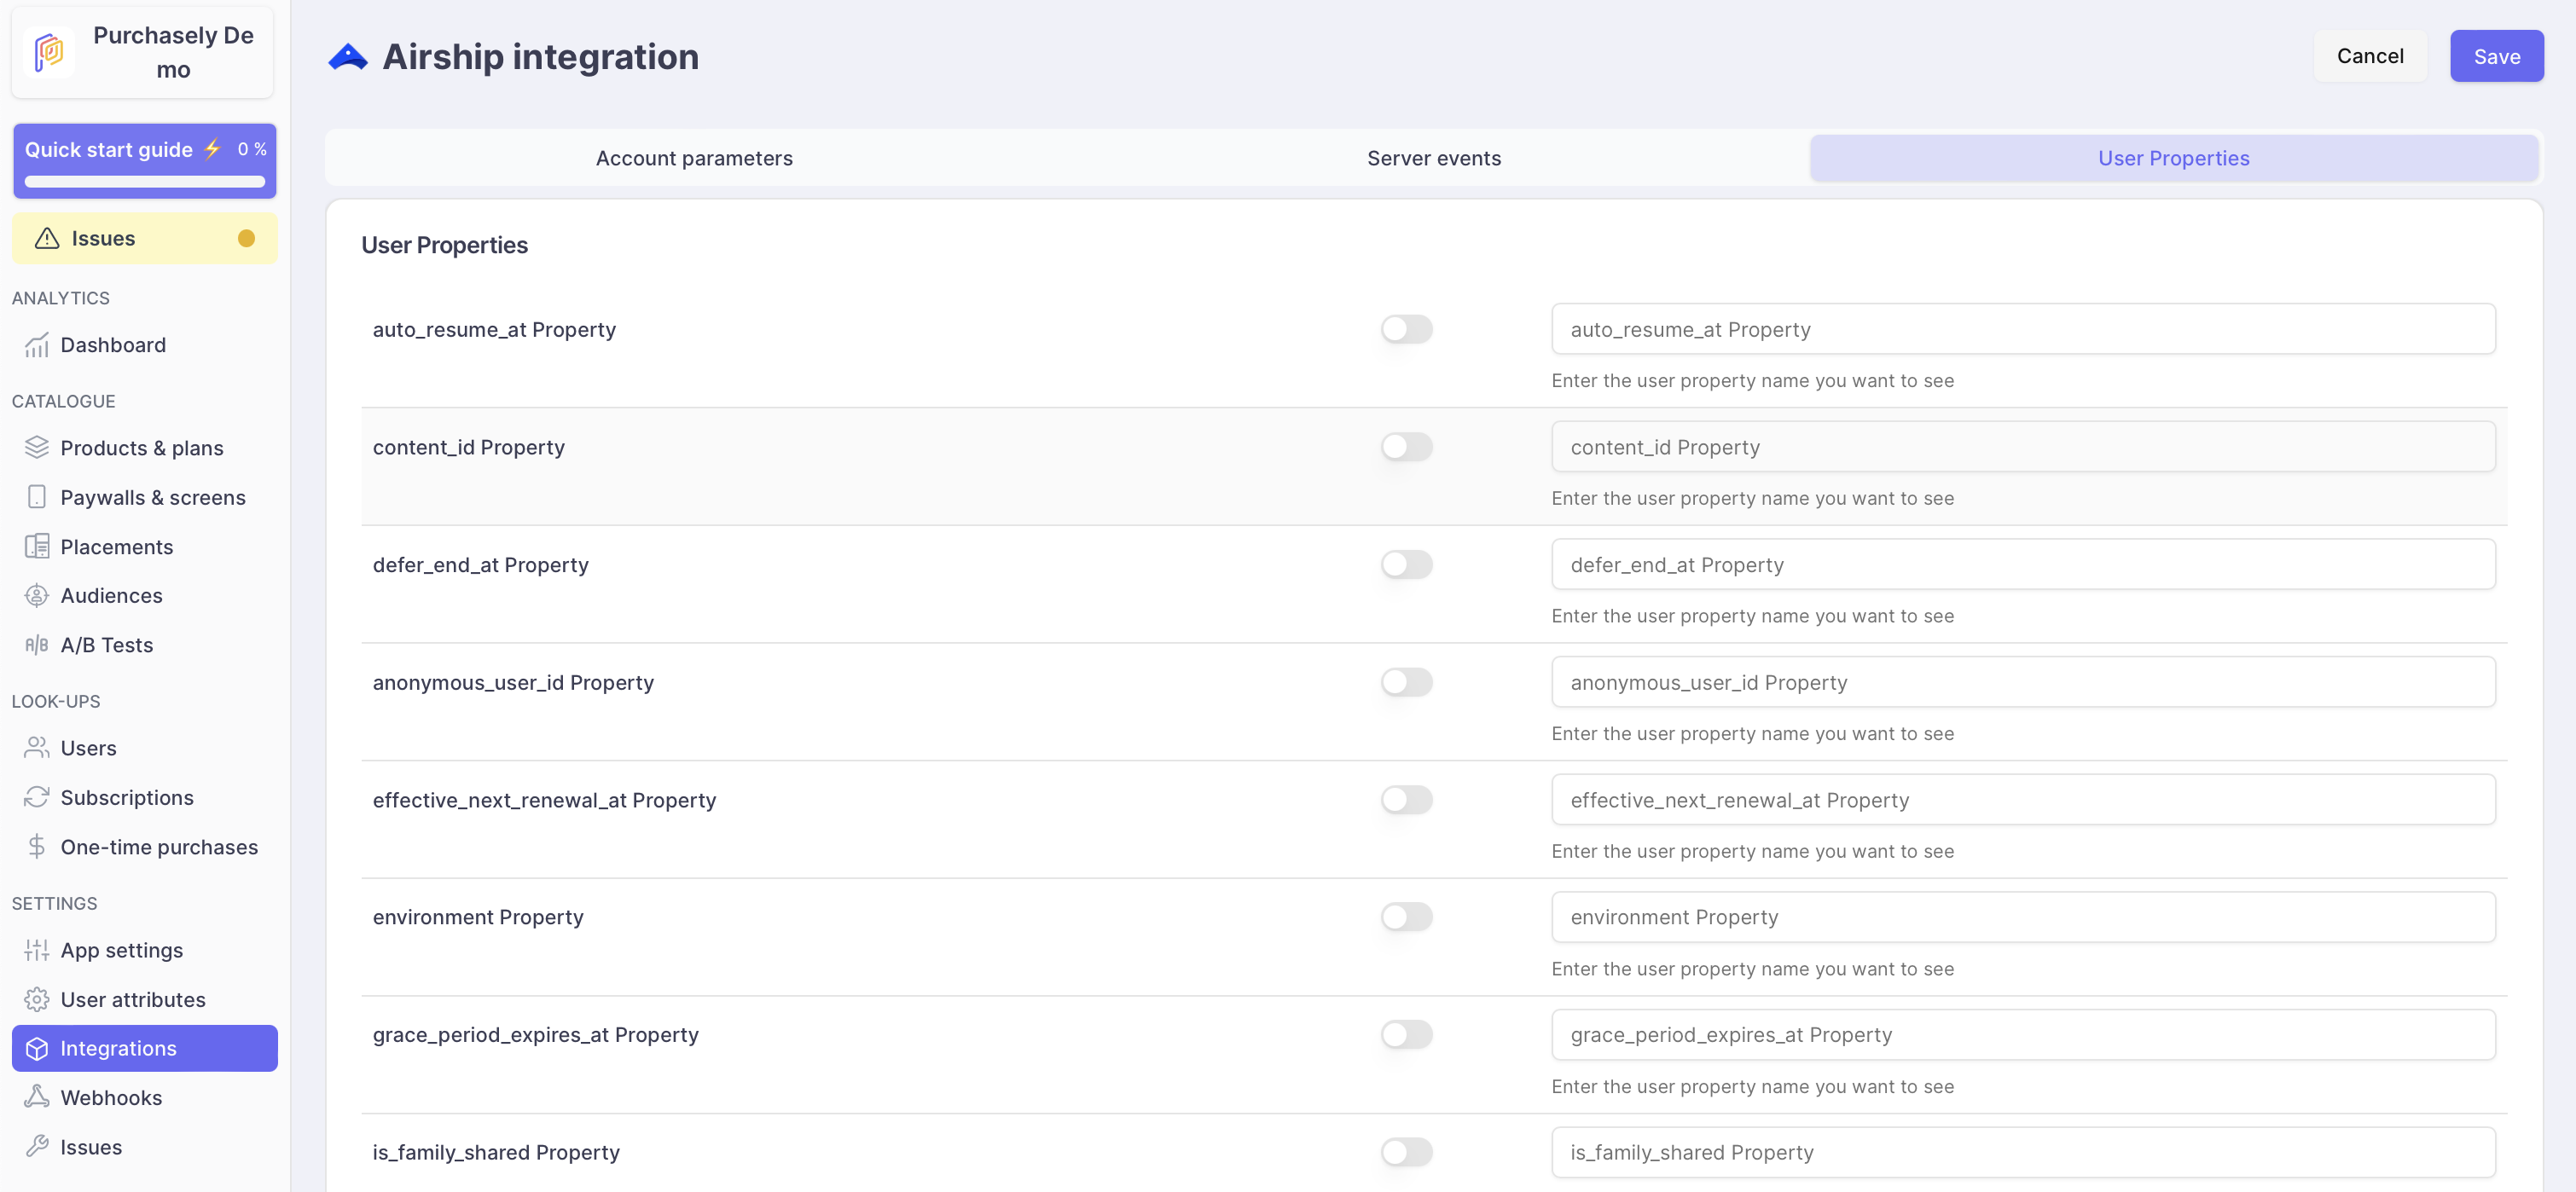
(Optional) User Properties names can be overridden to match with your nomenclature.
Keep in mindThe overridden name must only contain alphanumeric lowercase characters, underscores and dashes, as specified in the Airship documentation.
4 - Associate your users with an Airship ID
Naming your users allows our servers to send purchase events to Airship on your behalf.
You have two ways to associate your users:
- From within the app.
- From your server.
From within your app
In the Airship console, enable or disable Named Users in Settings » APIs & Integrations » Named Users.
In your app, when a user sign-in, associate their id in Airship.
If the Airship UserId differs from the Purchasely UserId, you can also pass the value you gave to Airship to Purchasely SDK (see second code block):
UAirship.namedUser().identifier = "theUserId"

Purchasely.setAttribute(.airshipUserId, value: "theUserId")
UAirship.shared().namedUser.id = "YOUR_USER_ID"
Purchasely.setAttribute(Attribute.AIRSHIP_USER_ID, "YOUR_USER_ID")UAirship.setNamedUser("YOUR_USER_ID")
Purchasely.setAttribute(Attributes.AIRSHIP_USER_ID, "YOUR_USER_ID");Purchasely.setAttribute(PLYAttribute.airship_user_id, "airship_user_id");UAirship.setNamedUser("YOUR_USER_ID")
Purchasely.setAttribute(Purchasely.Attribute.AIRSHIP_USER_ID, "YOUR_USER_ID");private PurchaselyRuntime.Purchasely _purchasely;
Purchasely.setAttribute(PLYAttribute.AIRSHIP_USER_ID, "userId");
For further informationfurther information on "named users" can be found here
From your server
By restricting association to server-side calls only, you have the added security of requiring your master secret to be verified after each call. While increasing security, you also lose the convenience of having your application automatically associate named users on login. Most apps do not require this additional security. But, if your app deals with extremely sensitive data, you may want to leave this setting disabled and associate named users exclusively through the API.
Use the Airship API to associate your users here:
require 'urbanairship'

UA = Urbanairship
airship = UA::Client.new(key: '<app key>', secret: '<master secret>')

named_user = UA::NamedUser.new(client: airship)
named_user.named_user_id = 'user-id-1234'
named_user.associate(
    channel_id: 'df6a6b50-9843-0304-d5a5-743f246a4946',
    device_type: 'ios'
  )
import urbanairship as ua
airship = ua.Airship('<app key>', '<master secret>')
named_user = ua.NamedUser(airship, 'user-id-1234')
resp = named_user.associate('df6a6b50-9843-0304-d5a5-743f246a4946', 'ios')UrbanAirshipClient client = UrbanAirshipClient.newBuilder()
.setKey("<app key>")
.setSecret("<master secret>")
.build();
NamedUserRequest request = NamedUserRequest.newAssociationRequest()
.setChannel("df6a6b50-9843-0304-d5a5-743f246a4946", ChannelType.IOS)
.setNamedUserId("user-id-1234");
Response<String> response = client.execute(request);Handle anonymous users
If you have anonymous users in your app, we'll need the Airship channel to send purchase events to Airship on your behalf.
if let channelId = UAirship.channel()?.identifier {
	Purchasely.setAttribute(.airshipChannelId, value: channelId)
}
UAirship.shared().channel.id?.let {
Purchasely.setAttribute(Attribute.AIRSHIP_CHANNEL_ID, it)
}var channelId = UrbanAirship.getChannelId().then(channelId => {
Purchasely.setAttribute(Attributes.AIRSHIP_CHANNEL_ID, channelId);
}));Purchasely.setAttribute(PLYAttribute.airship_channel_id, "airship_channel_id");Purchasely.setAttribute(Purchasely.Attribute.AIRSHIP_CHANNEL_ID, "channelId");private PurchaselyRuntime.Purchasely _purchasely;
Purchasely.setAttribute(PLYAttribute.AIRSHIP_CHANNEL_ID, "channelId");