

Application setup
This section describe how to configure your application in the Purchasely Console
Creating a new app
⚠️ Staging vs ProductionIf you have both a staging and a production apps
- start by creating a staging application in Purchasely's console
- implement and test on this app
- once done, you can create your production app in Purchasely's console and configure your full catalog and paywalls
If you have a staging environment but only 1 app for both staging and production
- we do not advise creating the application in our console as you can test in-app purchases with sandbox purchases.
- However, if you really need two API keys and/or need to set up two different webhooks, then you should create two applications. You will be able to duplicate screens between them, but you will have to manually set up the plans, placements, and audiences again
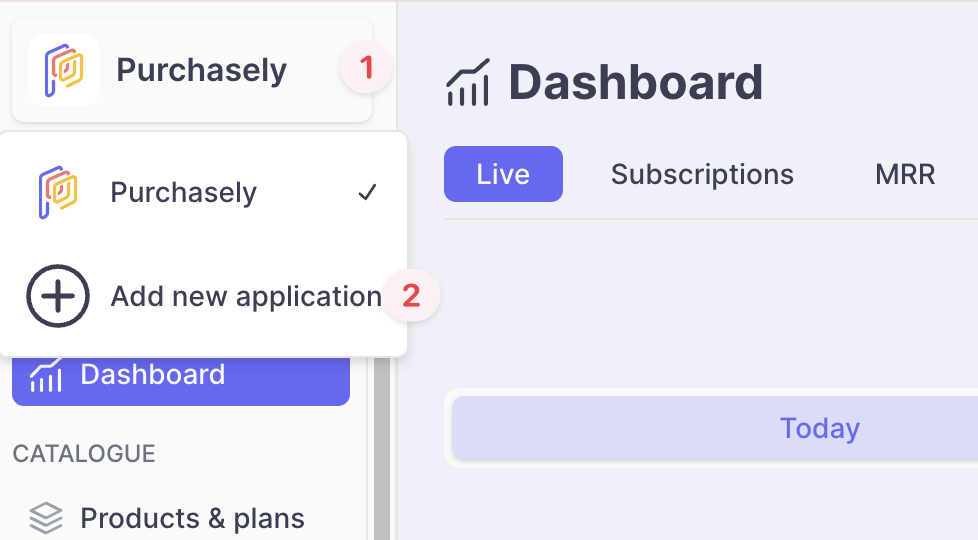
To create a new app, click on the ➕ Add new application in the drop-down menu in the top-left corner.
Then fill in the following form:
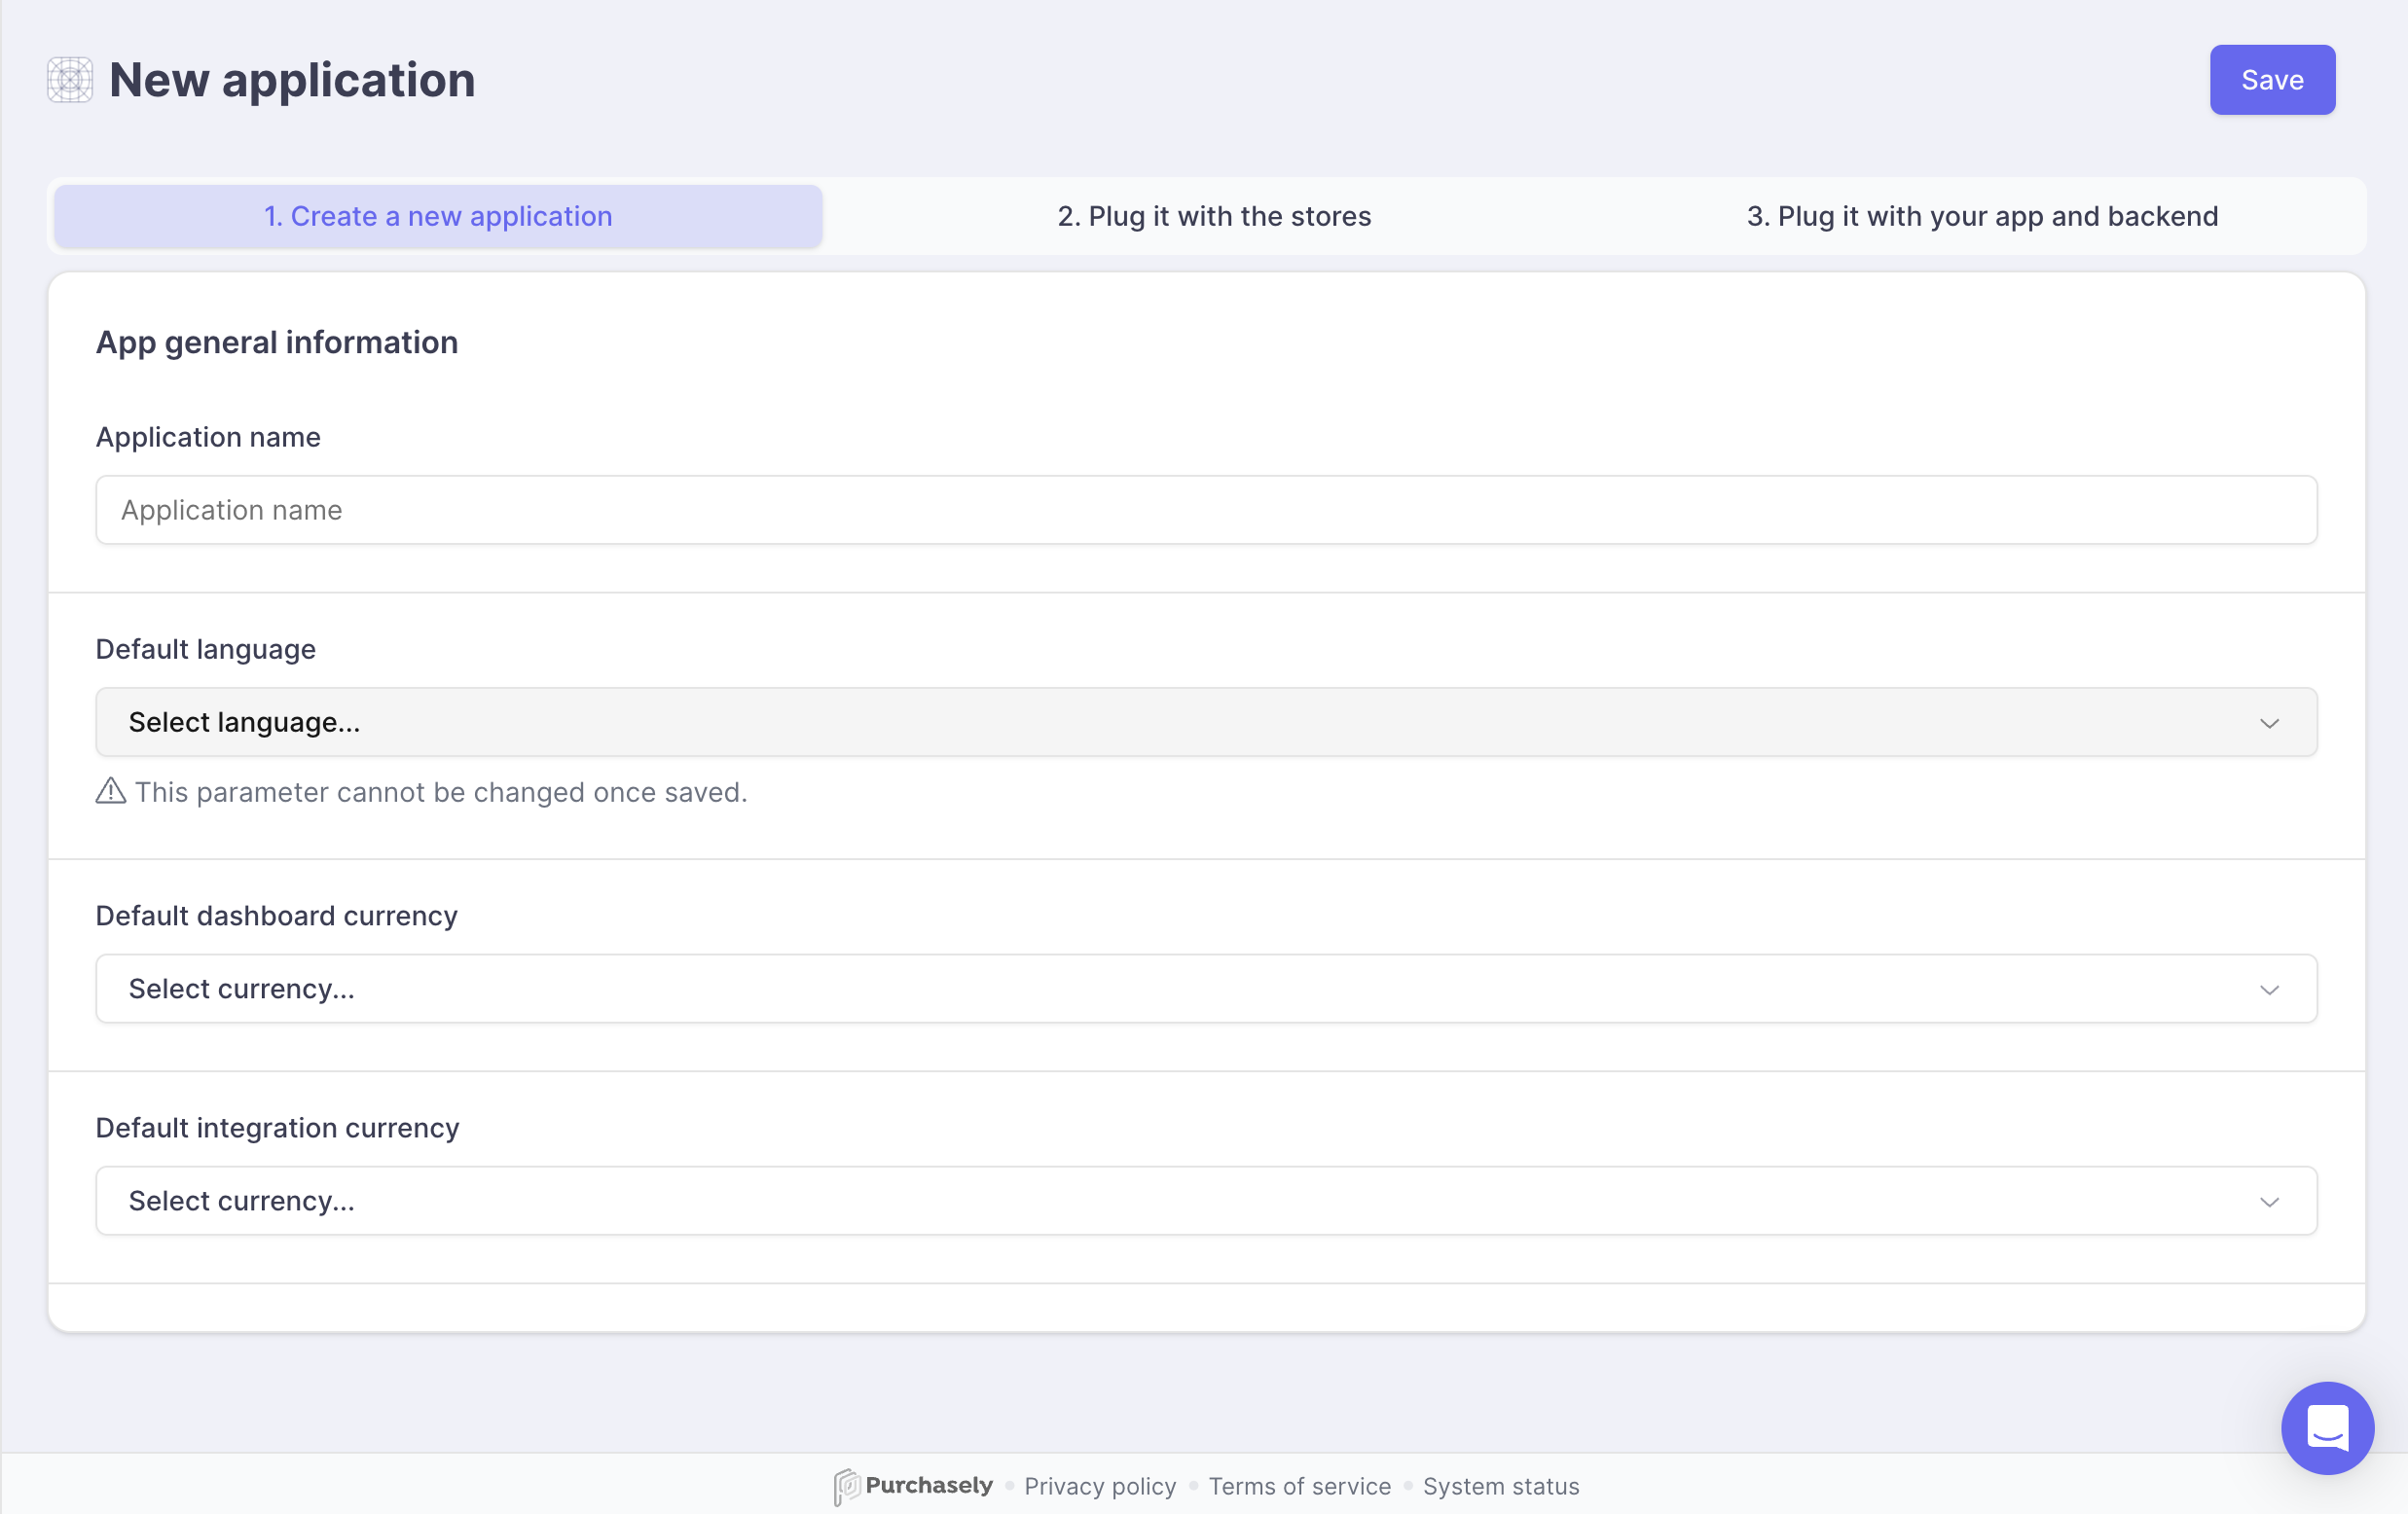
- Name: The name of the application as it will be displayed in the Purchasely Console.
This value can be changed after the app has been created. - Default Language: This will define which language will be used when the language on a user device is not supported by the app or not configured for an in-app screen
⚠️ This value cannot be changed later after the app has been created. ⚠️ - Default dashboard Currency: This is the currency unit displayed in your Purchasely Dashboards. All other currencies used for in-app payments will automatically be converted to the default currency.
This value can be changed after the app has been created. - Default Integration Currency: This currency unit is used to send price information to the Webhook and 3rd party integrations. 💡 It’s for attributes like
cumulated_revenues_in_eur. If you choose your integration currency to usd, then you would have the attributecumulated_revenues_in_usdinstead**
__This value can be changed after the app has been created.
Configuring the App stores
You can add up to four different App stores + Stripe to your app by clicking on the tab 2. Plug it with the stores then selecting the App store you want to configure.
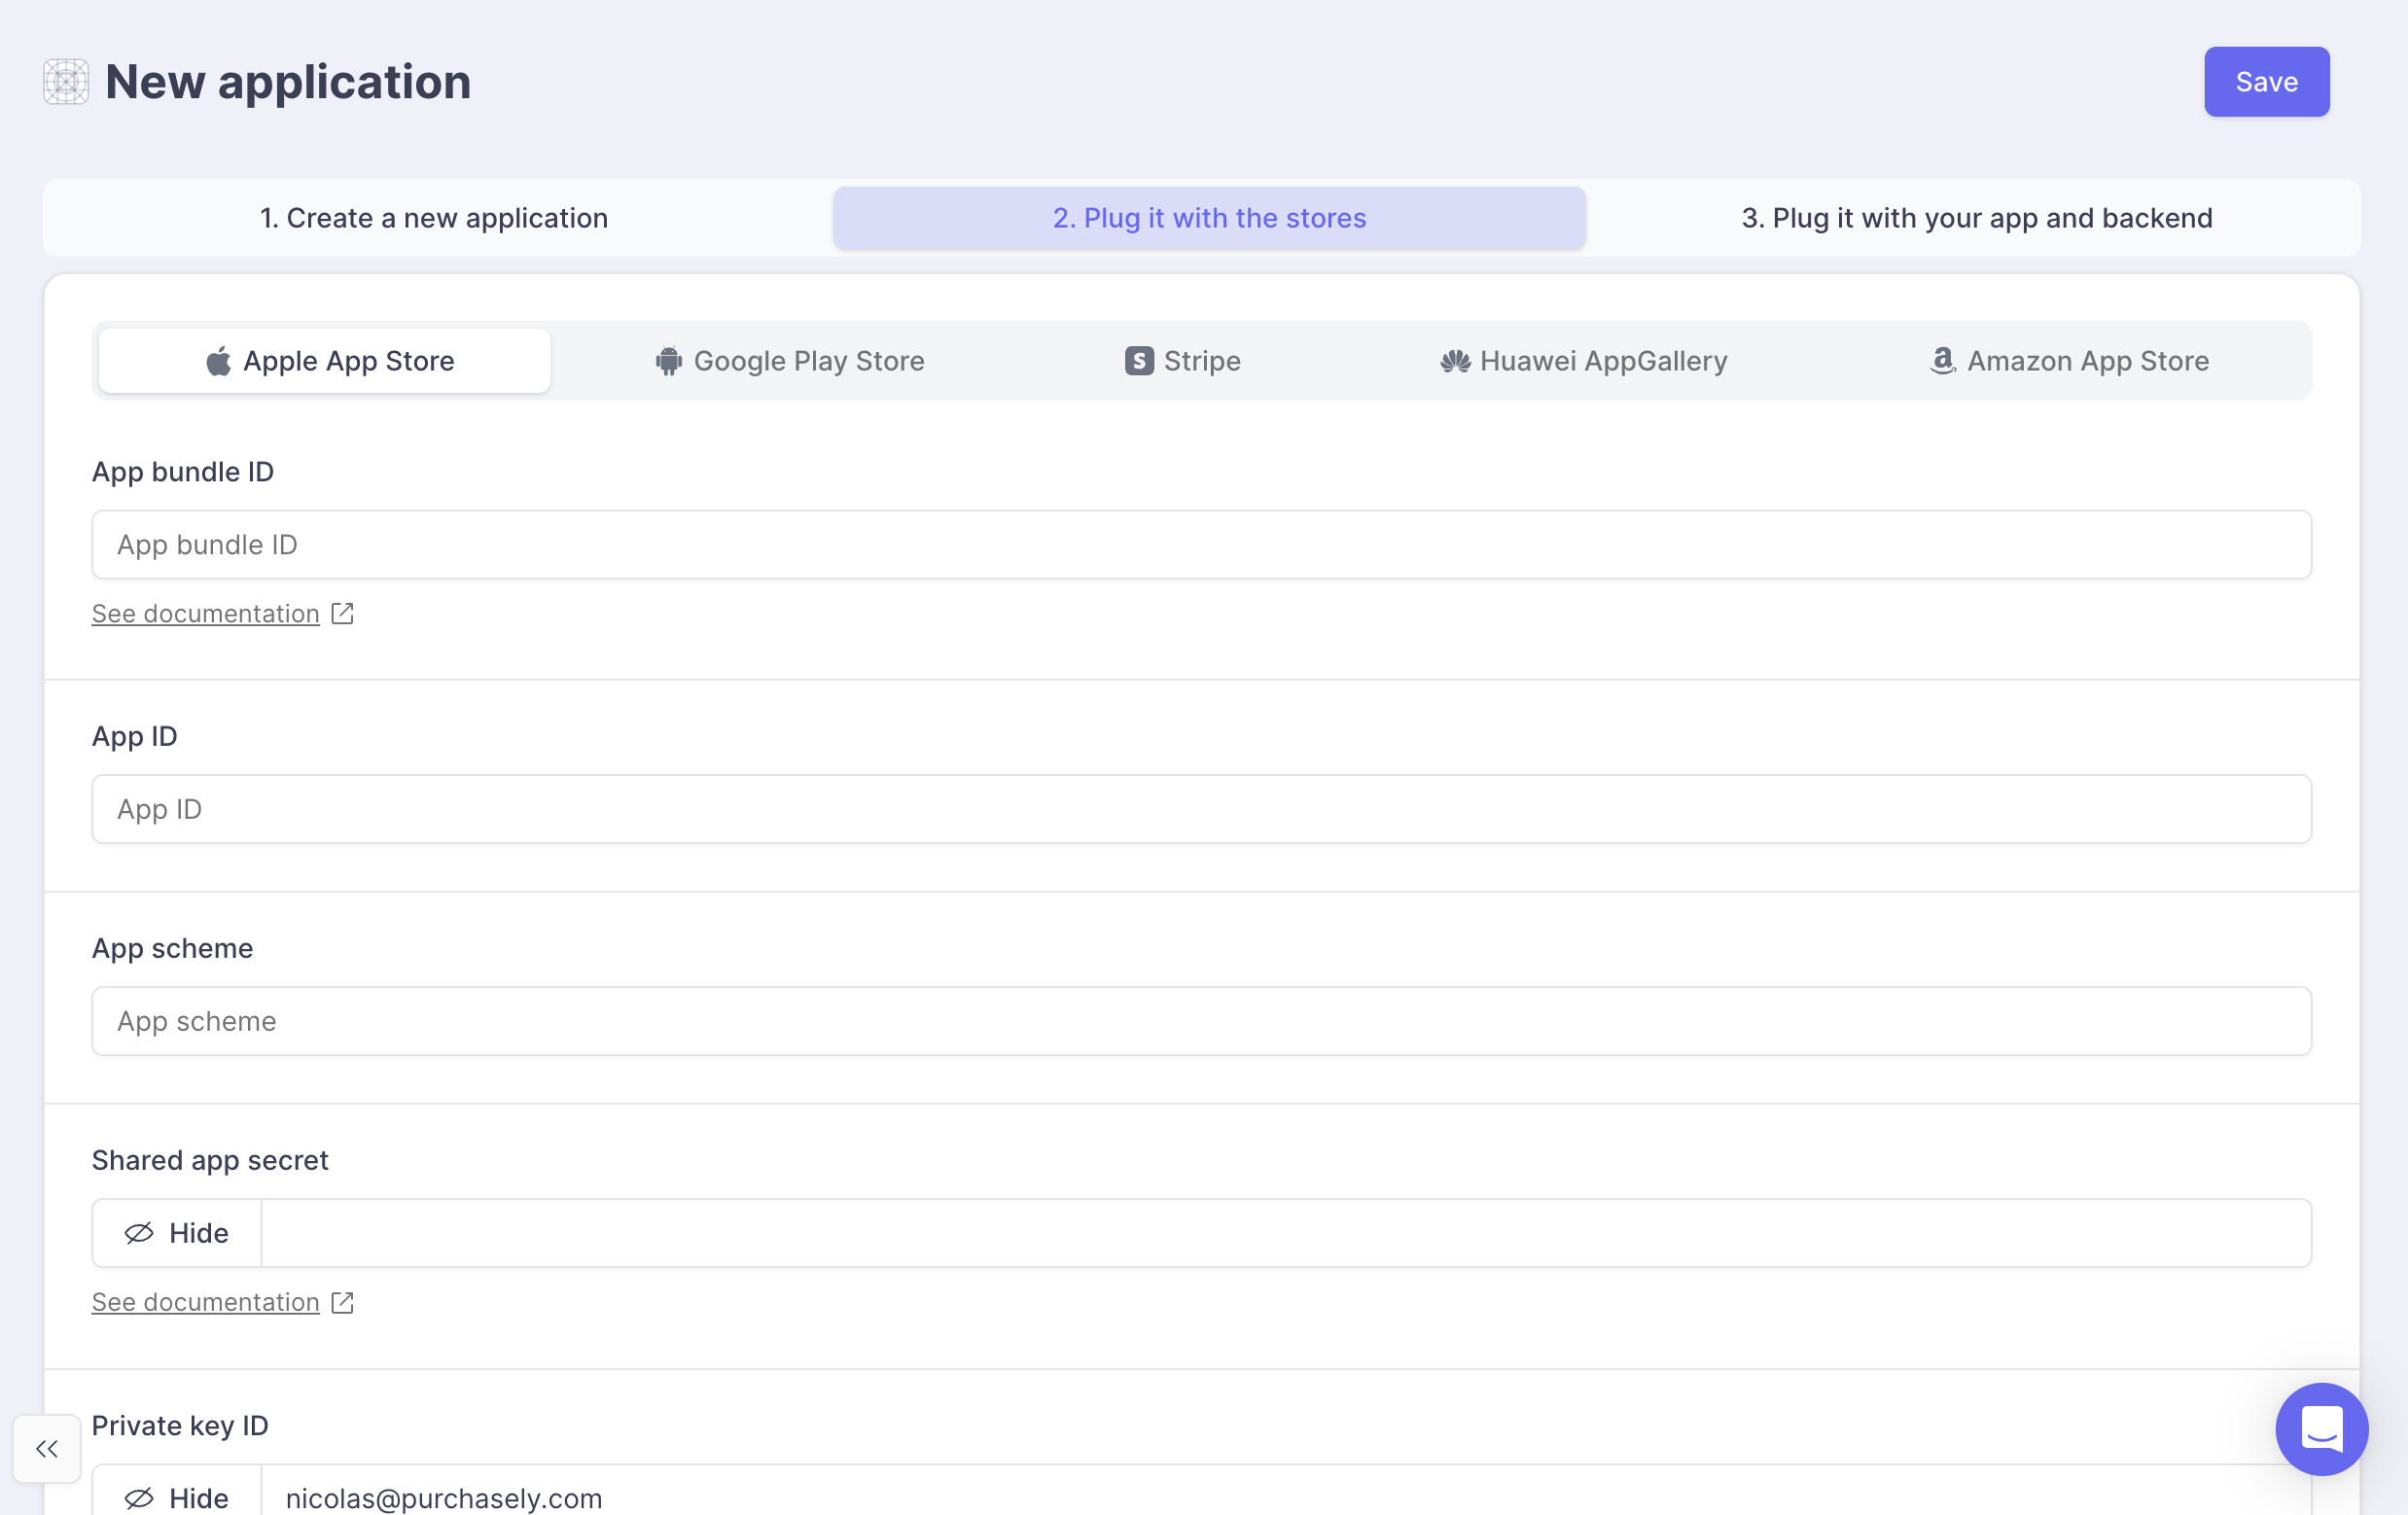
The step-by-step configuration for each store is explained below in dedicated sections:
Once you've finished configuring the first App store, click on the Save button
Configuring the backend and SDK
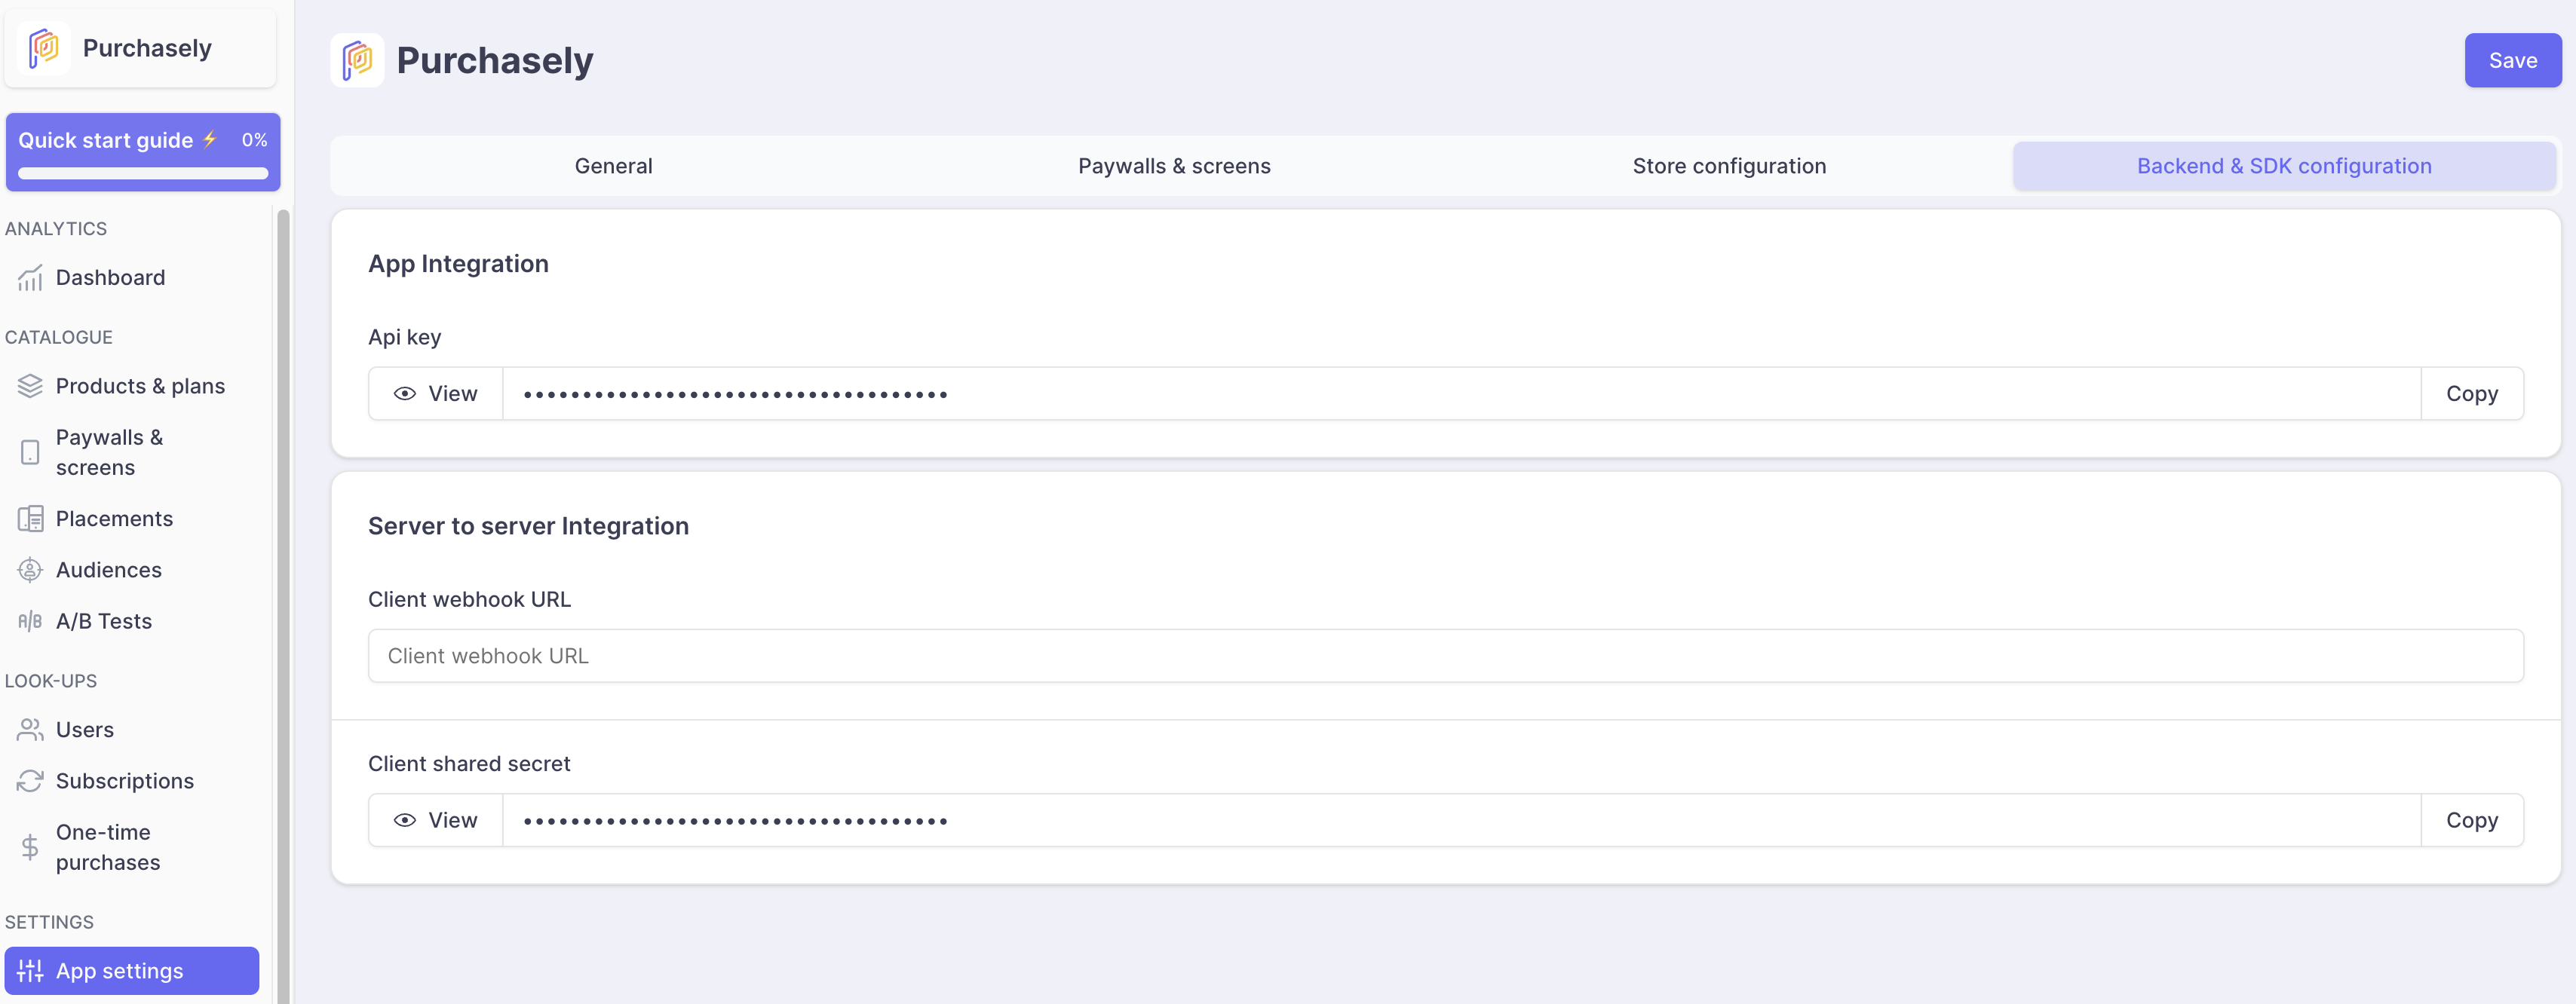
Click on "Copy" to copy the API key to your clipboard directly.
In the Backend & SDK Configuration section, you can:
- Get your API Key to initialize the SDK.
- Set your endpoint to receive webhook events.
- Get your Shared Secret to authenticate webhooks sent by Purchasely.
Don't forget to click on the "Save" button
Updated 9 months ago
What’s Next
Plug your app with your App Store Connect and Google Play Store accounts or start with the SDK Integration