Tags
This section provides details about the Price Tags available in the Screen & Paywall Builder
What are tag used for?
Purchasely has a tagging system to fetch information about the price and duration of subscriptions and one-time purchases, as well as the Introductory Offer (for user acquisition) and Promotional Offer (winback/retention) prices and durations.
Thanks to these tags, you don't have to hard code price for each and every stores in your screens and paywalls.
Using these tags will also ease to make your paywall compliant with the App Store Guidelines.
You should be transparent about the plan price in your paywalls. If you have any introductory offer or promotional offer, you should mention how much the user will pay after the offer ended.
Where can you use tags?
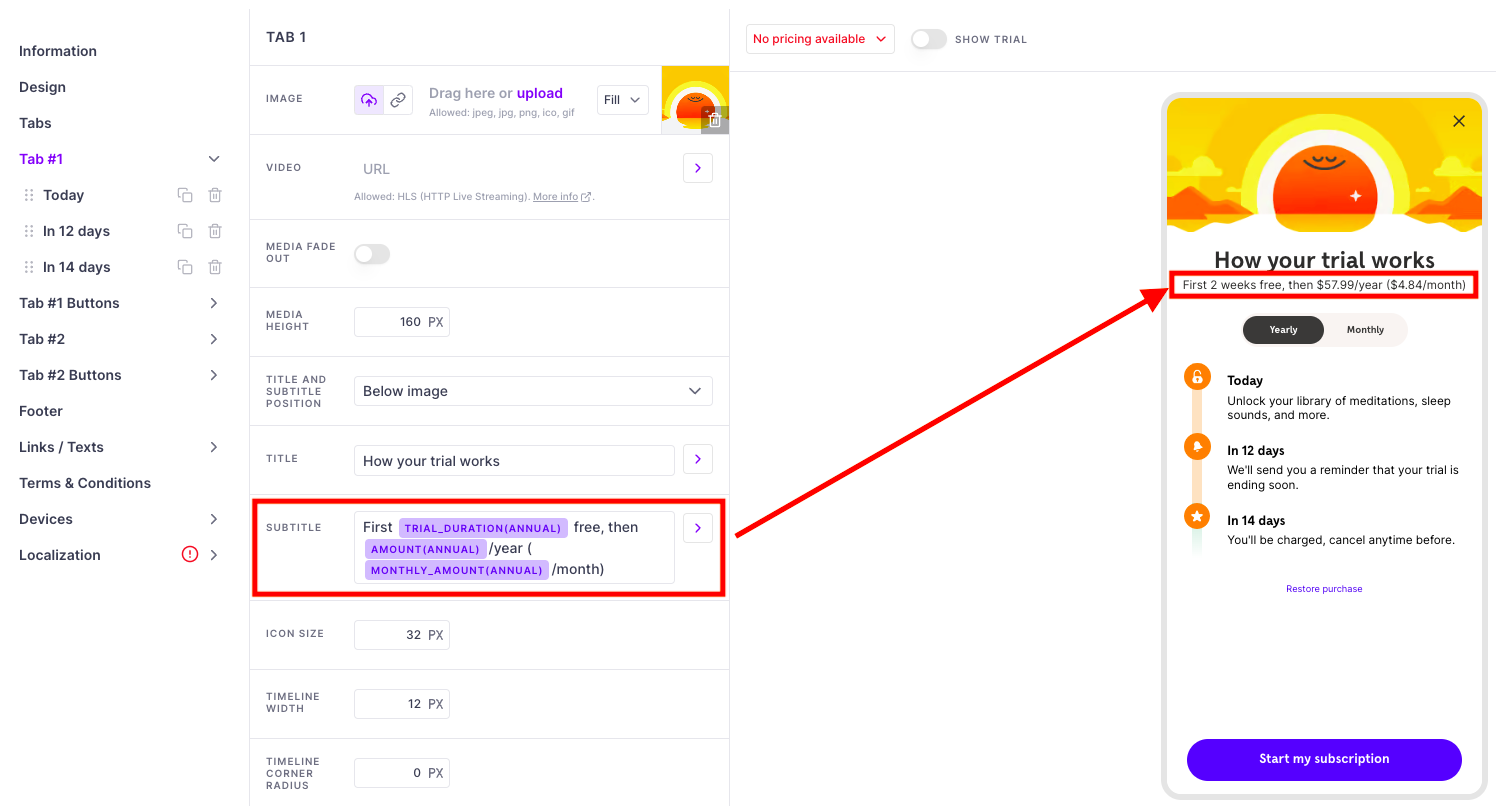
Tags can be used in any label on a Screen. You can add them by simply clicking on the + TAGS below the input text.

-
When using them inside a button, we strongly advise you to map them with the Plan associated with the button by choosing
Use button's plan
=> This way, if you change the Plan associated with the button / picker (or run an Price A/B test), you won't need to update the tag.
-
If you want to reference another Plan (e.g.:to show a strikethrough price) than the one associated with the button / picker, you can choose any other Plan configured in the Purchasely Console.
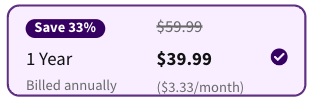
The tag $59.99 references a different Plan than the one associated to the plan picker
-
-
When using them outside of a button, you need to reference the associated Plan explicitly.
General tags:
These tags are most common tags that used in all the paywalls. Purchasely checks if your paywall has either the PRICE tag or AMOUNT/DURATION or AMOUNT/PERIOD tag in the purchase buttons.
Tag | Usage | Example |
|---|---|---|
| Displays the plan price with the period. | For a renewing plan: For consumables / non-consumables : |
| Displays the plan price. | For a renewing plan: The output will be: For consumables / non-consumables : The output will be: |
| Displays the period of the plan. | For a renewing plan: The output will be: |
| Displays the duration of the plan. | For a renewing plan:
|
Why does the preview display a$XX.XXinstead of the actual price?In some cases, tags cannot be displayed properly in the preview of the Console. They are replaced by XX.XX
The reason is that the Purchasely Console is not directly interfaced with the App stores. Therefore, it can only know the price of a SKUs in each territory once a transaction has been processed or observed by the Platform.
As soon as it is the case, the XX.XX will be replace by the actual price in the appropriate currency. Eg: $9.99
Be reassured however, the SDK fetches the information directly from the App stores, and therefore always displays the correct price, in the appropriate currency (the one from the user's App store territory).
Introductory offer tags
These tags displays the price and duration of the introductory offers or free trials you have created in the stores.
Tag | Usage | Example |
|---|---|---|
| Displays the intro price or discounted price(that you have configured in Apple or Google store) of the plan. | For a discounted trial:
|
| Displays the intro price or discounted price(that you have configured in Apple or Google store) of the plan. | For a discounted trial: The output will be: |
| Displays the trial period or free trial (that you have configured in Apple or Google store) configured for the plan. | For a free trial:
|
| Displays the trial period or free trial (that you have configured in Apple or Google store) configured for the plan. | For a discounted trial:
|
| Displays the trial duration in the days count. | For a free trial:
|
| Displays the discount percentage between the trial (free or paid) and the regular price of the plan for the period of the subscription. | For a free trial or intro price:
|
| Displays the price difference between the trial (free or paid) and the regular price of the plan for the period of the subscription. | For a free trial or intro price:
|
Duration tags
These tags help you display the subscription duration in days, weeks , months and etc.
Name | Usage | Example |
|---|---|---|
| Displays the subscription duration in days. | For a renewing plan:
|
| Displays the subscription duration in weeks. | For a renewing plan:
|
| Displays the subscription duration in months. | For a renewing plan:
|
| Displays the subscription duration in quarters. | For a renewing plan: The output will be: |
| Displays the subscription duration in years. | For a renewing plan: The output will be: |
Subscription cost per duration tags
These tags helps you to display subscription cost per day, week or month and etc. They are convenient to compare together several plans with different periodicities.
E.g.: compare the monthly price of a yearly subscription with a monthly subscription.
Name | Usage | Example |
|---|---|---|
| Displays the cost of a plan per day. | For a renewing plan:
|
| Displays the cost of a plan per week. | For a renewing plan: The output will be: |
| Displays the cost of a plan per month. | For a renewing plan:
|
| Displays the cost of a plan per quarter. | For a renewing plan: The output will be: |
| Displays the cost of a plan per year. | For a renewing plan:
|
| Displays the cost of the Introductory Offer or Promotional Offer of a Plan per day. | For a renewing plan:
|
| Displays the cost of the Introductory Offer or Promotional Offer of a Plan per week. | For a renewing plan: The output will be: |
| Displays the cost of the Introductory Offer or Promotional Offer of a Plan per month. | For a renewing plan:
|
| Displays the cost of the Introductory Offer or Promotional Offer of a Plan per quarter. | For a renewing plan: The output will be: |
| Displays the cost of the Introductory Offer or Promotional Offer of a Plan per year. | For a renewing plan:
|
Price & Percentage comparison tags
These tags comes handy for your to calculate percentage difference and the price difference between 2 different plans and show them automatically in the respective currency.
Name | Usage | Example |
|---|---|---|
| Displays the percentage difference between the plan in the purchase button and the plan chosen. | With:
|
| Displays the discount percentage between the actual plan in the purchase button and the plan chosen. | With:
|
| Displays the raise of price in percentage between the actual plan in the purchase button and the plan chosen. | With:
|
| Displays the price difference between the plan in the purchase button and the plan chosen. | With:
|
Promotional offer tags
These tags displays the price and duration of the winback/retention offers you have created in the stores and in the Purchasely console.
Tag | Usage | Example |
|---|---|---|
| Displays the winback offer price. | For a winback offer :
|
| Displays the winback offer amount. | For a winback offer :
|
| Displays the winback offer period. | For an extension of a free trial:
|
| Displays the winback offer duration. | For a winback:
|
| Displays the price difference between the discounted offer and the regular price of the plan for the higher duration. | With:
|
| Displays the discount percentage between the discounted offer and the regular price of the plan. | With:
|
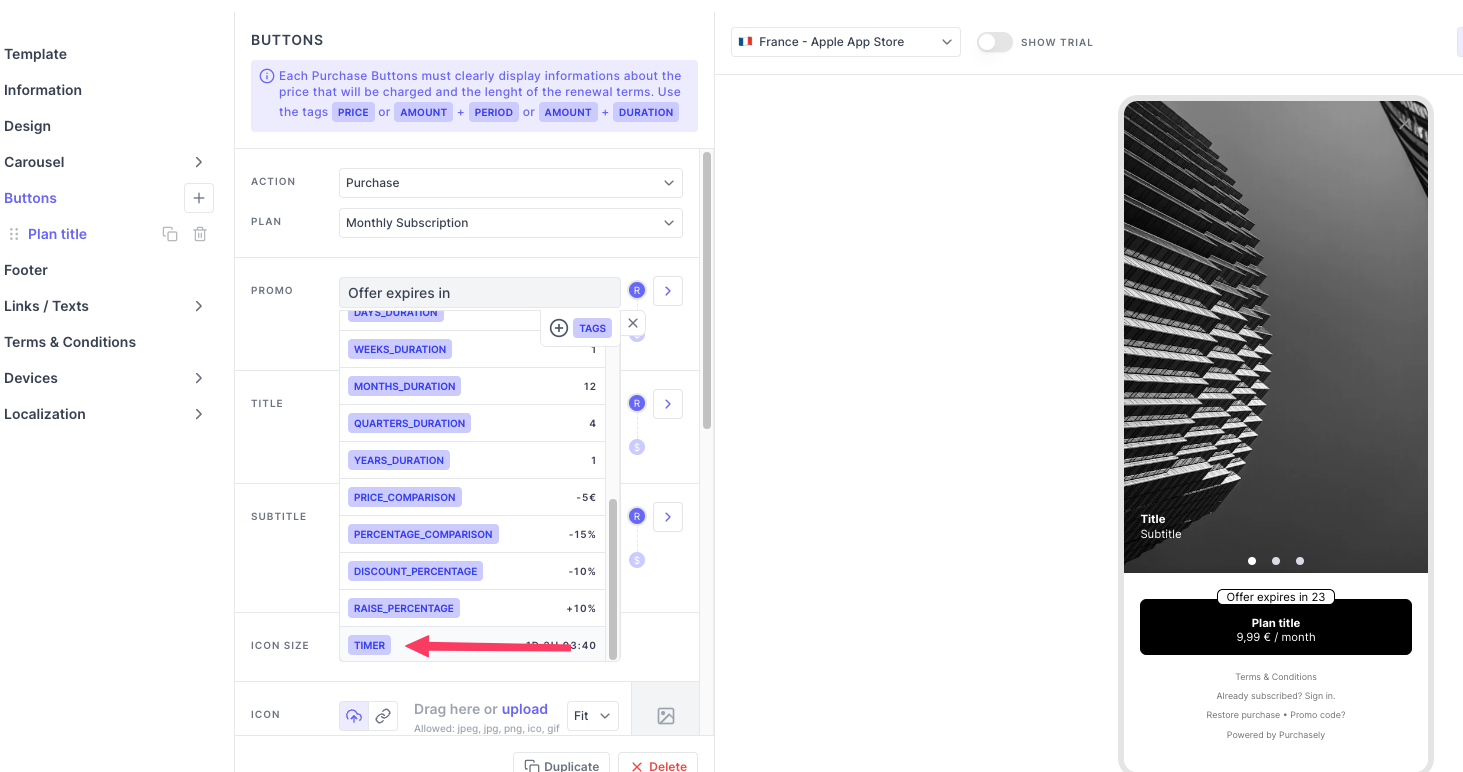
Timer tags
These set of tags are very useful to create dynamic countdowns. You can integrate them in any label of your Screen. 3 different types of Timers are offered:
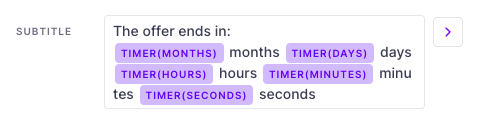
Timers are not only a simple tag but rather a set of tags composed of different sub-tags (TIMER(MONTHS), TIMER(DAYS), TIMER(MINUTES), TIMER(SECONDS)) that can be manipulated independently.
Depending on the format you associate to the Tag, they will appear in the text field with the following format:

Timer tags when the format D:hh:mm:ss has been selected
This allows you to keep only the desired tags or to insert static text in between:
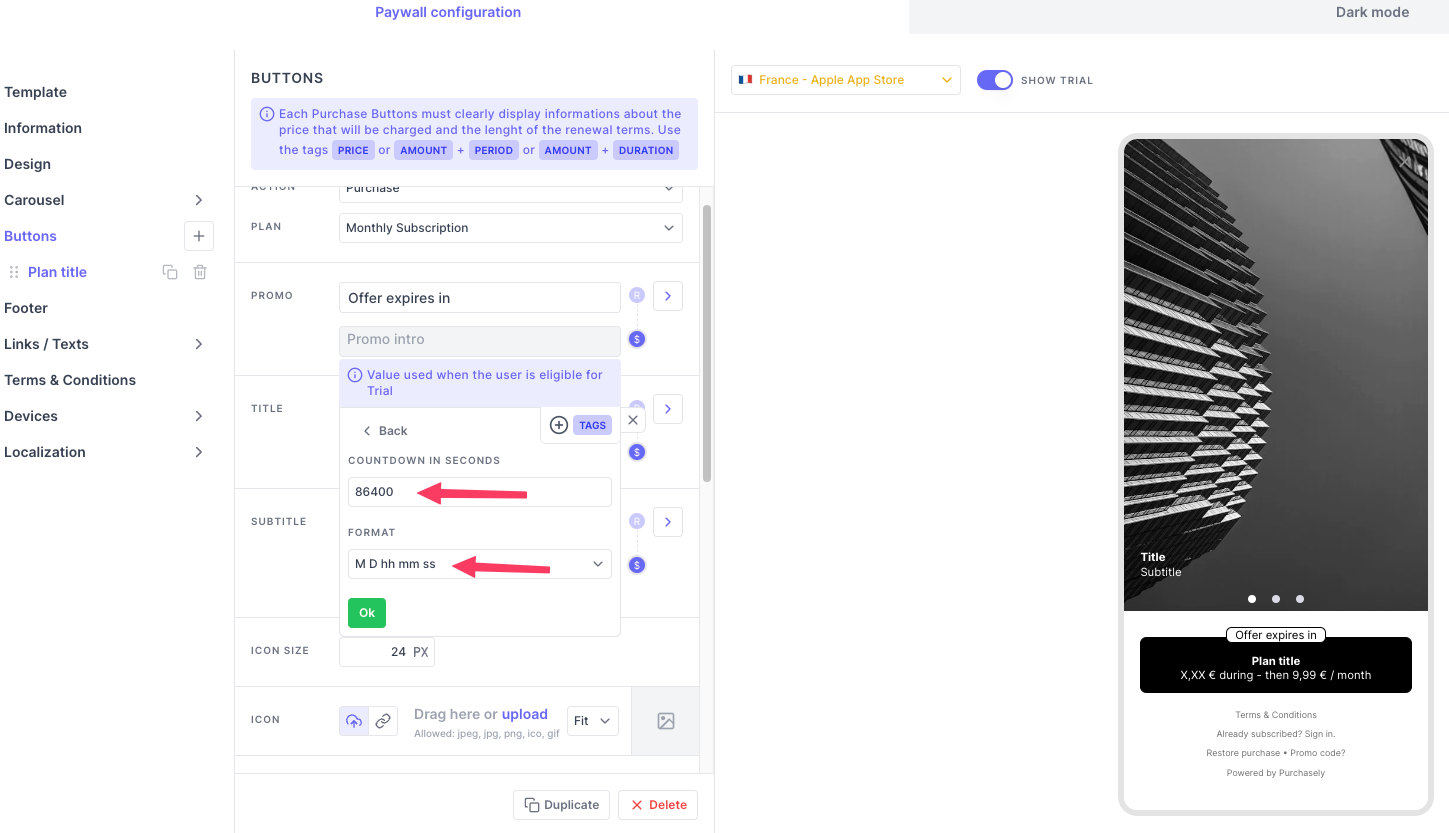
Timer (relative)
This tag presents a relative timer indicating when the offer will expire. This timer resets each time the paywall is reopened. You can use this timer for limited offers.
To use this tag, click on the tags and choose Timer
Select the timer type as relative,
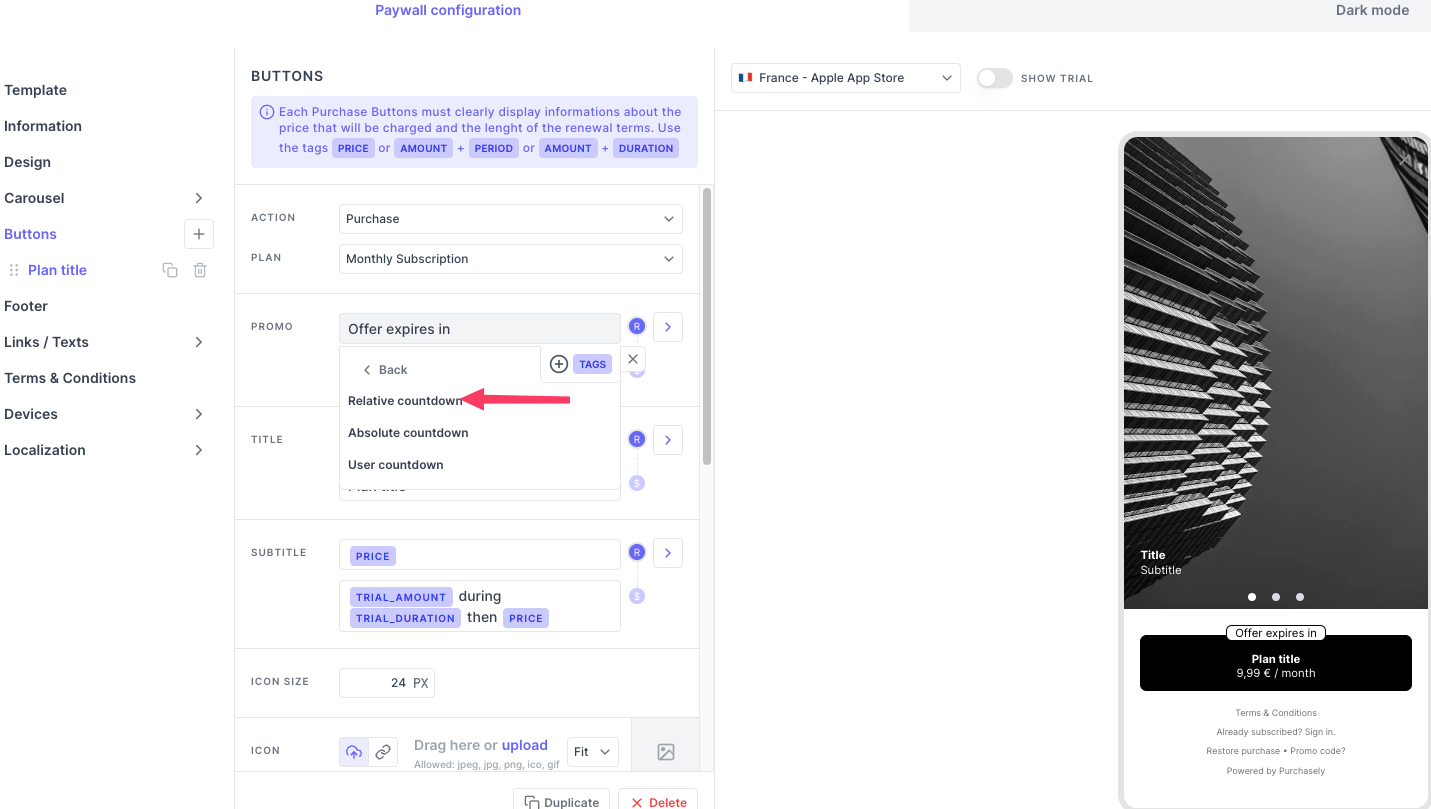
Fill in the count down in seconds and select the format you want to show it(M D hh mm ss .... etc) and click ok to set the timer.
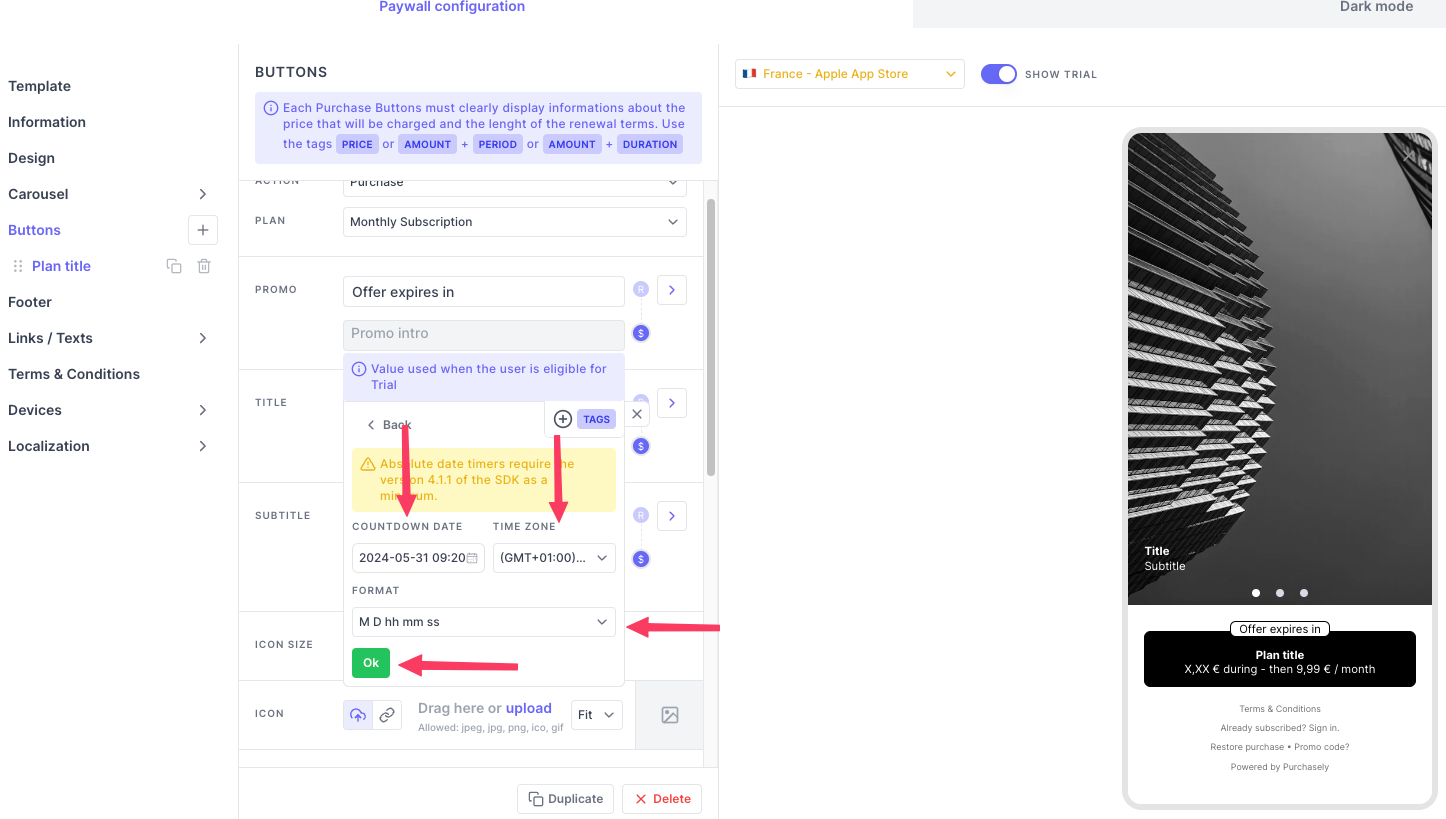
Timer (absolute)
This tag presents an absolute timer for the offer expiration. This timer automatically calculates the remaining time left based on the countdown date set.
To use this tag, click on the tags and choose Timer
Select the timer type as absolute

Select the count down end date, the timezone, and the format you want to show it(M D hh mm ss .... etc) and click ok to set the timer.
Timer (User countdown)
This tag presents an user centric timer. This timer is set based on any date attribute related to the user and their subscription. Refer to all the date attributes here. You can also create a custom attribute and choose it to customize this timer.
To use this tag, click on the tags and choose Timer
Select the User countdown
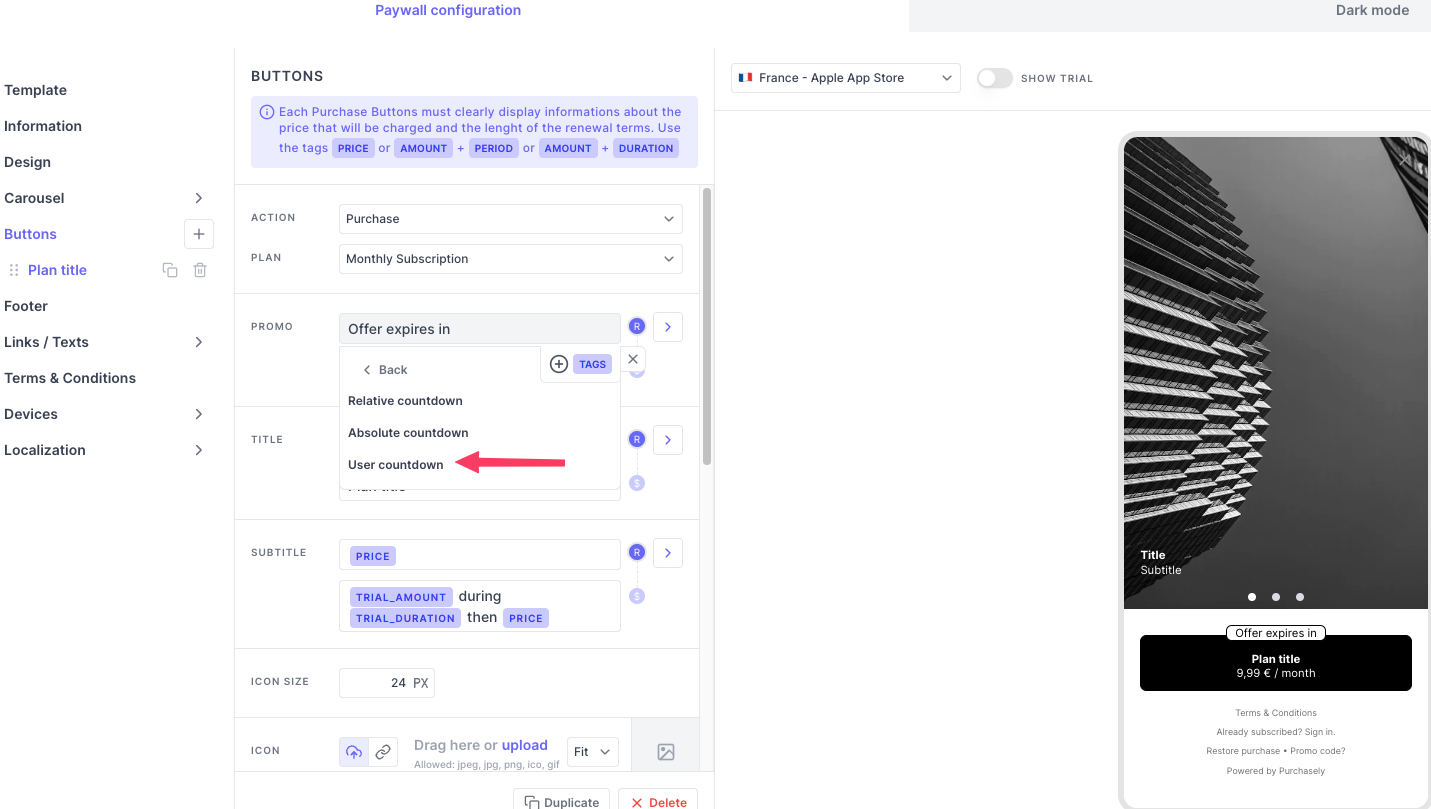
- Select the user attribute to set a countdown dynamically from the app.
- The countdown in second you choose is also the number of seconds that will be added to the one you set in the attribute. So the final countdown is attribute + countdown in seconds
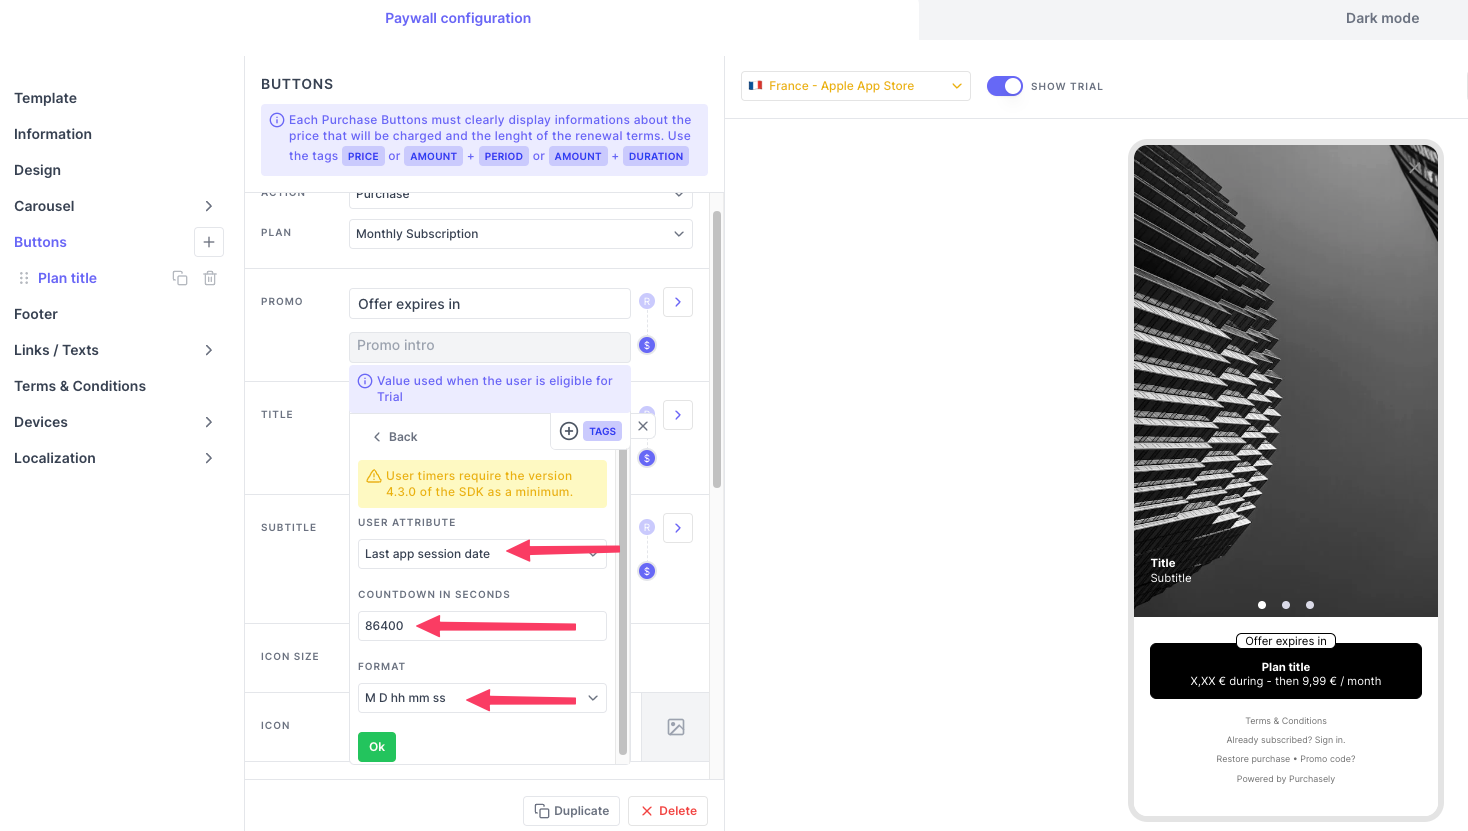
- When leveraging a Custom User Attribute for the count down (e.g.: promotionStartDate, type:Date) if it has not been set when the paywall is displayed, the SDK will automatically initialize it with the current date -
now()- when the Screen is being displayed for the first time.
More details on how to configure and leverage countdown to boost the conversion
Updated about 1 month ago