

BYOS - Configuration guide
This page provides details on how to configure a Custom Screen in the Purchasely Console
SDK v5.6.0+ mandatoryBYOS requires SDK v5.6 (changelog) or later and the use of the
display()method to show In-App Experiences.It is currently available for native Swift and Kotlin apps and will be extended to React Native, Flutter, and Cordova in a future release.
Creating a Custom Screen
-
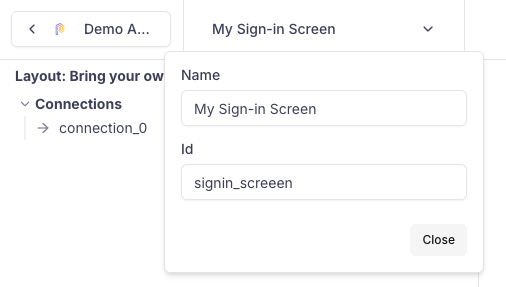
Create a new Screen in the Screen Composer and choose the layout Bring Your Own Screen.
-
Enter the Screen ID for your Custom Screen. This Screen ID needs to be communicated to your mobile engineers as they will need it to know which custom screen shall be displayed.
-
Associate a screenshot of the Screen as the background image to make it easy to recognize
-
Define the connections (e.g., login_successful, signup, cancel) — these determine the possible exit points for the Screen
Note: The IDs defined for the connections need to be decided with / provided to your mobile engineering team as they will need them in the code of the BYOS implementation.
-
[Mobile engineers] Implement BYOS into your app
Bringing You Own Screen Within a Flow
BYOS allows you to blend native app screens and Purchasely-generated screens into one seamless user journey.
-
Insert your Custom Screen anywhere in the Flow from the Console — including as the very first step.
-
Connect it to other Screens in the Flow and define the transition type for each incoming and outgoing connection.
The Custom Screen will appear in the Flow’s navigation exactly according to the transition you configured.
- Example: If the connection leading to your Custom Screen uses the pop-in transition, the SDK will display your native screen as a pop-in.
You can also chain multiple Custom Screens together and control the transition of each link independently.
- Example: If your sign-in process spans several native steps, each step can be mapped to its own Custom Screen node with its own transition.
Using BYOS Within a Paywall A/B Test
You can also include Custom Screen inside Paywall experiments in A/A test or A/B test scenario.
-
create a Custom Screen corresponding to your existing in-house Paywall - don't forget the Screenshot!
-
Integrate it in your A/B test as the control variant
Using BYOS to reorder steps in your existing onboarding Flow without code
BYOS lets you recreate and manage your existing native onboarding flow inside Purchasely by representing each of your native screens as a Custom Screen node. Once mapped, you can reorder, insert, or remove steps directly from the Console — giving you full no-code control over the structure and sequencing of your onboarding while preserving your original UI.
- Create one Custom Screen for each native onboarding step, assign it a Screen ID, and define its connections (exit points).
- Add all these Custom Screens to a Flow in the Console.
- Drag and drop the nodes to reorder, insert, or remove steps as needed.
- Draw the transitions between nodes and attach the appropriate connections to each one.
- Publish the Flow so the SDK orchestrates your onboarding sequence according to your no-code configuration.
Note: This requires having implemented BYOS in your app and mapping each onboarding view controller to its corresponding Screen ID and connections.
Tracking of the Custom Screens
When a Flow is displayed by the SDK, Custom Screens are automatically tracked like any other Purchasely Screen.
Each time a Custom Screen is shown, the SDK emits a PRESENTATION_DISPLAYED event containing the Screen ID (in the displayed_presentation property). This allows you to analyze user paths, visualize transitions, and measure drop-off at every step of the Flow. This is also used to compute conversion rates in A/B tests.
Custom Screens are also tracked outside of a Flow, but only when displayed via the SDK’s display() method.
If your app manually fetches Screens and displays the Custom Screen’s view controller itself - without using the SDK’s display() method - you must trigger the tracking events manually:
- call
clientPresentationDisplayed(presentation)when your Custom Screen is shown - call
clientPresentationClosed(presentation)when it is dismissed
These calls ensure the Custom Screen appears in your analytics.
Finally, note that user interactions inside Custom Screens are not tracked by the SDK, since these screens are fully managed by your app. If you require interaction-level analytics, you should instrument them directly in your own client-side code.
Don't forget to synchronize purchasesIn a Paywall A/B test scenario, make sure with your engineering team that the In-App Purchases performed inside the Custom Screen are properly synchronized.
If purchases are not synchronized, in-app purchases happening on your Custom Paywall will not be counted by the SDK and integrated in the A/B test data.
Updated 8 months ago
What’s Next
Follow the implementation guide to integrate BYOS into your app