

Google Ads
Report your funnel purchases as Google Ads conversions to measure and optimize your Search, YouTube and Demand Gen campaigns.
The Google Ads integration loads the Google tag on your funnels and reports your funnel events as conversions from the visitor's browser. Google matches each conversion to the ad click through the click identifier (gclid) that auto-tagging adds to your landing URL and that Purchasely keeps until the purchase.
In Google Ads, each conversion you want to measure is a conversion action, identified by a conversion label. All the conversion actions of an account share the same Conversion ID, in the form AW-123456789.
| Purchasely event | Suggested conversion action | What to enter in the Console |
|---|---|---|
| Page View | Page view | Its conversion label |
| Screen Viewed | Page view or custom | Its conversion label |
| Purchase Tapped | Begin checkout | Its conversion label |
| Purchase | Purchase, with value and currency | Its conversion label |
Only events with a conversion label are sent. Each conversion carries a unique transaction ID, so Google deduplicates repeated events.
1. Enable auto-tagging
Auto-tagging appends the click ID to your funnel URL when a visitor clicks an ad. Without it, Google cannot attribute conversions.
- In Google Ads, open Admin → Account settings.
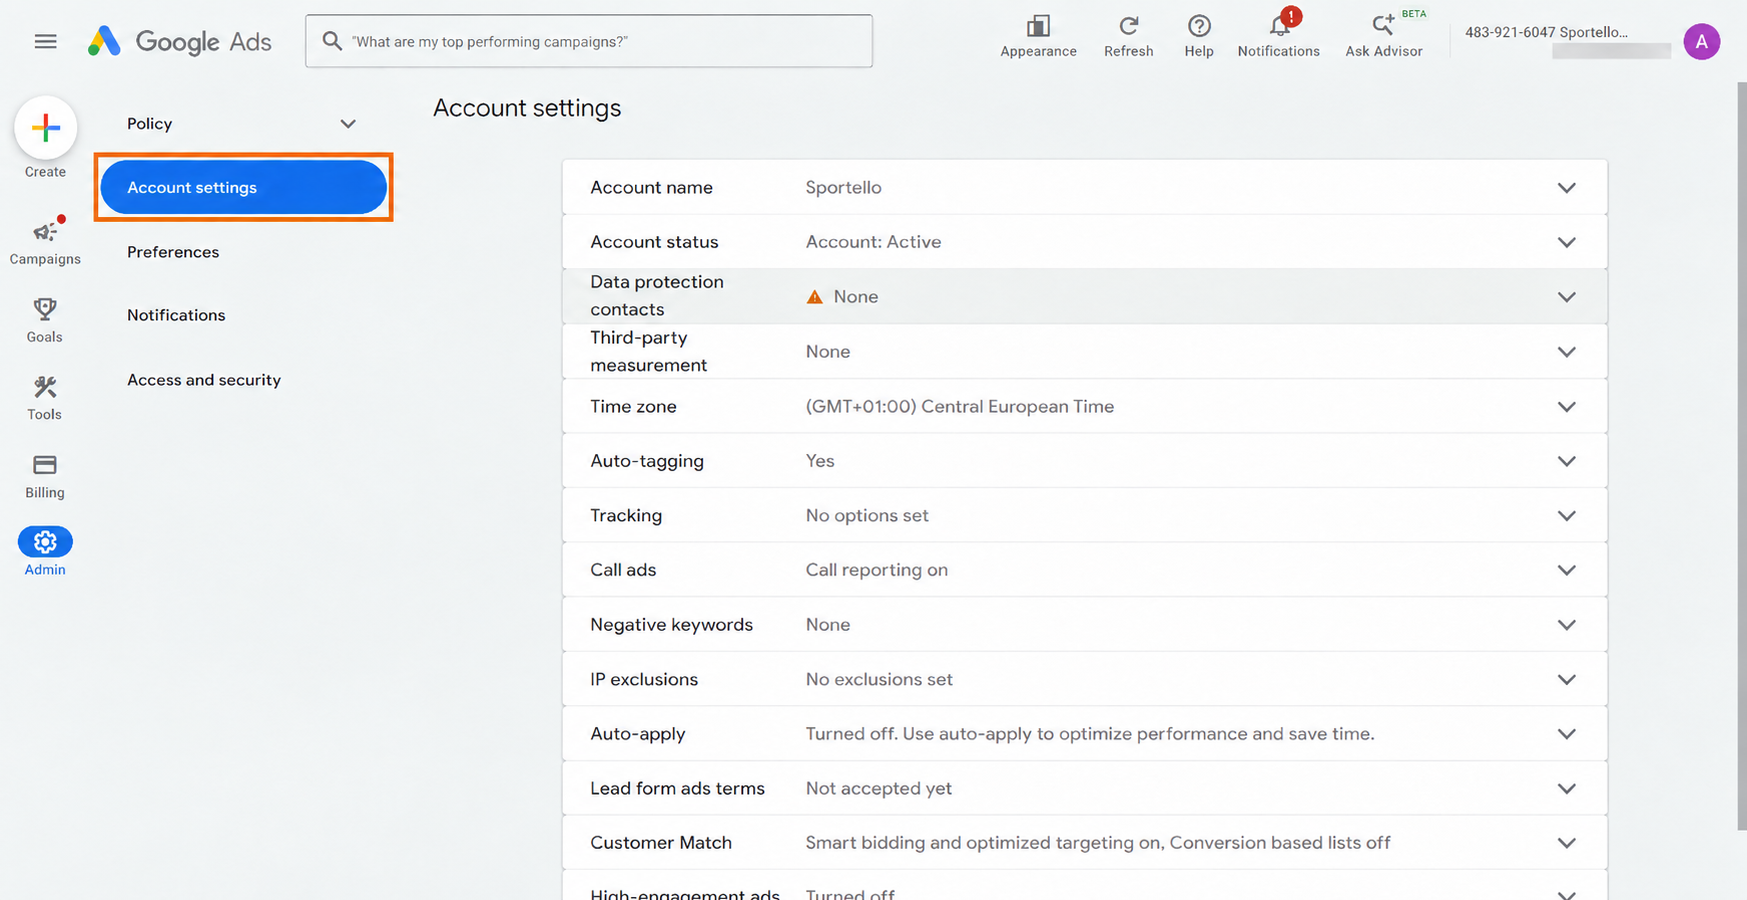
- Expand Auto-tagging, tick the option and save.

2. Create the conversion actions
Create at least the Purchase action. Repeat for Begin checkout if you want to optimize on checkout starts.
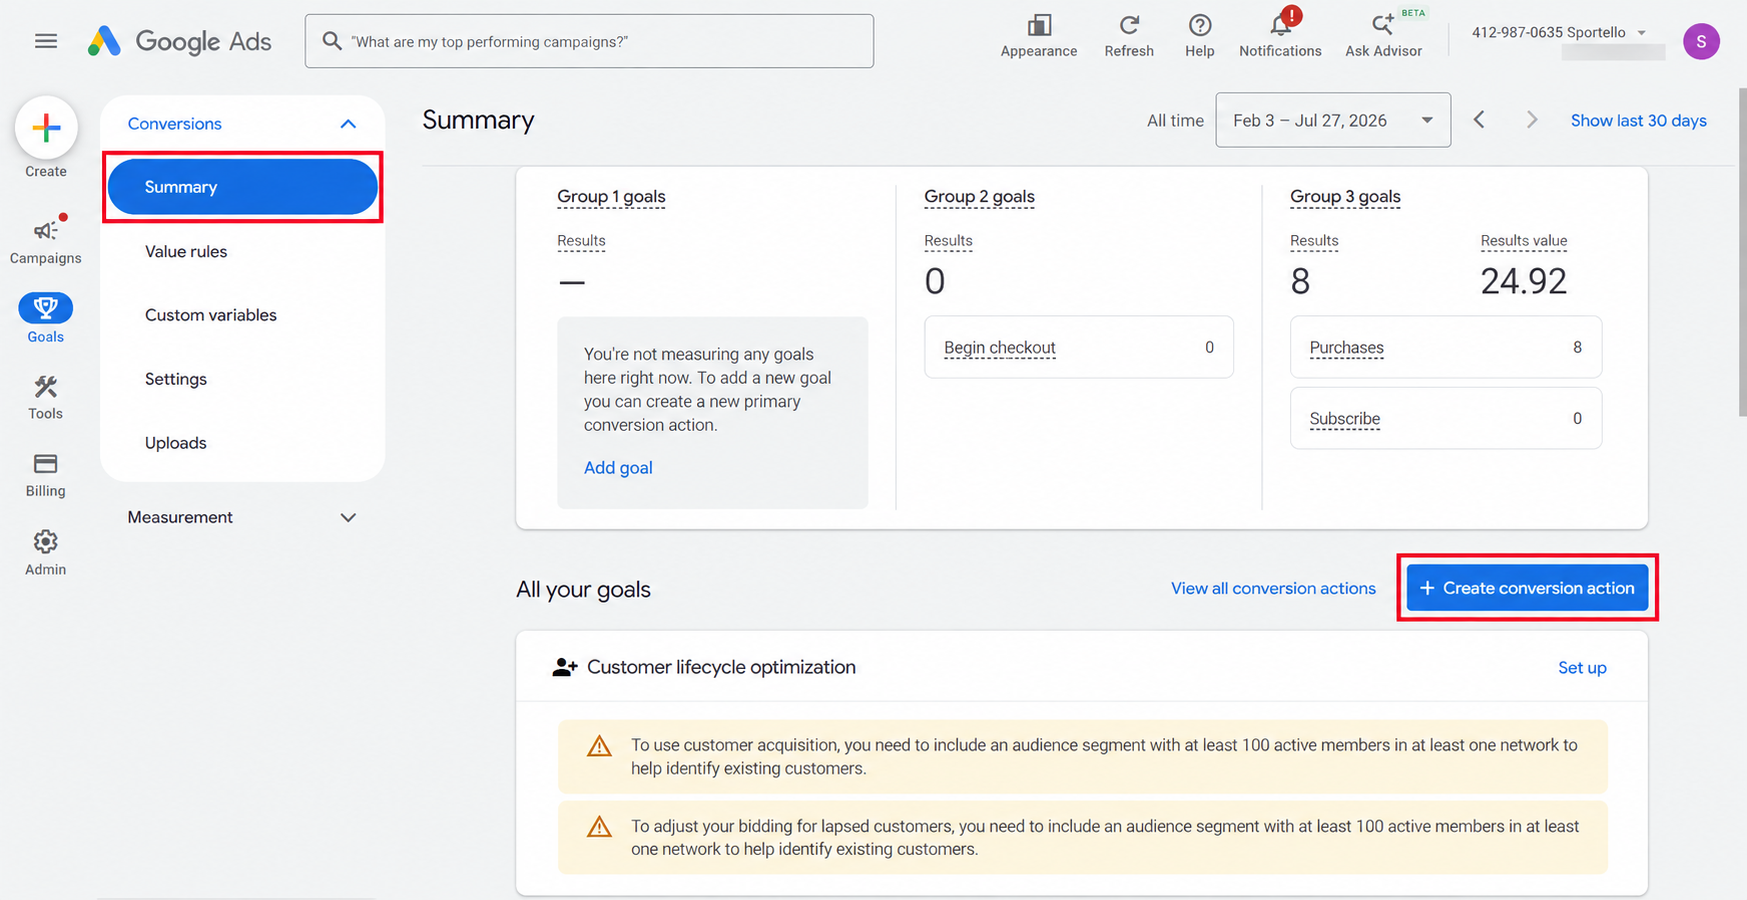
- Open Goals → Conversions → Summary and click + Create conversion action.
- Choose Website as the source, enter your funnel domain (
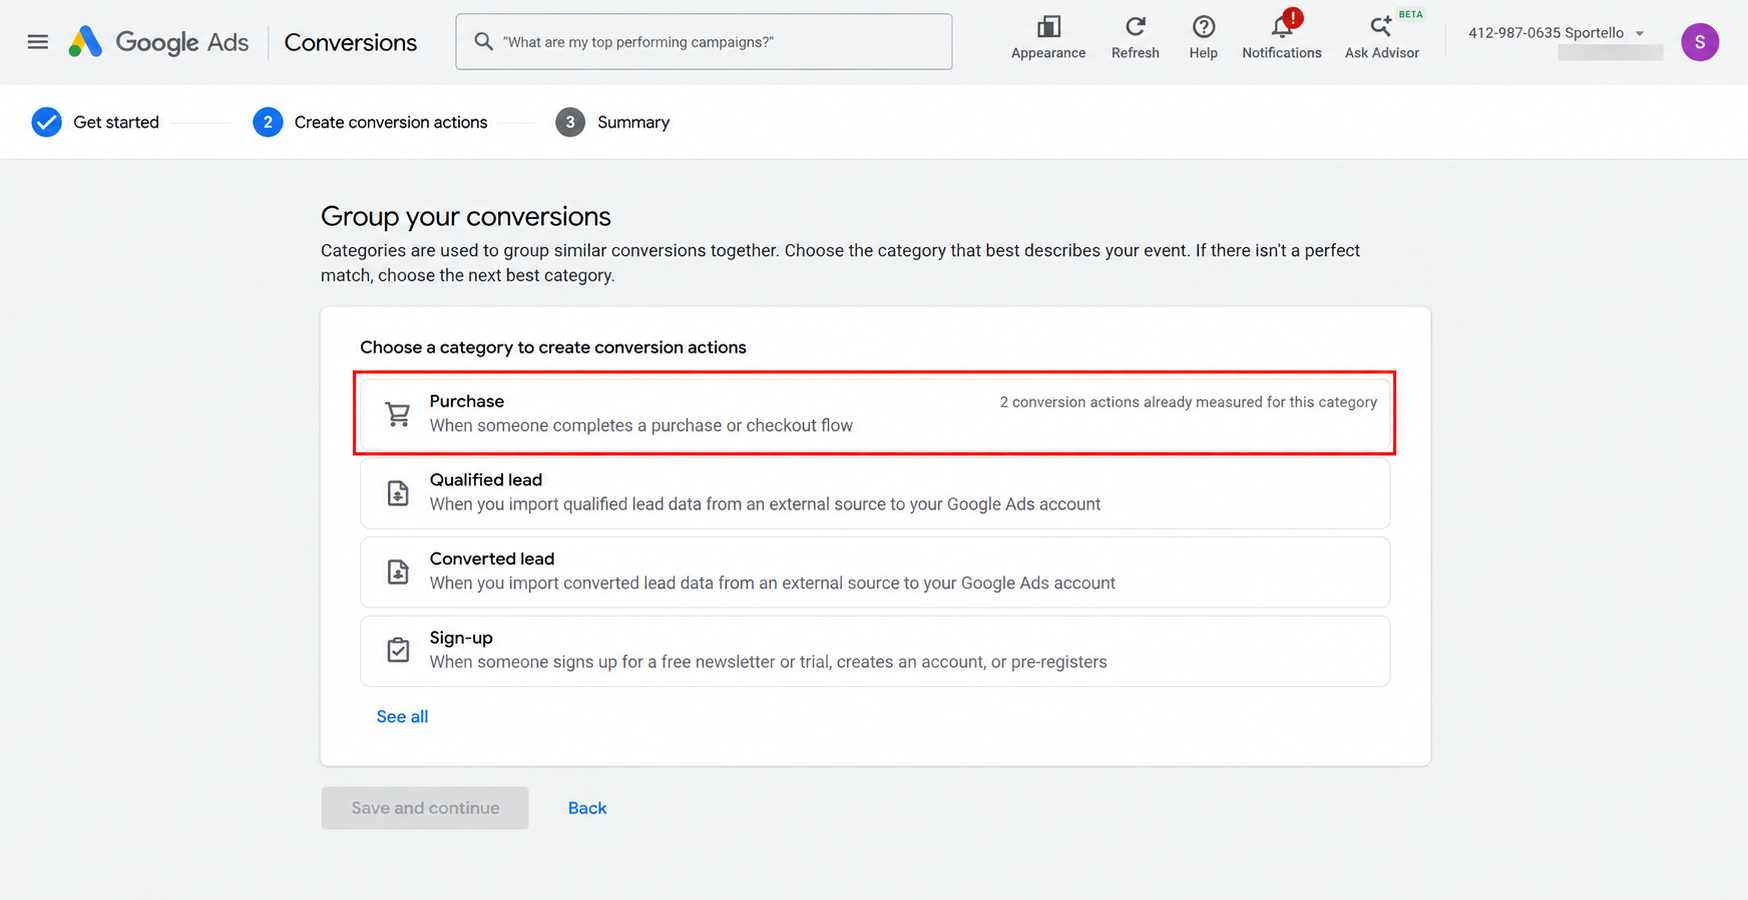
web.purchasely.ioor your subdomain) and continue. - Under Create conversion actions manually, add an action with the Purchase category. Name it, for example Web2App Purchase, set Value to Use different values for each conversion, and Count to Every.
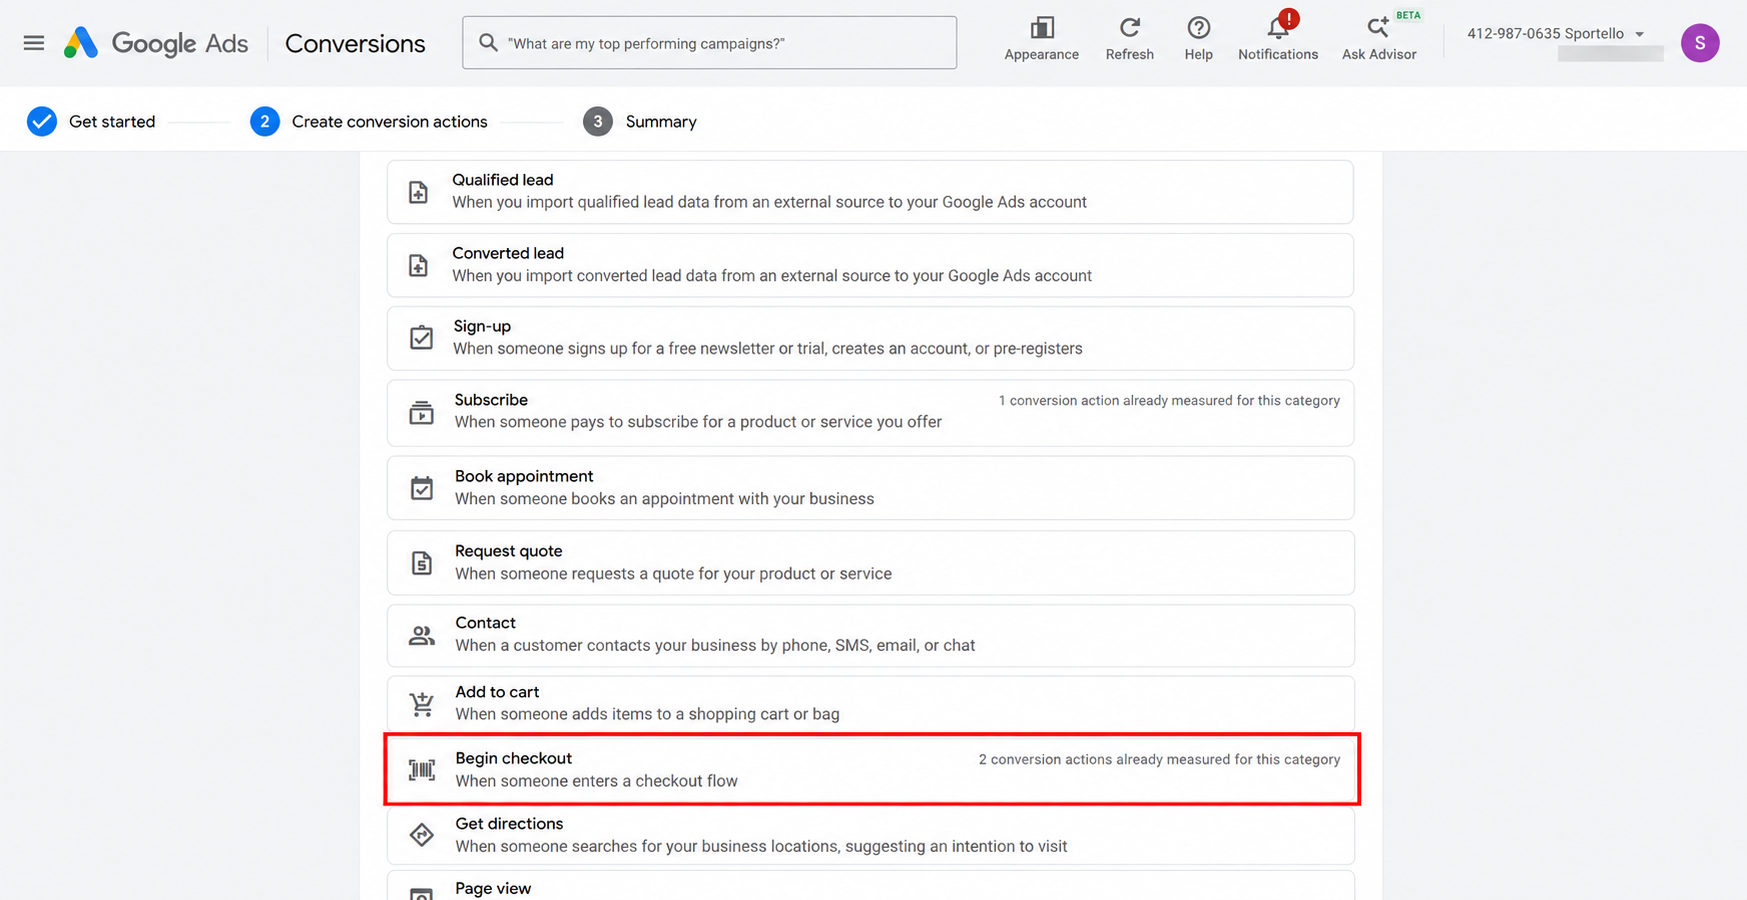
- Optionally add a second action with the Begin checkout category, with no value and One count.
- Save. Google now proposes to set up the tag.
3. Get the Conversion ID and labels
- On the conversion action, open the tag setup and choose Use Google Tag Manager. Google displays the Conversion ID (
AW-123456789) and the Conversion label (a short string such asAbC-dEfGhIjK1LmNoPqR).

- Copy the Conversion ID once, and the label of each action you created. You do not need Google Tag Manager: Purchasely loads the tag for you.
4. Enter the Conversion ID and labels in the Console
- In Web2App → Setup, section 4. External integrations, open Google Ads.
- Enable the integration and paste the Conversion ID.
- In the Front events tab, enable Purchase and paste its Conversion Label. Do the same for Purchase Tapped if you created a Begin checkout action. Leave the label empty for events you do not want to send.
- Save.

5. Check that conversions arrive
Open the sandbox URL of a Web Flow from a Google ad preview, or with a gclid parameter in the URL, browse a few screens and complete a purchase with a Stripe test card. In Goals → Conversions → Summary, the action status changes from Inactive to Recording conversions once Google has received an event; conversions can take a few hours to be processed.
Sandbox purchases are real conversions for Google Ads. Test with a low volume, or remove the label while you iterate on a funnel.
Troubleshooting
| Problem | Cause and solution |
|---|---|
| The action stays Inactive. | The conversion label is missing in the Console, or auto-tagging is off. Google also needs a few hours after a first conversion. |
| Conversions are recorded but not attributed to campaigns. | Auto-tagging is disabled, or the ad links to a URL that strips query parameters. Point ads to the funnel URL directly. |
| Conversion values are missing. | The action's Value setting must be Use different values for each conversion. |
| Purchases are under-counted. | Google receives browser events only. Ad blockers and some in-app browsers block them; compare with your Purchasely dashboards. |
Updated 21 days ago