

Setup 1 · Connect Stripe
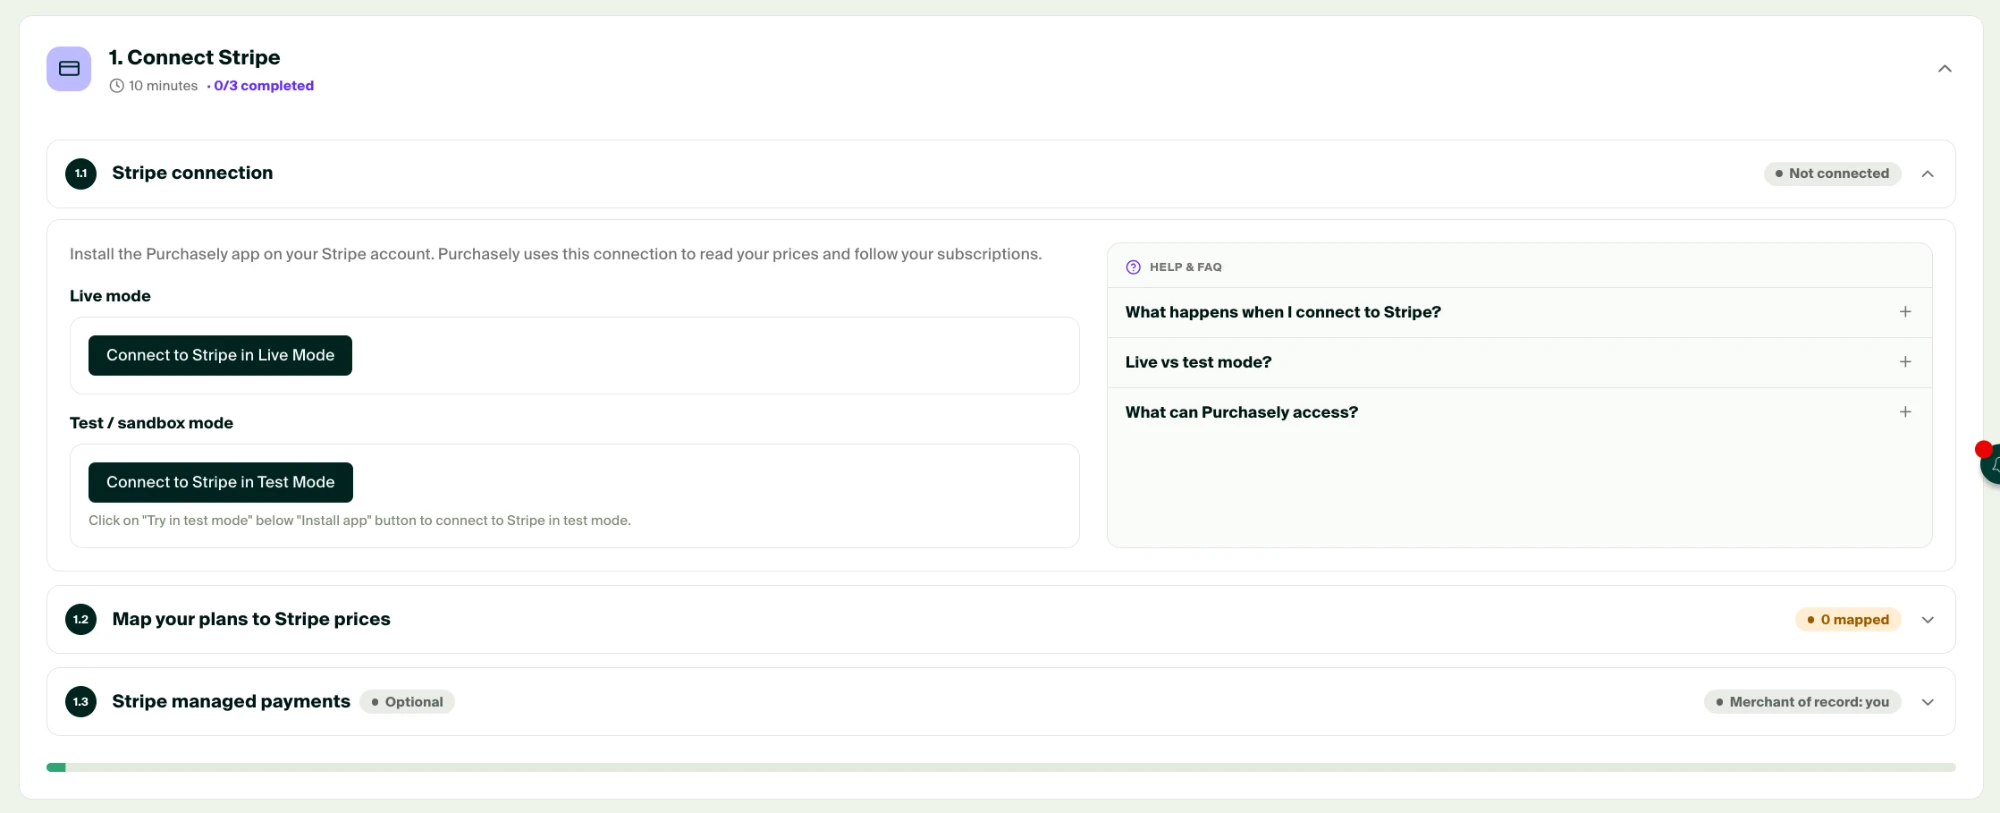
Install the Purchasely app on your Stripe account, map your plans to Stripe prices and choose who is the merchant of record.
Stripe processes every payment made in a Web Flow. This first setup section connects your Stripe account to Purchasely, tells Purchasely which Stripe price to charge for each of your plans, and lets you decide who is the merchant of record. It takes about ten minutes.
You can complete it from two places in the Console:
Both screens edit the same configuration.
Before you startYou need a Stripe account with admin rights, and the Stripe products and prices you want to sell on the web. If you have not created them yet, see Stripe - Configuring Subscriptions.
1.1 Stripe connection
Purchasely connects to Stripe through the Purchasely app on the Stripe App Marketplace. There are no API keys to copy: you install the app on your Stripe account, sign in with your Purchasely credentials and pick the Purchasely app to attach. Purchasely then reads your prices and follows your subscriptions through webhooks.
Live mode and test mode
A Stripe account has two modes, and the Purchasely app must be installed once per mode:
| Mode | What it is for | How Web Flows use it |
|---|---|---|
| Live mode | Real payments. | The live URL of every Web Flow. |
| Test mode | Fake payments with Stripe test cards. | The sandbox URL of every Web Flow. |
The recommended setup is to connect your production Purchasely app to both modes of the same Stripe account. You can then validate every funnel end to end on its sandbox URL before sharing its live URL.
For a staging Purchasely app, use a Stripe Sandbox instead. A Sandbox is a separate Stripe account that only has a test mode and never touches your live data. You can create a Sandbox account directly from your Stripe dashboard and connect it to the staging app in test mode.
One Stripe account per Purchasely appA Purchasely app can be linked to a single Stripe account, in live and test mode. A Stripe account can be linked to one Purchasely app per mode. Once purchases have been made through an app, its Stripe account can no longer be changed: contact your Customer Success manager if you need to migrate.
Install the Purchasely app on Stripe
Repeat these steps for Live mode, then for Test / sandbox mode.
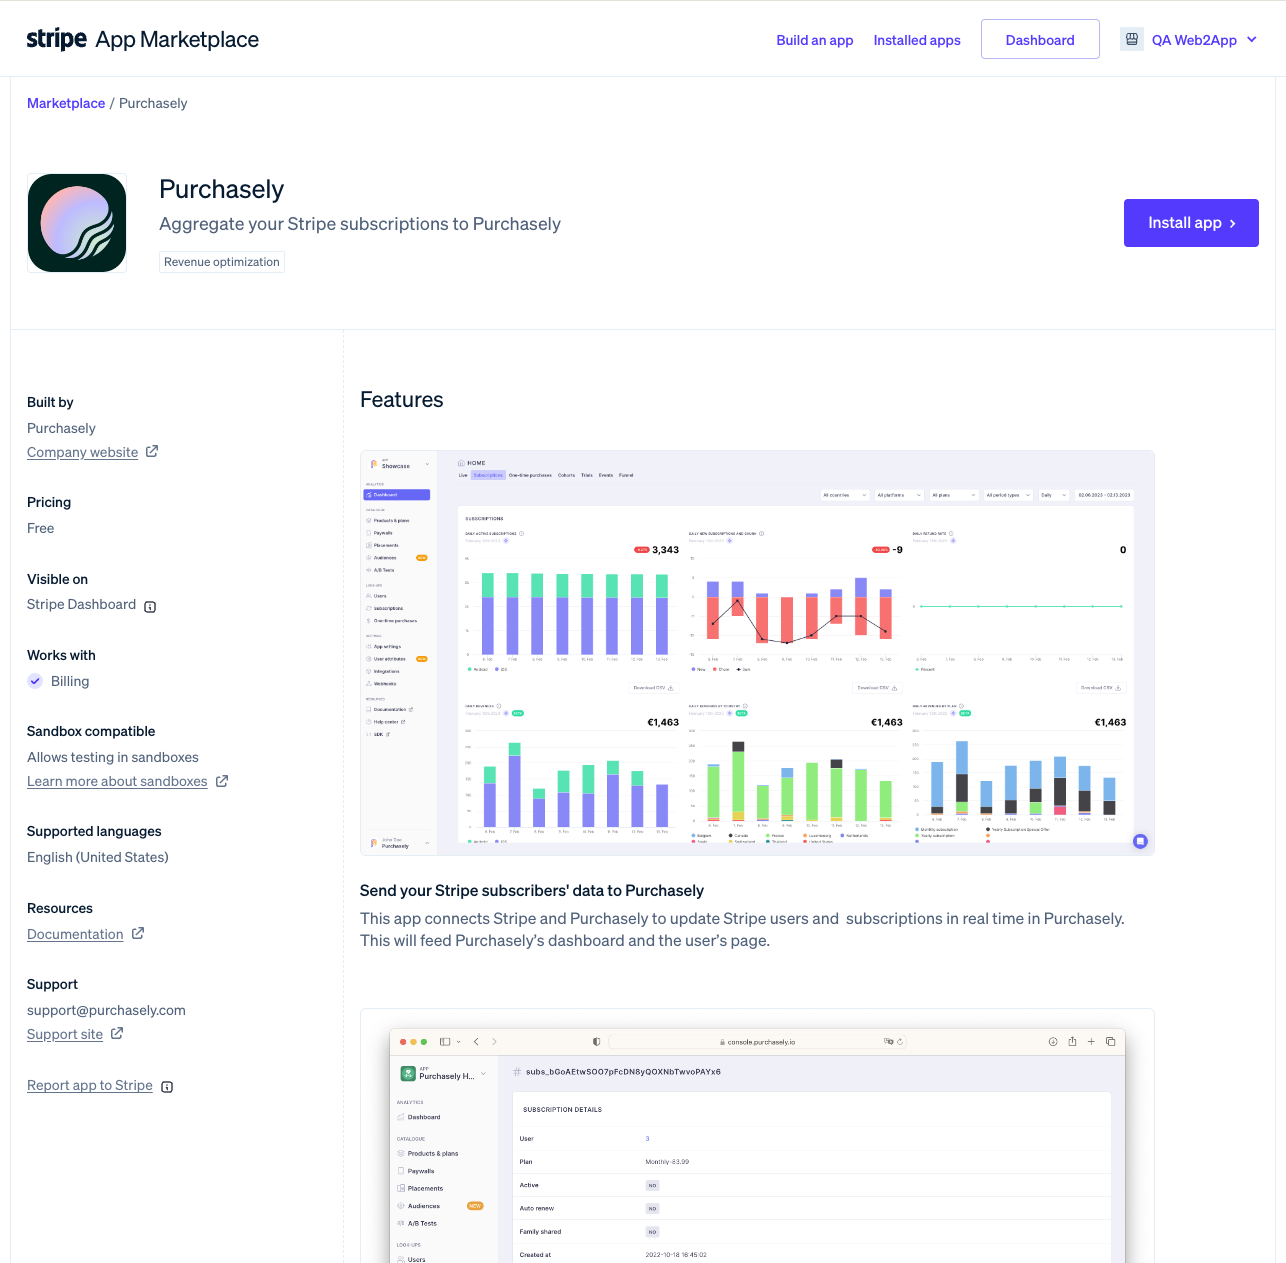
- In the Console, click Connect to Stripe in Live Mode (or Connect to Stripe in Test Mode). The Purchasely app page opens on the Stripe App Marketplace.
- Click Install app in the top-right corner. To install in test mode, click Try in test mode under the Install app button instead.
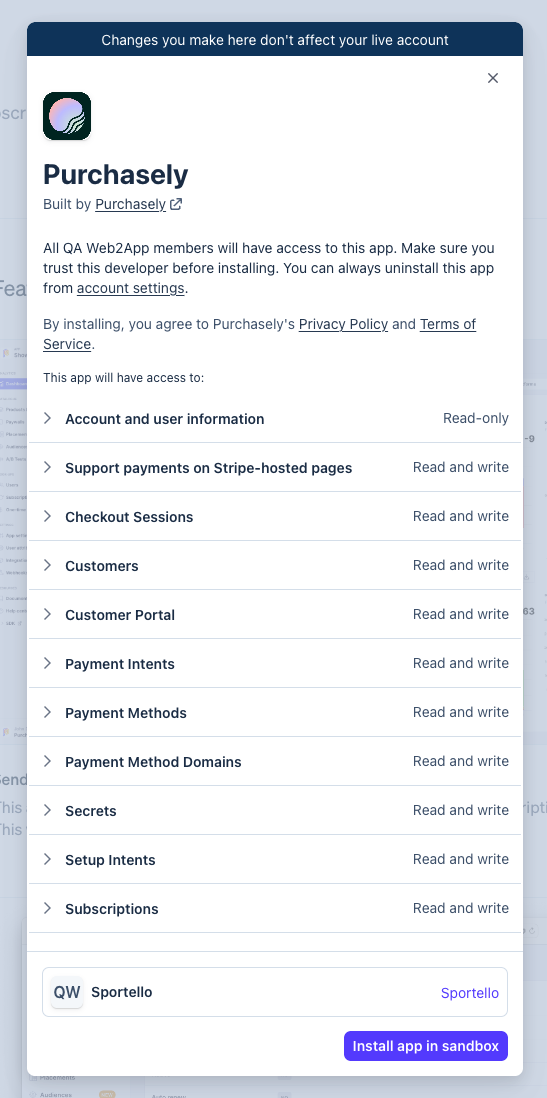
- Review the permissions requested by the app and confirm the installation. In a Sandbox, the button reads Install app in sandbox.
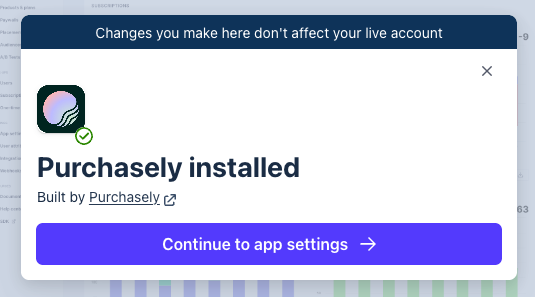
- Once the app is installed, click Continue to app settings. Stripe opens the Purchasely app inside your Stripe dashboard.
- Click Sign in and log in with your Purchasely credentials.
- In Stripe Platform Setup, select the Purchasely app you want to attach this Stripe account to, then click Next.
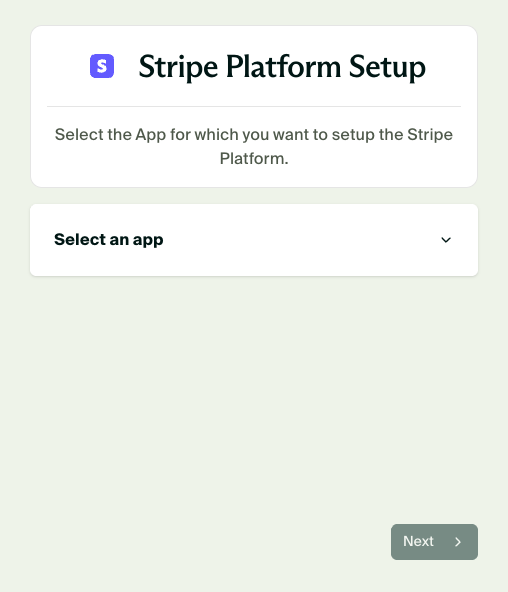
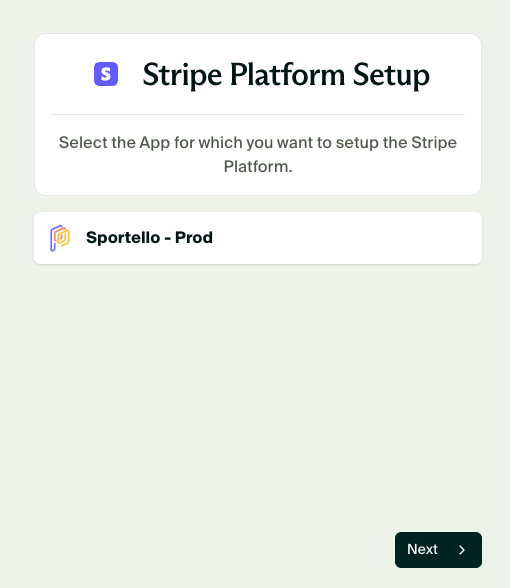
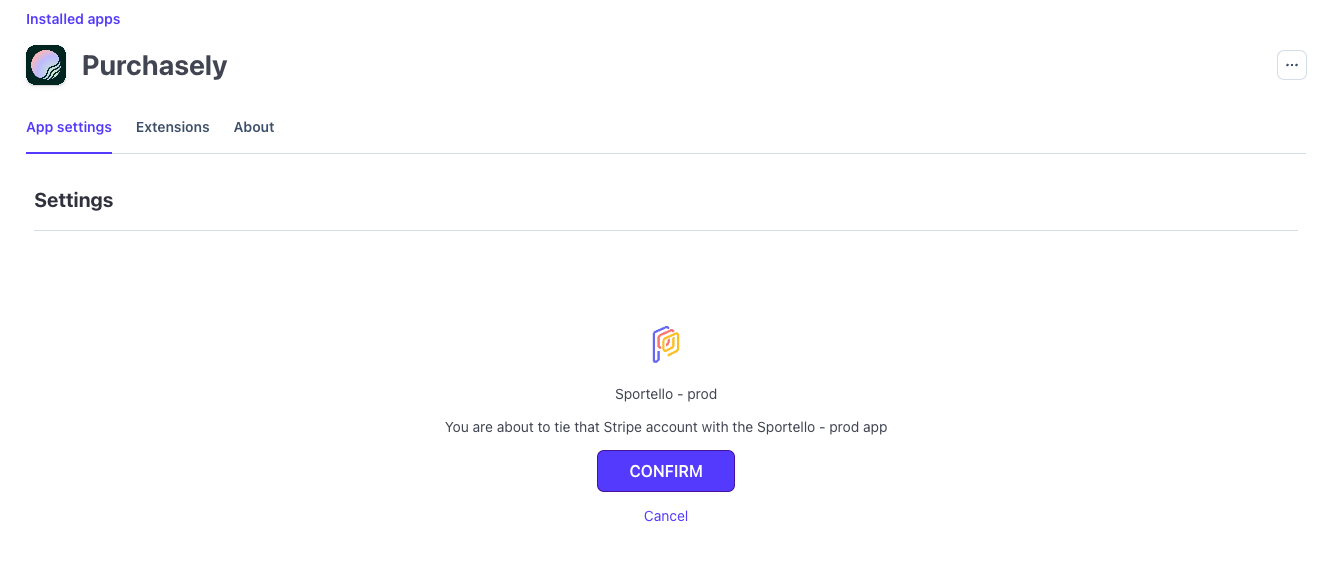
- Click Confirm to tie the Stripe account to the app
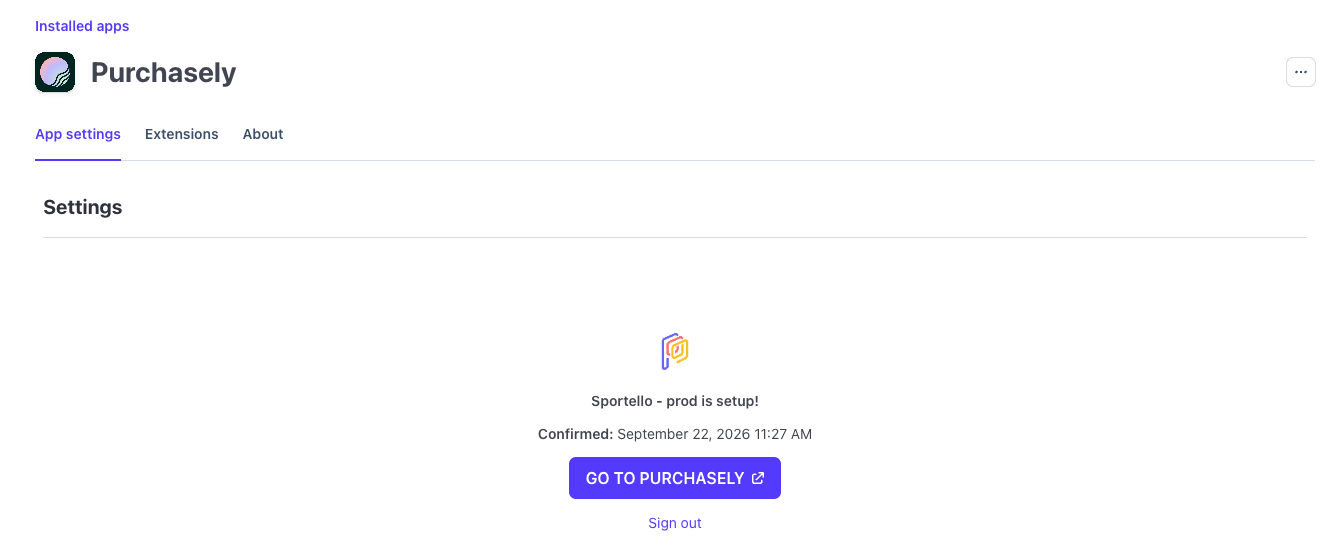
- Stripe confirms the setup with the date of the connection. Click Go to Purchasely to return to the Console.
Back in the Console, the mode shows Connected with your Stripe account ID and a link to the Stripe dashboard. When both modes are connected, step 1.1 is complete.
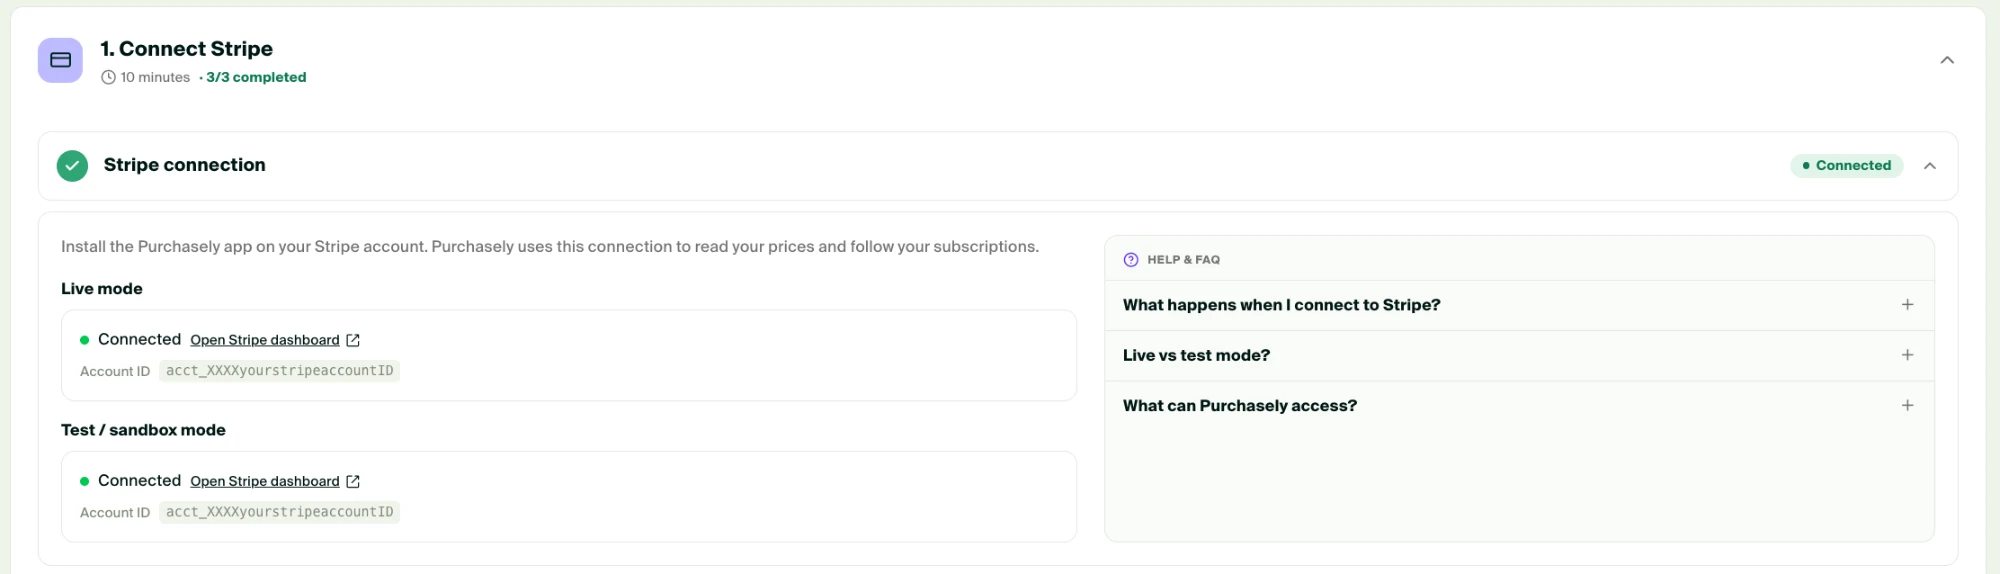
What Purchasely can access
The permissions requested by the app are the ones needed to run and follow a web checkout. Purchasely never sees your Stripe secret keys, and your Stripe account remains fully yours.
| Permission | Why Purchasely needs it |
|---|---|
| Account and user information (read-only) | Identify the connected account and its owner. |
| Products, prices and coupons (read) | List your prices in the Console and display them in your funnels. |
| Checkout Sessions, Payment Intents, Setup Intents, Payment Methods | Create and complete the embedded Stripe Checkout of your funnels. |
| Customers, Subscriptions, Invoices | Follow the lifecycle of each web subscription and keep entitlements in sync. |
| Payment Method Domains | Register your funnel domains for Apple Pay and Google Pay. |
| Customer Portal | Let subscribers manage their web subscription. |
| Webhooks and events | Receive subscription events in real time. |
Purchasely listens to the following Stripe events: checkout.session.completed, invoice.paid, invoice.payment_failed, customer.subscription.updated, customer.subscription.deleted, and account.application.deauthorized.
Disconnect
To disconnect a mode, open the Purchasely app from Installed apps in your Stripe dashboard and click Sign out, or uninstall the app from Stripe. Purchasely stops receiving events for that mode immediately.
1.2 Map your plans to Stripe prices
A Web Flow sells Purchasely plans, the same plans your paywalls sell in the app. To sell a plan on the web, link it to one or more Stripe price IDs. A plan without a Stripe price can still be sold in the app, but it cannot appear in a web checkout.
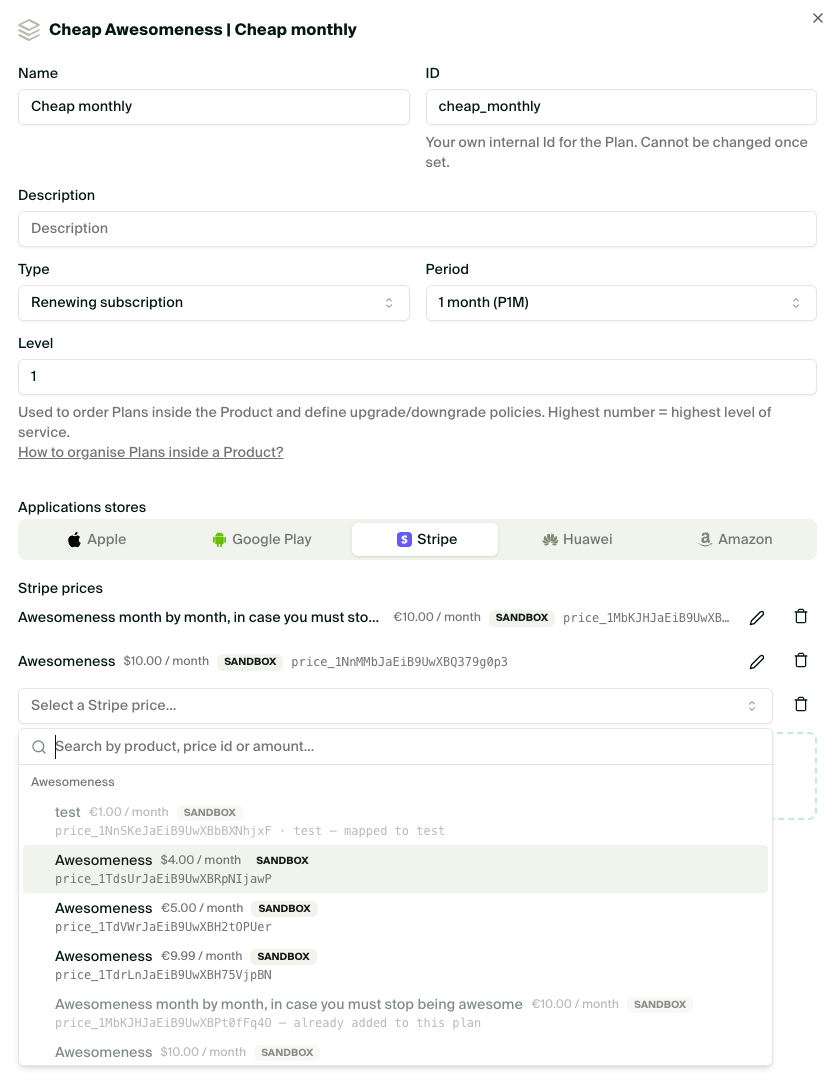
- The step lists every plan of your app. Click Link a Stripe price next to a plan. The plan editor opens on its Stripe tab.
- Under Stripe prices, pick a price in the list. You can search by product name, price ID or amount. Each price carries a SANDBOX or LIVEMODE badge that tells you which mode it comes from.
- Add as many prices as needed, then save. The counter in the step header shows how many plans are mapped. Step 1.2 is complete as soon as at least one plan is mapped.
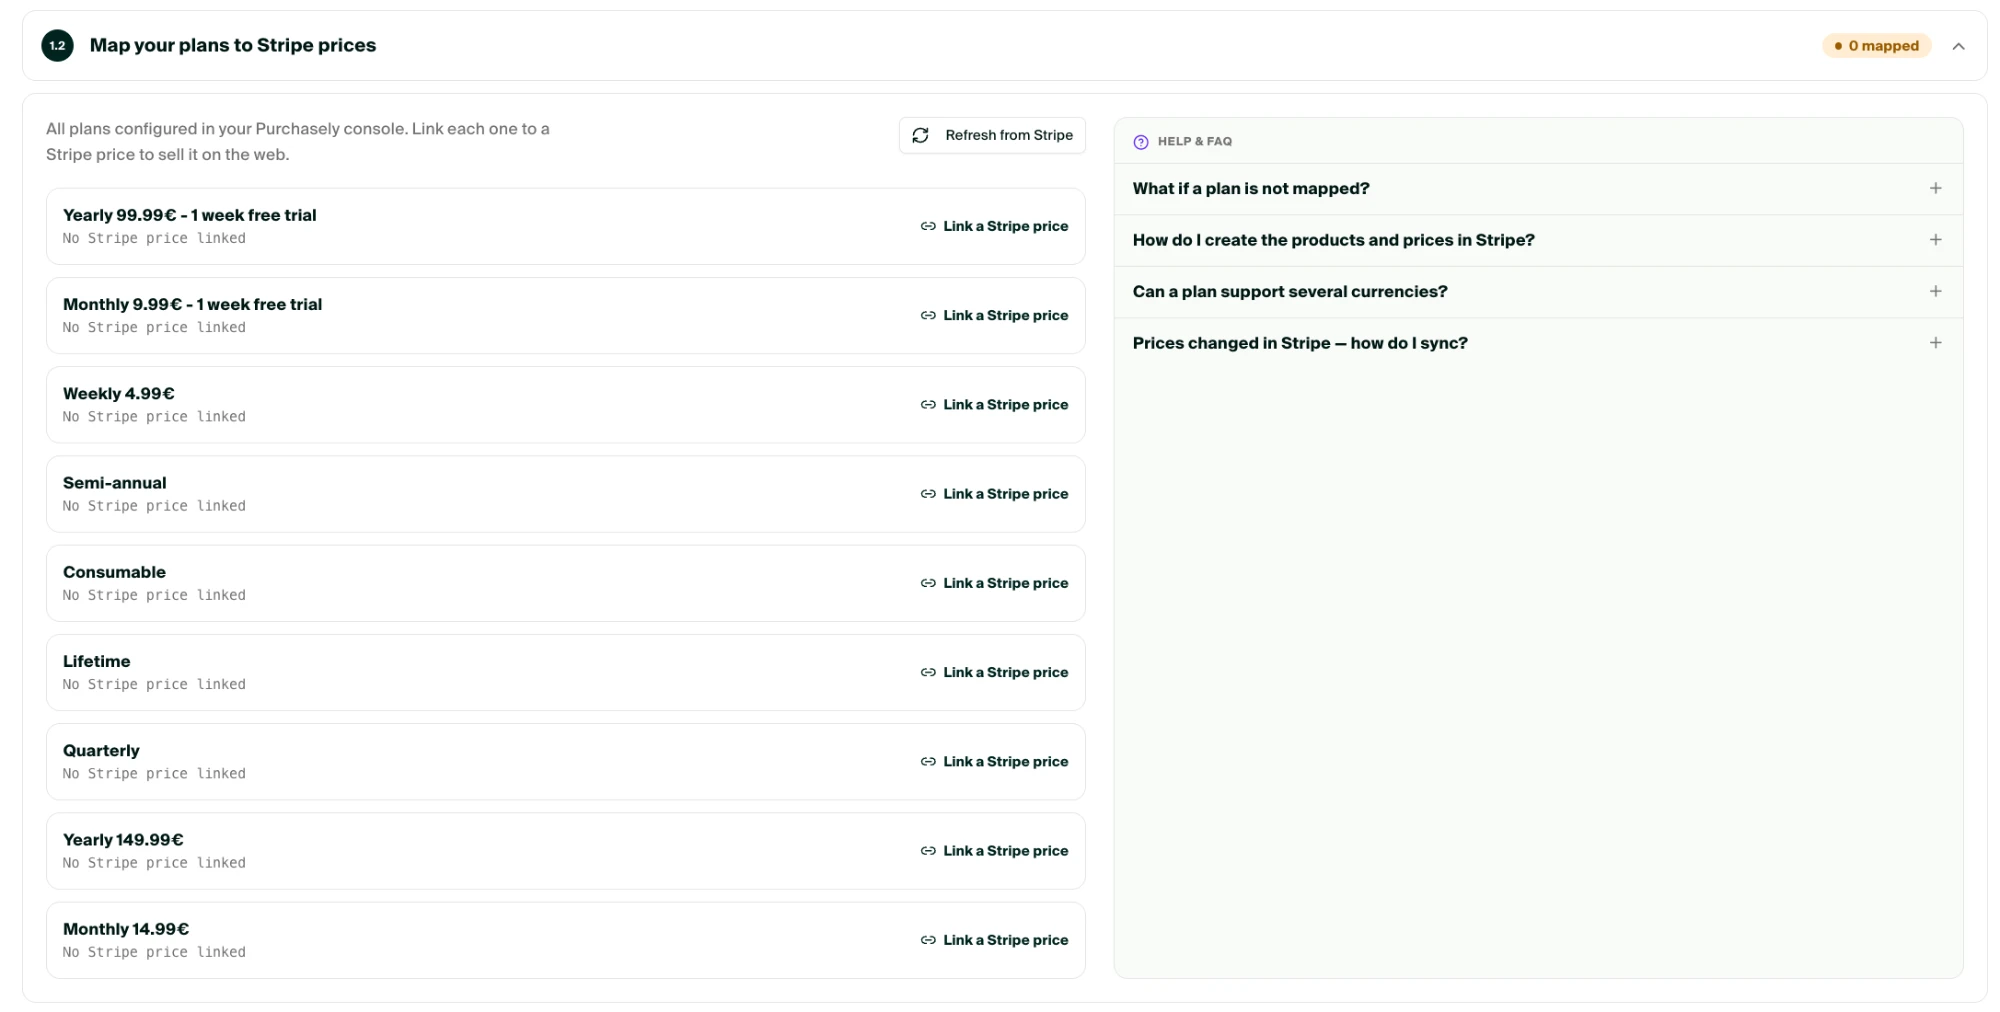
You can also edit this mapping at any time from Products & Plans in the Console: open a plan, then its Stripe tab.
One plan, every storeThe target model is one Purchasely plan linked to an App Store product, a Play Store product and your Stripe prices. Nothing forces you to create separate plans for the web. The SDK picks the payment method, in-app or web, according to the platform the Screen is displayed on, so the same paywall works in the app and in a Web Flow.
Live and test prices on the same plan
Link both your live mode prices and your test mode or Sandbox prices to the same plan. The live URL of a Web Flow charges the LIVEMODE price; the sandbox URL charges the SANDBOX price. This is what lets you test a funnel end to end with a Stripe test card without touching your production catalog.
Creating separate plans for test prices works too, but we do not recommend it: you would have to duplicate every paywall that sells them.
One price with several currencies, or one price per currency
Stripe supports two ways of pricing in several currencies. Purchasely handles both.
| Model | How it works in Stripe | What to link in Purchasely |
|---|---|---|
| Multi-currency price (recommended) | One price ID with several currencies, using Stripe's multi-currency prices. | One price ID per mode. Purchasely picks the currency from the visitor's browser settings: EUR for a visitor in France, USD for a visitor in the US. If the visitor's currency is not configured on the price, the price's default currency is used. |
| One price per currency (legacy) | One price ID per currency, the only model Stripe supported before multi-currency prices. Common in catalogs created several years ago. | All the price IDs of the plan. This is why a plan accepts several Stripe prices. |
If a price ID carries several amounts for the same currency, Purchasely uses the most recently created one. Purchasely never converts amounts itself.
How do I create the products and prices in Stripe?
In your Stripe dashboard, create one Stripe Product per Purchasely plan, with one recurring Price per billing period (weekly, monthly, yearly…), in live mode and in test mode. The step-by-step guide, including multi-currency pricing and tax codes, is on Stripe - Configuring Subscriptions.
Introductory offers and trialsFree trials and introductory prices configured on a Stripe price are not supported yet in Web Flows. Map your plans to prices without a trial period; introductory pricing on the web is on the roadmap.
Prices changed in Stripe. How do I sync?
Purchasely refreshes your Stripe catalog automatically within minutes. To force an immediate re-sync, click Refresh from Stripe in the step header.
1.3 Stripe managed payments (optional)
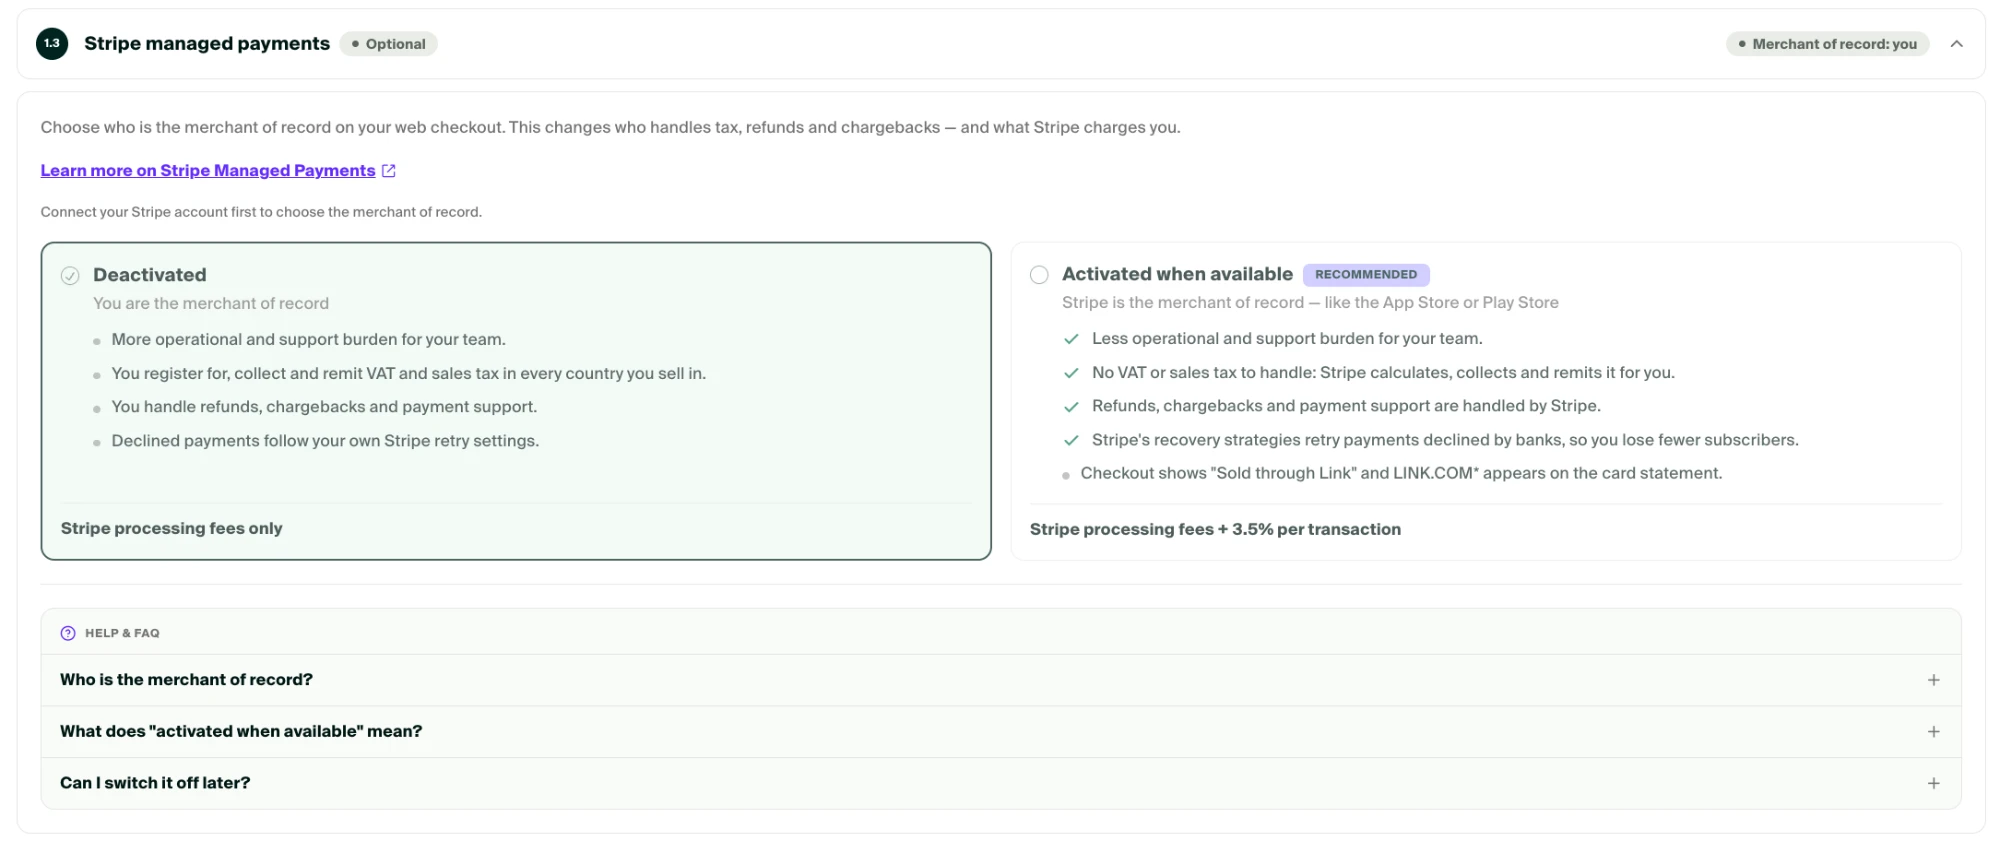
This step decides who is the merchant of record on your web checkout: you, or Stripe. With Stripe Managed Payments, Stripe becomes the merchant of record, like the App Store or the Play Store, and handles VAT and sales tax, refunds, chargebacks and payment recovery for you, for an additional 3.5% per transaction.
The option must be enabled in Stripe first, then activated in the Console. Benefits, prerequisites and the two-step activation are detailed on the dedicated page: Stripe Managed Payments.
By default the option is deactivated and you remain the merchant of record. Stripe must be connected before you can choose.
Troubleshooting
| Problem | Cause and solution |
|---|---|
| The mode still shows Not connected after the Stripe setup. | The account selection was not confirmed. In Stripe, open Installed apps → Purchasely and complete the Stripe Platform Setup until you see is setup!. |
| The Purchasely app in Stripe shows another app or another client. | You signed in with a Purchasely account that has no access to the target app. Sign out in the Purchasely app on Stripe and sign in with the right account. |
| Link a Stripe price shows no price. | Check that the prices exist in the connected Stripe account and are recurring, then click Refresh from Stripe. |
| The sandbox URL sells the plan but the live URL does not (or the reverse). | The plan only has prices from one mode. Link both a SANDBOX and a LIVEMODE price to the plan. |
| The Activated option is disabled. | Connect Stripe first. |
| Managed Payments is activated in the Console but checkouts still show your business name. | Managed Payments is not enabled on your Stripe account. Enable it in Stripe first, see Stripe Managed Payments. |
Updated 20 days ago
What’s Next
Next, configure your web domain, your email domain and the wallets.